Wednesday, June 30, 2010

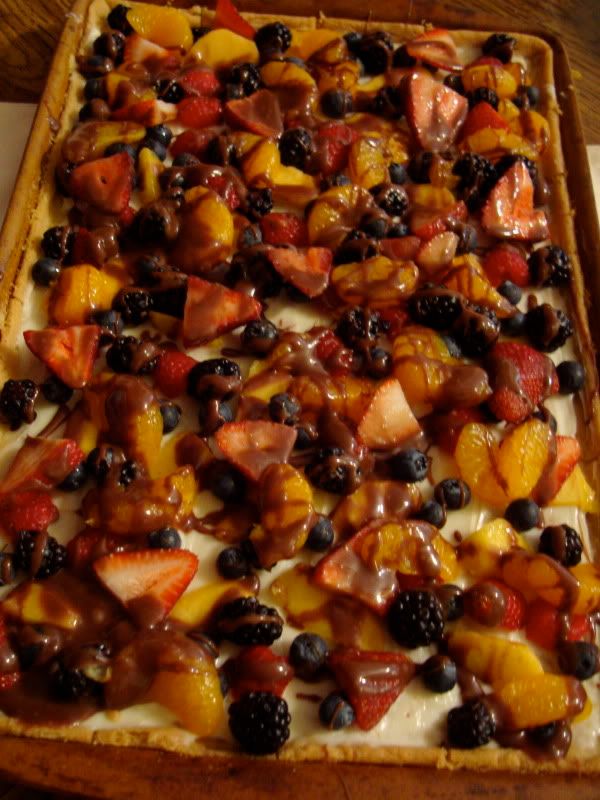
Fruit Pizza, requests, and photography!

Photobucket


This is probably the absolute EASIEST recipe you will ever make, and it will garner RAVE reviews from your family and friends. Those are two things that I LOVE putting together, easy, and great. I even broke one of my cardinal rules for this baby, by following the recipe, and using pre-made, refrigerated cookie dough. Which I usually believe is DEFINITELY from the devil. I mean NOTHING beats homemade cookie dough. But in this case, it's all about the ease of this recipe, and nothing's easier than rolling out pre-made dough. It comes to you from one my culinary heroes, Paula Deen! I mean, really who DOESN'T love her? Everytime I see her on TV I just want to invite her over to hang out with me. I feel like she'd be the best friend you'd ever have, not to mention the goodies she's bring to the party! I could just see us being great friends, sipping on some homemade mint iced tea, watching Steel Magnolias, and eating something fried, and wrapped in bacon.

Also, this recipe is a request from one of my awesome friends, Tricia, and the last recipe (the fruit salsa) was a request from another great friend, Rene. If there are any recipes YOU are dying to try, but don't feel like wasting the ingredients if they suck, feel free to leave me a comment, and I'll be happy to try them for you. And I'll only send you a bill for 1/2 the ingredients! Okay, just kidding, I won't bill you for anything, but I will blog about here, so we can save the world from bad recipes, and shout it from the mountaintops for good recipes. Consider the comment box your all-night, request live station, and me, your cooky all night radio DJ. I'm excited to see what you guys come up with!

Also, I have just downloaded a copy of Photoshop Elements, so once I have time to sit down, and figure out how to use it, we should have some much more beautiful photographs on here! Now, onto the recipe!

Hallelujahs: Easy, delicious, beautiful
Hellfires: Not enough frosting, I would double the recipe next time, also 1 roll of cookie dough was not enough for my pan, I had to buy two, and had some left over of that 2nd roll, which is a hallelujah for my taste buds, but a hellfire for my hips!

**Note, the original recipe called for a green apple on the fruit pizza, but The Husband (a fruit pizza connoisseur) felt that it did not go with this recipe, so I left it out. I also used mandarin oranges, instead of a navel orange, because they are just so cute, and because in keeping with the theme of this recipe, they are MUCH easier than cutting a navel orange. In addition, I've adjusted the amount of white chocolate chips/chocolate syrup, because I had WAY too much left over, so much so that even I couldn't have eaten it all. Also, I'm going to list this with the doubled recipe for the frosting, and the cookie dough, because let's face it you can't have too much frosting, or cookie dough.**

Fruit Pizza a la Paula Deen

2 rolls refrigerated sugar cookie dough
2, 8-ounce packages of cream cheese
2 cups powdered sugar (aka confectioner's sugar)
1 large peach, sliced
1 can mandarin oranges, drained
1/2 pint fresh strawberries, sliced
6 ounces fresh blueberries
6 ounces fresh raspberries
1/4 cup white chocolate chips, melted
1/4 cup chocolate syrup


-Preheat oven to 350*
-While oven is preheating, spray cookie sheet, or other pan (I used a stoneware cookie sheet), and roll cookie dough to form an even layer on the bottom. You can make this as thick, or as thin as you like, depending on your optimum crust to fruit ratio.
-Bake crust for 11-15 minutes, or until it is firm to touch. If you cook it too long, it will be hard, and very difficult to cut, and eat.
-While the cookie crust is cooling, combine the cream cheese, and powdered sugar in your mixer.
-Spread the cream cheese frosting on your cooled cookie crust.
-Artfully (not haphazardly, you didn't know you had to be an artist, here, did you?) arrange your fruits on the crust.
-Melt white chocolate chips.
-You can do this by making a double boiler on the stove, or by microwaving at half power in 20 second increments. Do NOT burn your chocolate. You will regret it, I promise.
-Add chocolate syrup to melted white chocolate, and stir.
-Drizzle chocolate mixture over your fruit pizza until it looks delicious!

Original Recipe found at: http://www.foodnetwork.com/recipes/paula-deen/fruit-pizza-recipe/index.html
(notice that Paula's pizza is MUCH more beautiful than mine, yet mine was still tasty...thus proving that you do NOT have to be an artist to make a delicious fruit pizza!

Enjoy! And keep those requests coming!

Sunday, June 27, 2010

Adding to your appetizer arsenal, and a yummy party drink!

I don't know about you, but I absolutely LOVE to entertain. Having people over, mingling, having fun, and of course EATING is worth all the work it takes to make it happen! The Family (the one I married into) happen to be a pretty casual bunch, some chips, and salsa, and they're happy campers (did I mention that at least half of them think they are hispanic, often speak spanish more than English, and have a strange obsession with Mexican food?). But me? No, no, no, that's WAY too simple for me. And if there's one thing I'm really great at, it's over-complicating things. Dare I say it's my specialty. So, when I put on a party, it's a several day event, in terms of planning, and shopping, and cleaning, and cooking. Thank goodness that I married a man who doesn't mind pitching in, and helping, because I couldn't do it without him.

This weekend, I had a surprise party at my house for my awesome sister-in-law, Anne, who is one of TWELVE children, and hadn't had a birthday party to call her own before. Heavens knows I had to remedy that! Anyway, being the Southern girl I am, most of the recipes in my party arsenal are fairly heavy, and/or deep fried. Fried chicken, sausage balls, rigatoni and meatballs, biscuits, all kinds of deliciousness that are very filling, and very HOT! Being that it was going to be almost 90* on Saturday, and we were going to be spending a lot of time outside, I wanted to do some lighter items, that wouldn't have us sweating all afternoon. Looking through my recipe files, I realized that I was severely lacking in appetizer and/or finger food recipes that don't involve hot oil, or copious amounts of sauce. So, I took to my good ole friend, Google (what did people DO before the internet, anyway? Perhaps this is the reason for the abomination masquerading as an appetizer that is 'pigs in a blanket,' seriously, what IS that?!), and came up with a new idea, or two.

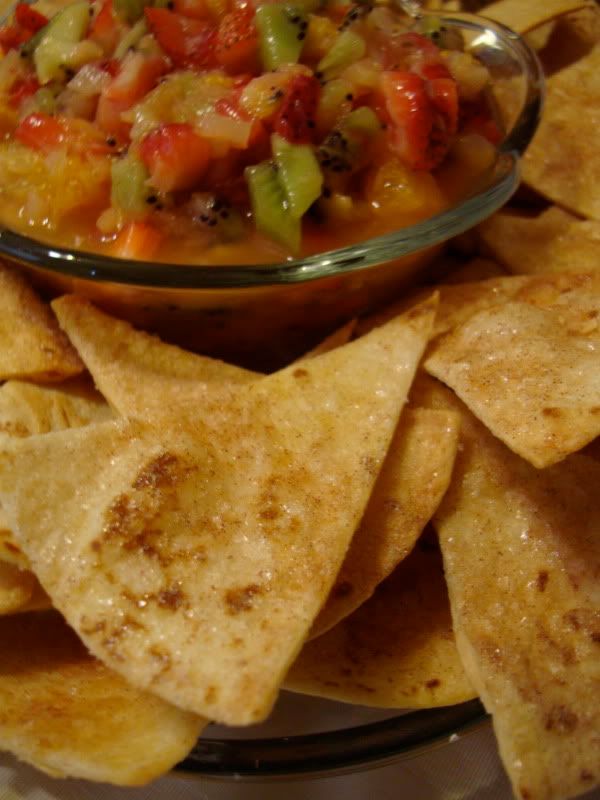
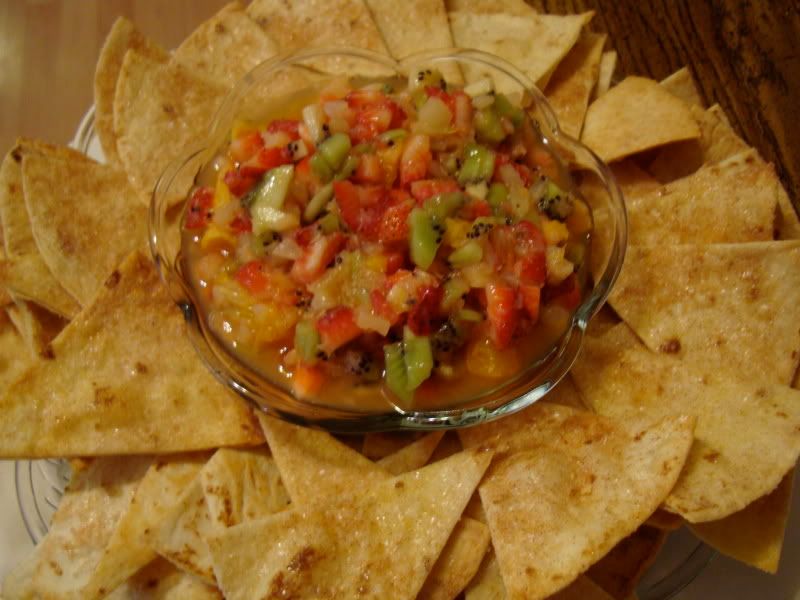
The recipe that caught my eye right off the bat is especially interesting because I don't actually like 90% of the ingredients (are you noticing a theme here? I'm probably pickier than your children!), but it just looked so BEAUTIFUL in pictures, that I absolutely HAD to try it. Add to the fact that it's a play on The Family's favorite food (the ubiquitous chips & salsa), and it was a winner in my book! It was obscenely easy to put together, and the results were delicious, winning rave reviews from the Mexican loving crowd! Fruit Salsa with Homemade Cinnamon Tortilla Chips is definitely a winner to add to your appetizer arsenal, in case yours is as lacking as mine was.

For some reason, I didn't take any photos of the process of this recipe (could be that it was 10:00 at night, and I still had WAY too much to do), but the final product was so beautiful, I had to share two!

Photobucket

And, marrying into an absolutely FABULOUS Mormon family means that my drink repertoire is even more limited than my appetizer arsenal. Seriously, it's been so long since I've seen a cocktail that I could probably get tipsy off a SNIFF! And the ubiquitous Mormon "mocktail" of Sprite and Sherbet just doesn't do it for me (sorry, Utah, I drank it at my wedding, but it's just not my cup of tea!). As such, I make a LOT of lemonade, embarrassingly enough, not even homemade lemonade, plain old Country Time lemonade. And I LIKE it! But, I was feeling a little bit bored of lemonade, and looking for something with a bit more pizazz, reminiscent of a good, bubbly Mimosa, or Bellini. What I came up with, Sparkling Berry Lemonade is so easy, and tasted so good, that on a good day, it's even a substitute for a good, strong cocktail. On a bad day? Well, let's just not go there! ;) Again, this is an original recipe, so there aren't any official measurements, I just filled my new pitcher ($4.00 from Wal-Mart, the evil giant I love to hate), half way full of water, and half way full of club soda, and then enough lemonade mix to acheive the flavor I like (slightly tart, but mostly sweet). The addition of frozen berries turns the whole thing a beautiful orange color as the fruit thaws, and mingles with the lemonade (no photos of that, sorry!), and let's just face it, bubbles (from the club soda) make EVERYTHING better!

Photobucket

Sparkling Berry Lemonade
Country Time Lemonade Mix (or your favorite mix, this just happens to be the brand I'm loyal to)
Water
Club Soda
Frozen Mixed Berries


-Fill your pitcher half way full with water (Tap, or filtered, whatever floats your boat, I use filtered, because I'm anal like that, but I won't tell if you don't!)

-Then fill the rest of the way with Club Soda.
*Note, leave a little room at the top of your pitcher, as the club soda and lemonade fizz a fair amount when mixed! This is chemistry in action, folks!*

-Add your lemonade mix, and stir well, until you achieve the flavor you like best! Some people like their lemonade uber sweet, and others extremely tangy, I think I'm somewhere in the middle, leaning more toward the sweet side.

-Add some frozen berries and stir.
*I'm sure you could also use fresh berries, but I use the frozen because they act as my ice cubes. This is extra great for me, because one of my biggest pet peeves in the kitchen is making lemonade with ice cubes in the water. Because when they melt, it dilutes the lemonade, and ruins the whole batch. My husband and I disagree on this, and he makes lemonade WITH ice cubes just to get my goat, and I make them without just to get his, but TRUST ME ON THIS, do NOT put ice cubes in your water when making lemonade. Put some thought into it, make the lemonade early, and stick it in the fridge. Or, put ice cubes in your individual glass if you don't find diluted lemonade to be as big of a tragedy as I do, but whatever you do, DON'T rain on everyone else's parade! (or as we say in my house, "don't poop on my parade," but I wasn't sure exactly how appropriate that would be on a food blog!)

Hallelujahs: Fast, Delicious, BUBBLY, and nutritious? (hey, there's fruit in there, which is already an improvement for me!)
Hellfires: Not sure if there are any, maybe that it's non-alcoholic, if you're looking for a nice, stiff drink.

Photobucket

Fruit Salsa with Cinnamon Tortilla Chips
-Note, I doubled the original recipe (except for the pineapple), and added a fair amount more sugar, as well

For the Cinnamon Chips
16 Flour Tortillas (these are on my list of things I want to learn to make from scratch, but for this, I was pressed for time, and used store bough tortillas, and they STILL turned out DELICIOUS!)
1 stick of butter
Cinnamon/Sugar Mixture
(I always have this hanging around for my cinnamon toast, which is God's gift to breakfast!)

-Preheat oven to 350*
-Using a pastry brush (or a BBQ sauce brush, or a paint brush, or a spoon, or even the tools God gave ya-your hands!), spread melted butter on all of the tortillas.
-After buttering, sprinkle each tortilla with cinnamon/sugar in whatever ratio you like. It's important to make the cinnamon sugar mixture ahead of time, though, you don't want to have big streaks of cinnamon on your chips.
-Stack the tortillas (4-6 at a time) and cut into 8 wedges.
-Place tortilla chips in one layer on a greased baking sheet, and bake for 5-10 minutes until crisp. It will take several batches, but no matter how tempted you may be to stack them, especially if it's 10:00 pm, place them in a SINGLE LAYER on your baking sheet. It's important for the crisping. Also, they will continue to crisp after you take them out of the oven, so don't wait until they feel like the tortilla chips you get in the store. Mine took closer to 10 minutes, than 5.
-After removing from oven, place in bowl, and allow to cool COMPLETELY before sealing in Ziploc bag (otherwise they'll get soggy)


For the fruit salsa
-1 pound of strawberries, rinsed, and chopped fine
-2 Navel Oranges, rinsed, and chopped fine

*Incidentally, it's not so easy to dice an orange, and it hurts when you squirt the juice in your eye!
-6 kiwis, peeled, and chopped fine
-1 large can of crushed pineapple, drained
-2 tablespoons of lemon juice
-Sugar to taste

*The originally recipe would call for 2 tsp here, but you know how I feel about measuring. I did several heavy turns of the bowl. Just start small, and taste as you go!

-Chop your fruit, and place in large bowl.
-Add Lemon Juice, and Sugar
-Toss
-Serve with cinnamon chips

Hallelujahs: Easy as pie (which actually ain't easy), delicious, light, fresh, beautiful
Hellfires: There's a lot of liquid in this, as it sits, which makes it look less beautiful, maybe strain it in collander first?


Original Recipe, and nutrition info can be found at: http://www.tasteofhome.com/Recipes/Fruit-Salsa-with-Cinnamon-Chips

Okay, now you have some fantastic new summer recipes, you've got no excuse here, GO HAVE A PARTY! Have some fun with it, go a little crazy (if you're a non-LDS reader, throw some Vodka in with the lemonade), and report back to me! Also, if you have some great summer appetizers, share them with me, I could use a few more!

Friday, June 25, 2010

Balsamic Glazed Pork Chops that taste better than steak, and a new rating system!!

Okay, I know, it's almost a sin to declare that ANYTHING tastes better than steak, but this is not my sin, that is an exact quote from my husband, who typically doesn't even LIKE pork chops, let alone LOVE them. So, you know this recipe is good!

But, before we get to the actual recipe, I want to debut a new recipe rating system. I thought it might be nice to have a "quick and dirty" rating system for the recipes, that way if you don't have time to read the entire post (not like I'm longwinded or anything!), you can still get an idea of how I liked the recipe. Of course, you'll miss my witty banter, but if you can live with that, so can I. But, you had to know, I couldn't just do a simple "pros," and "cons" list. No, no, my friends. This here blog is THEMED. And so must be the quick list. So, instead of pros, and cons, we'll have "Hallelujahs," and "Hellfires." Obviously (or maybe not so obviously) the "Hallelujahs" are the equivalent of a "pro," and the "Hellfires," are the equivalent of the "cons."

This is another recipe that is inspired by a hometown favorite. What can I say? I'm feeling nostalgic this week. After my sophomore year of college, right before I dropped everything to move to Utah, and meet my soulmate, The Husband, I waited tables at an AMAZING Italian restaurant, called Bravo Cucina Italiana. The fact that there are no Bravo's on the west coast is a major problem, in my book. We were often short staffed, and I had nothing better to do with my summer, so I worked a LOT of double shifts. Which meant that in between my lunch/dinner shifts I would eat dinner at Bravo (or have martini's next door at Bossa Nova, but this is a family blog, and I may or may not have been underage, so we'll leave it at that.). Now you KNOW that the food at a particular restaurant is good if you eat it 4-5 nights a week, and serve it to guests, and you STILL want to go there for dinner the other 2-3 nights a week. Bravo food really is THAT good. Besides the Pasta Bravo, a delicious pasta with roasted red pepper cream sauce that I am planning on trying to recreate in the near future, their number one specialty is a an AMAZING butter, balsamic glazed, thick sliced pork chop. Literally it melts in your mouth.

Photobucket

Since I can't just hop a flight everytime I'm craving some Bravo (note to the Husband: please make us rich so I can hop a flight anytime I'm craving Ohio food), I decided to peruse the internet for a copycat recipe. While I couldn't find the exact recipe for Bravo's pork chops, the one that I did find is pretty amazing! According to the website that lists the recipe, it's originally a Rachael Ray recipe, but I can't vouch for how true that is. No matter who came up with it, it's truly great, though I'm not sure it really fits in the "30 minute meals" category. I do the recipe a little different than she does, namely I use more rosemary, and thyme, and more honey, as I wanted these to be sweeter, rather than more acidic. The recipe I will list is the way that I make it. If you want to see the original recipe, you can click the link below.

Hallelujahs Well, my pork-hating husband declared these "better than steak," so I'm pretty sure that counts as hallelujah; easy, fancy-looking, moist, and delicious
Hellfires A little more time consuming than typical fried pork chops, makes a big mess in my kitchen (both totally worth it, though!)

Bravo-Style Balsamic Glazed Pork Chops

1 package of bone-in pork chops (I use a big package, about 8-10 pork chops)

Salt and freshly ground black pepper

2-4 tablespoons of Extra Virgin Olive Oil (I just go around the pan 2-3 times)

1 medium onion, chopped

1-2 tablespoons of dried Rosemary

1-2 tablespoons of dried thyme

7-10 garlic cloves, chopped (depending on how much you love garlic)

1/2 cup balsamic vinegar (I actually measure this!)

5-8 tablespoons honey (depending on how sweet you like it)

2 cups chicken stock or broth

-First, pre-heat your electric skillet, or your stovetop skillet. Medium high, or so, you want to be able to get a good sear on the pork chops. Add your olive oil before heating.

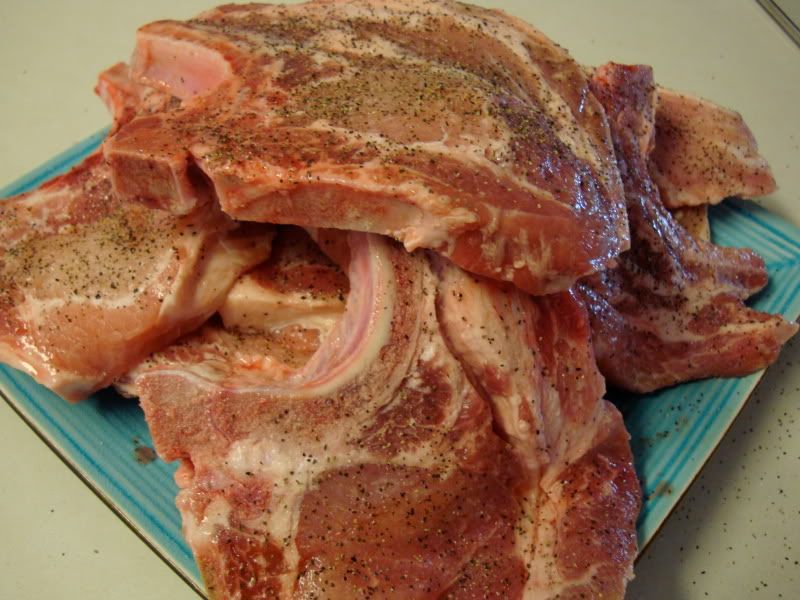
- Then, salt and pepper your pork chops. Be liberal here, and don't be lazy, do both sides. I like to use kosher salt, or coarse-sea salt because it seems to stick better to the meats. (Got this tip from Pioneer Woman, so you know it's good!)

Photobucket

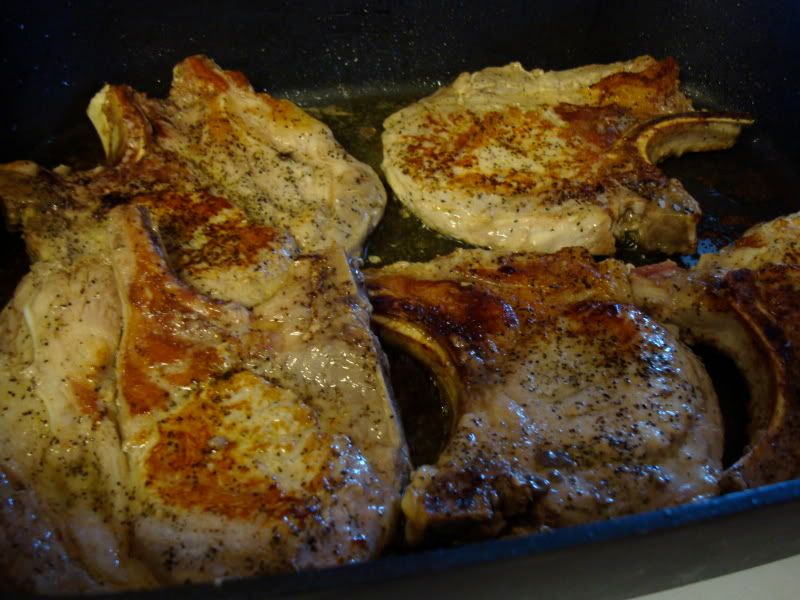
-Add seasoned pork chops to the pan, and cook for 5 minutes on each side. Because I use such a big packet of pork chops, I usually have to do this in two groups. Be sure to get a good sear on either side, and be sure to get them to 165* internal temperature. If you have thicker pork chops, this might take longer than 5 minutes.
**Note, you won't often hear me say to be exact on things, but trust me, you want to be SURE that your pork is cooked thoroughly. I just finished a microbiology class, and I've SEEN what can grow inside you if you don't. Trust me, it's worth the extra few minutes. In case you don't trust me, do a google image search for Trichinella spiralis.**

Photobucket

-While the pork chops sear, get to work chopping your onion. Personally, I chop it into large pieces, because I like put the glaze through a sifter to clarify it, and I don't want any chunks of onions slipping through.

-Once pork chops are seared on both sides, remove them to a plate, and cover them with a tin-foil tent. Let them rest while you finish the glaze.

Photobucket

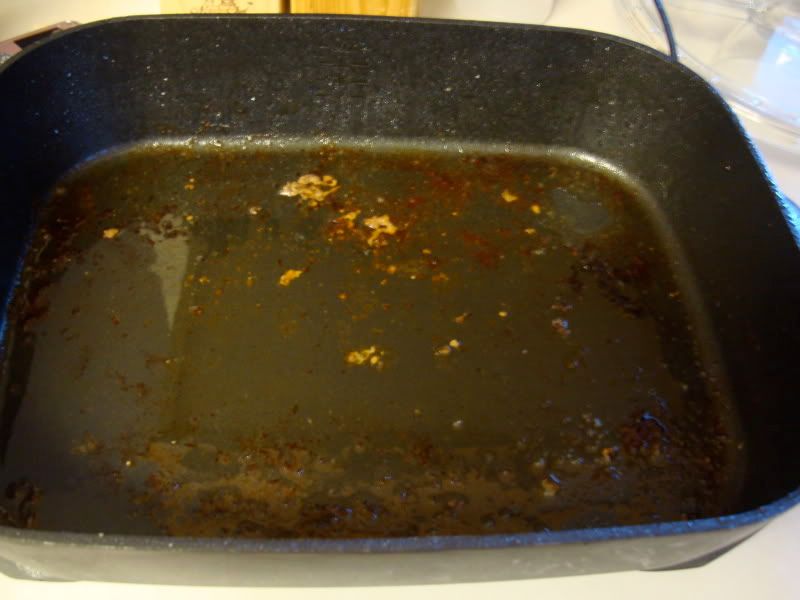
-Take a look at all the rendered goodness from those chops! This is going to make your glaze delicious!

Photobucket

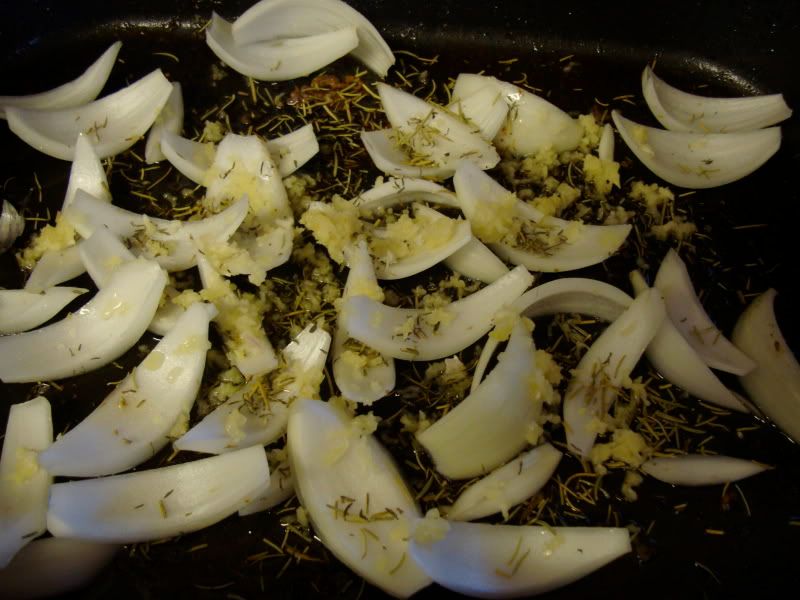
-Now, add your onions

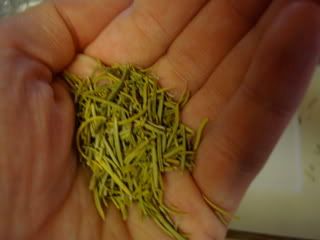
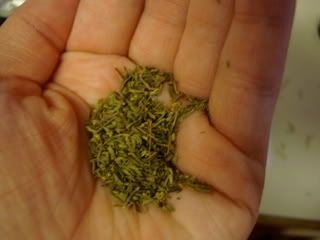
-Next, add your thyme, and rosemary. I happen to LOVE rosemary, so I add a fair amount. But, I don't measure. I took a picture of how much I put in to give you an idea:

Photobucket
Photobucket

-Now, add your garlic. If you don't have a garlic press, buy one. Seriously, you can always chop it into tiny bits with a knife, but this is a LOT of work, especially for 6-8 garlic cloves. If you have a good garlic press (mine is Pampered Chef), you don't even have to peel the garlic. Perfect for the efficient (NOT lazy!) cook! The original recipe calls for 6 garlic cloves, but we happen to be a garlic loving family, so I add at least 8.

Photobucket

-Saute all of this together, stirring every now and again, until the onions start to look translucent.

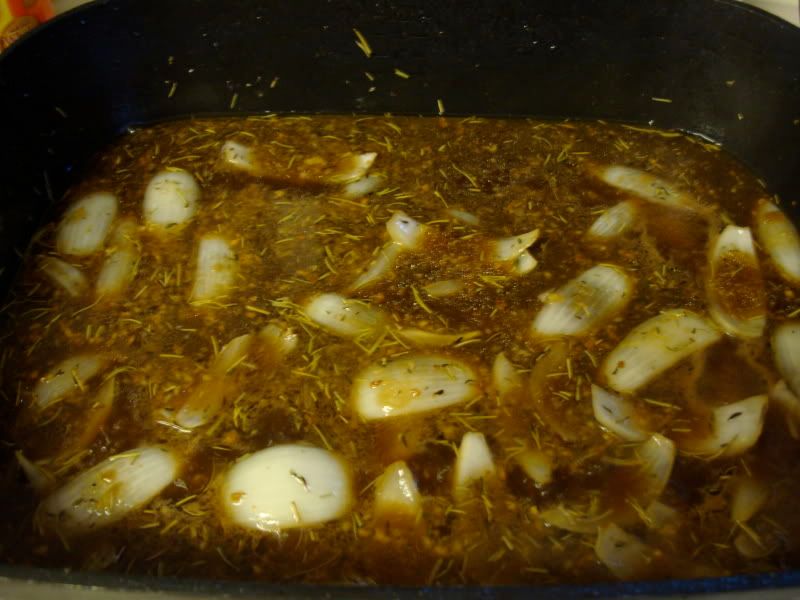
-Next, whisk in your chicken broth, balsamic vinegar, and honey. Stir it around well, so the honey and balsamic are evenly incorporated.

Photobucket

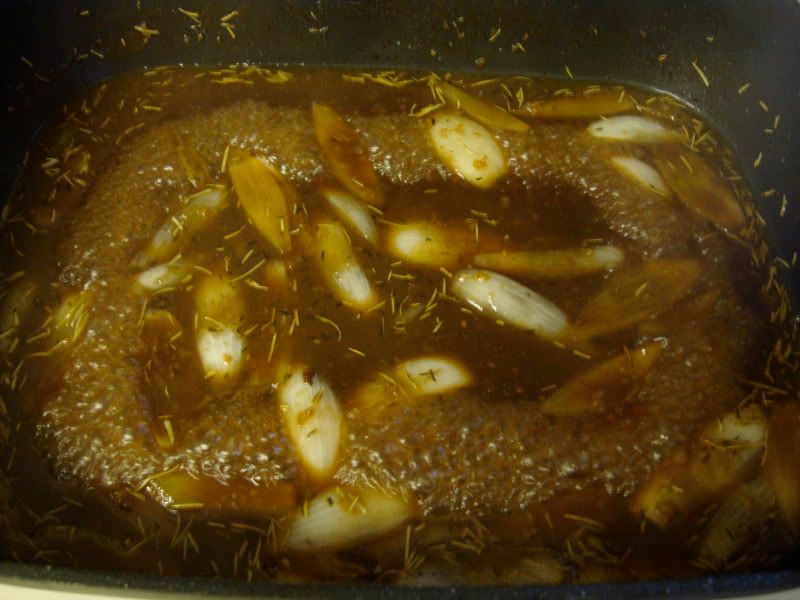
-Now you're going to simmer this (whisking occasionally) until it reduces by half. Just about the time you start thinking "this is NEVER going to happen, it's not ever going to get thicker," it will thicken up. I promise, it will. It takes mine about 15 minutes or so, usually.

Photobucket

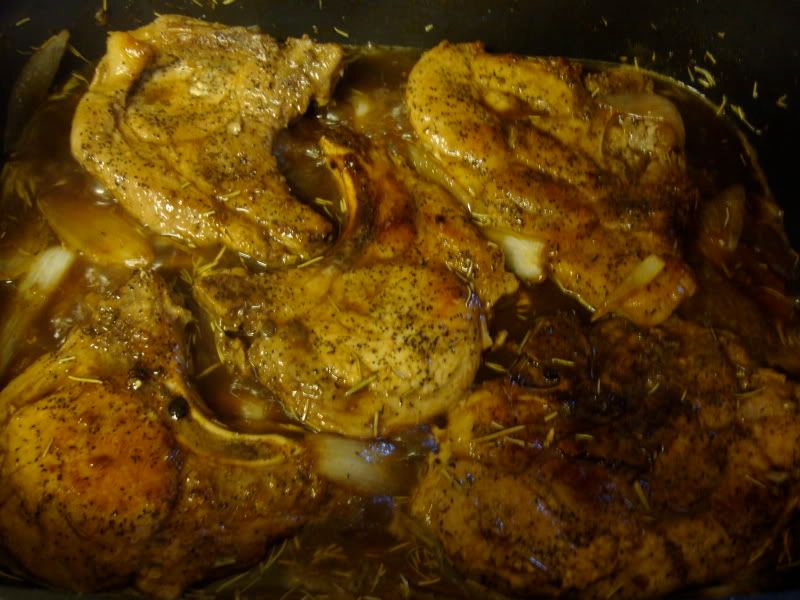
-Once the glaze is thickened, you're going to add your chops back in and coat them. Again, I have to do this in two groups. The original recipe says to just get them coated, and you're done, but as I already stated, I'm more than a little paranoid about my pork being cooked all the way, so I usually cook them for 2-3 minutes per side in the glaze. This way I know they're done, and there aren't any little unwelcome friends wriggling around in there.

Photobucket

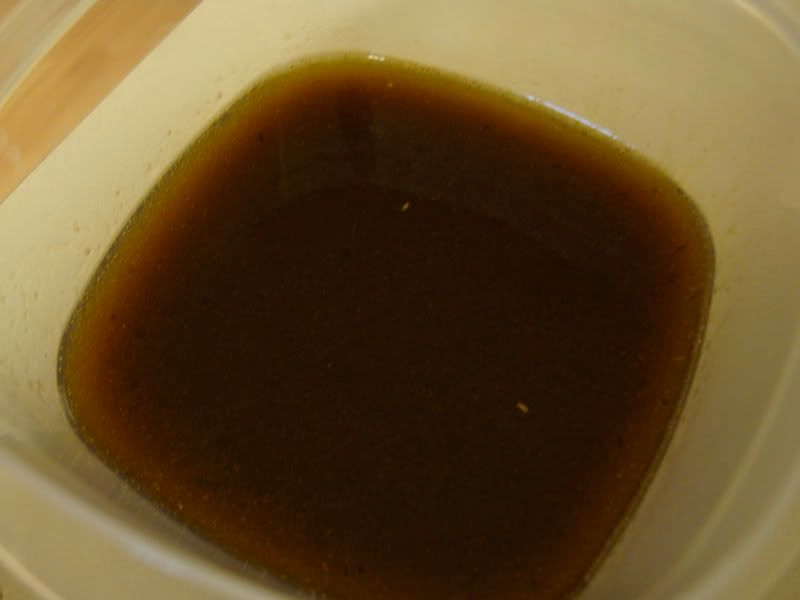
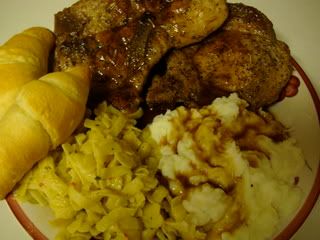
-Then, I get out my sifter (not the kind with the trigger, just a plain old sifter), and push the glaze through it, removing all the onions, and many of the leftover herbs. This turns it into almost a gravy that I happen to love to pour over my butter-filled mashed potatoes, and chicken noodles.

Photobucket

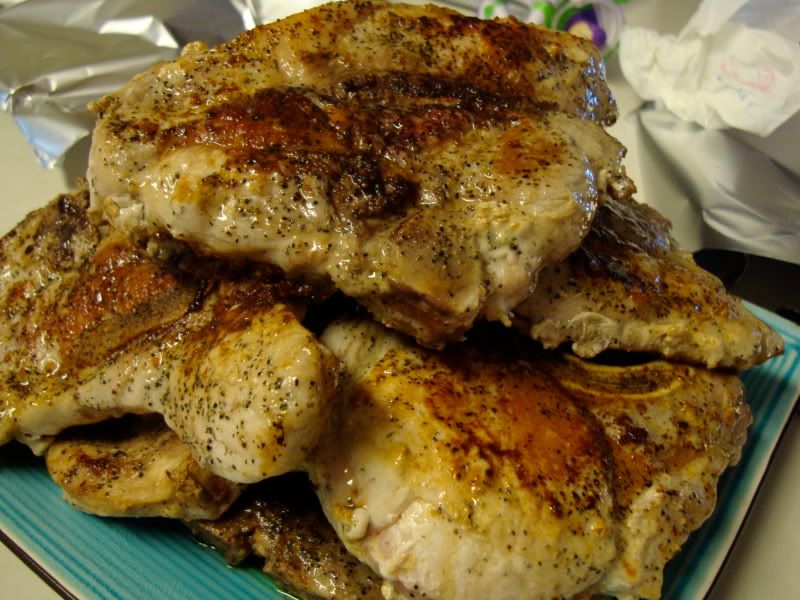
Now if THIS doesn't look like a good meal, I don't know what does:

Photobucket

Original Recipe:
http://www.copykatchat.com/archive/index.php?t-6770.html

Wednesday, June 23, 2010

Peanut Butter Madness, part DEUX!

Here are the DELICIOUS peanut butter cookies I alluded to in an earlier post.

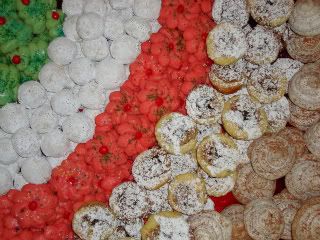
A little background on me. Around here, with the family, I am known as the cookie queen. I'm CONSTANTLY baking cookies, even in my terrible, old oven I like to pretend never existed. I'm known to start baking and freezing Christmas cookies in November, and for making 100's of batches for family parties. So, I don't think it would be too immodest to say that I am pretty qualified to judge a cookie recipe. In case you want some proof, here is a picture from one of my cookie trays last Christmas:

Photobucket

I happen to love almost ALL cookies. Except oatmeal cookies. Because seriously, the LAST thing I want in my cookie is oatmeal. I mean, really who thought it was a good idea to bastardize something so delicious as a cookie with something so disgusting as oatmeal?!?! Of course, my father-in-law disagrees, as oatmeal raisins are his absolute FAVORITE cookie, and I have been known to indulge him by making some from time to time. Of course, I can't vouch for the taste, because chances of me trying one are pretty much nil.

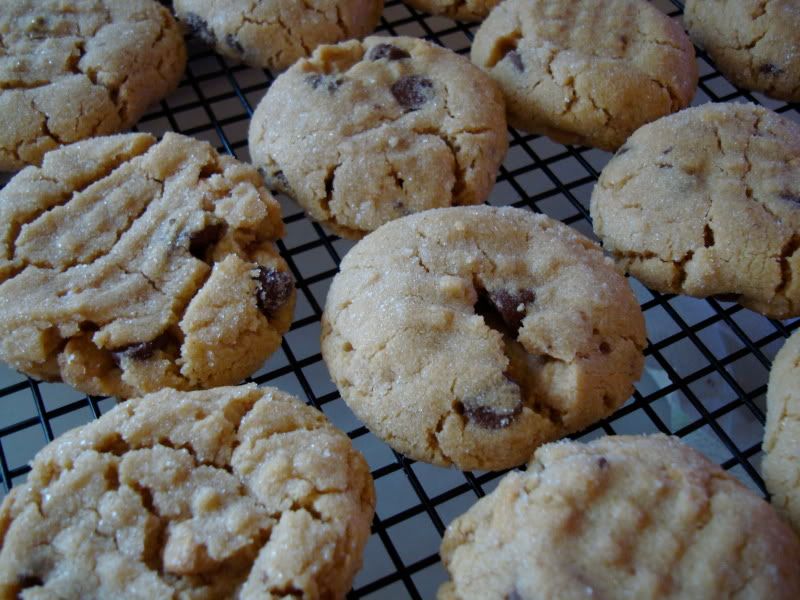
Anyway, other than oatmeal cookies, I would have to say that peanut butter cookies used to be pretty far down my list of great cookies. I didn't hate them, but I didn't love them either, though I made them often, because they are my Mom's favorite. Let me tell you this, after making this recipe, peanut butter cookies have SKYROCKETED to the top of my favorite cookie list. I mean, these cookies are so good, you could eat them for breakfast, lunch, and dinner. Oh, and dessert, too. Can't forget dessert. They are without a doubt the best cookies I have ever made, or eaten, in my life. Of ANY kind. They are fluffy, and chewy, and almost melt in your mouth, without being gooey (I'm not a fan of gooey cookies). And the peanut butter/semi-sweet chips inside just elevate them to a whole different level.

An important note about these cookies, the taller you make them, the better. I used a pampered chef cookie scoop, and my secret helper (the husband) rolled them in sugar, and pressed them with a fork for me. The ones that we BARELY pressed with the fork, and left almost golf-ball shaped were the BEST texture, as opposed to the ones we flattened. I would say the cookie scoop is pretty important in these cookies, or if you don't have one, get ready to get your hands dirty (your best tool in the kitchen, according to my hero, Paula Deen!), and roll them into golf-ball sized cookies, instead of just using two teaspoons.

Photobucket

Unfortunately, I was in a hurry while making these, and didn't snap any of the dough, or sugar rolling, but if you go to the link below, to the smittenkitchen site, there will be PLENTY of those for you, and much better photo quality too!

Here they are, as Shelby does her work!

Photobucket

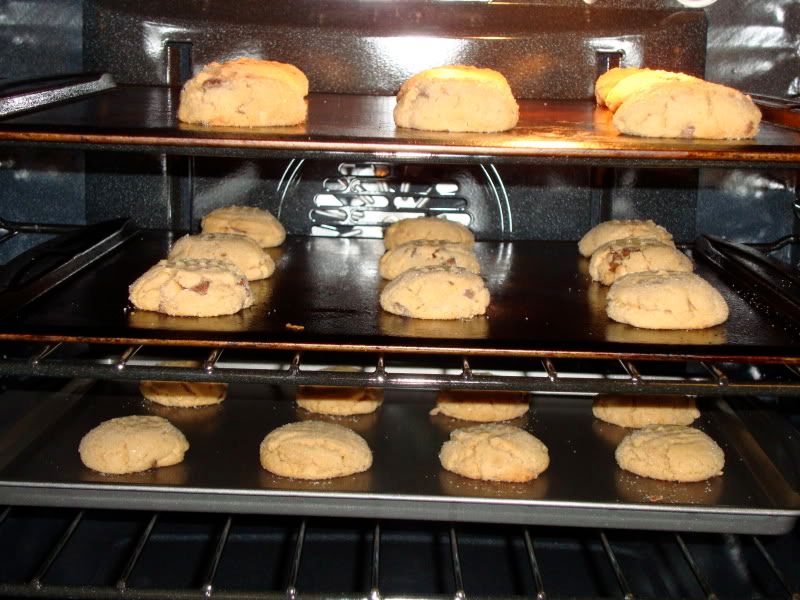
And cooling, on the counter. Here, you can see the difference in heights. The taller cookies, that weren't significantly pressed were SO much better.

Photobucket

I also want to point out what a HUGE difference rolling the entire cookie in sugar before baking made. I always sprinkled my PB cookies with sugar before baking, but never knew why, or really noticed when they were done. With these cookies, you roll the entire cookie in sugar before baking, and it really makes a MAJOR difference (which of us can't use a little more sugar in our lives?). It lends a contrast in textures, and an instant "melt-in-your mouth" sweetness that just can't be beat.

LIFE CHANGING Peanut-Butter Cookies
a la Smitten Kitchen
Peanut Butter Cookies
Adapted from the Magnolia Bakery Cookbook

1 1/4 cups all-purpose flour
3/4 teaspoon baking soda
1/2 teaspoon baking powder
1/4 teaspoon salt
1/2 cup unsalted butter, softened
1 cup peanut butter at room temperature (smooth is what we used, but I am pretty sure they use chunky at the bakery)
3/4 cup sugar
1/2 cup firmly packed light brown sugar
1 large egg, at room temperature
1 tablespoon milk
1 teaspoon vanilla extract
1/2 cup peanut butter chips
1/2 cup chocolate chips

For sprinkling: 1 tablespoon sugar, regular or superfine

Preheat oven to 350 degrees. In a large bowl, combine the flour, the baking soda, the baking powder, and the salt. Set aside.

In a large bowl, beat the butter and the peanut butter together until fluffy. Add the sugars and beat until smooth. Add the egg and mix well. Add the milk and the vanilla extract. Add the flour mixture and beat thoroughly. Stir in the peanut butter and chocolate chips. Place sprinkling sugar — the remaining tablespoon — on a plate. Drop by rounded teaspoonfuls into the sugar, then onto ungreased cookie sheets, leaving several inches between for expansion. Using a fork, lightly indent with a crisss-cross pattern (I used the back of a small offset spatula to keep it smooth on top), but do not overly flatten cookies. Bake for 10 to 12 minutes. Do not overbake. Cookies may appear to be underdone, but they are not.

Cool the cookies on the sheets for 1 minute, then remove to a rack to cool completely.

*Important notes:
1) I used SMOOTH peanut butter, as I, personally, think that chunky peanut butter is from the devil. It looks all silky and smooth, and then you are unpleasantly surprised by these miserable chunks of nuts. ALMOST as bad as biting into a beautiful brownie, and finding it's full of nuts. Sins of the highest level, in my book.

2) Do NOT use a spatula to flatten these cookies. Another of the 7 deadly sins, according to Kelley. Peanut butter cookies are supposed to have a beautiful cross-hatching pattern on top. That's what makes them peanut butter cookies. That's how it's always been done, and how it should always stay. There's something so homey, and old fashioned about it, and you know how I feel about all things homey, and old fashioned!

Original recipe/blog post/beautiful photos found at: http://smittenkitchen.com/2007/12/peanut-butter-cookies/

Lunchbox Lovin', and a trip down memory lane...

I know, it's amazing, I'm here, alive, AND posting recipes. My finals are over, so I should have a lot more to share with you guys now that time isn't such a hot commodity.

Today's recipe is so simple, I'm almost embarrassed to post it as my first "original" recipe on the blog, except it's so delicious there's nothing to be embarrassed about! This recipe is one that was inspired by my hometown, and my Mom. Good thing I introduced her, huh?

I grew up in NE Ohio, but, right now, I happen to live in Utah. Which, is a beautiful place, but probably one of the most generic, "white bread" places in the world. Now don't get me wrong, I happen to love white bread, nothing beats a plain old PB&J on Wonder Bread. And don't even get me started on the monstrosity that is "white wheat bread," BLECH! Anyway, what I'm getting at is that Utah County is very devoid of a lot of the immigrant communities I grew up around in Ohio. You want great Mexican food? You can find it on almost as many corners as a Mormon church. But, you want some delicious homemade Polish pierogis? You're SOL (which means "SORRRY out of luck," you crazy sinners, this is a revival, you know!). A quaint little Italian Bakery? Not a chance. Which, in my opinion, is a real tragedy.

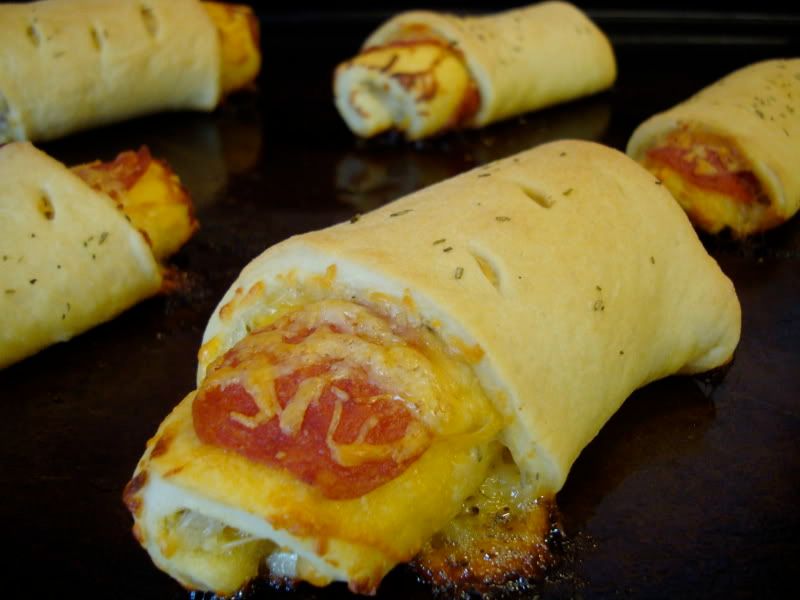
I grew up near some really GREAT Italian bakeries, and pizza places (can anyone say Guido's in Chesterland? YUM!). Two of my favorites are T&T Bakery in Painesville, and Ianiro's, in Chardon, and if you're ever in NE Ohio, you MUST go there (and bring me back some Pizzelle's and Pepperoni Rolls!). You want great donuts? Biaggio's in Willoughby, but that's another post. This post is about something more savory, and more practical for your lover's (or your own) lunchbox. The number one specialty at these great Italian bakery's is something that is so incredibly simple, you can't believe how good it can be. They are called Pepperoni Rolls (say it with me now, pepp-er-oni-rolls, NOT pizza rolls), and if you want one from T&T bakery, you'd better be there at exactly 10:30 am, or they'll be sold out before you get one, and that would be a real travesty.

Photobucket

T&T and Ianiro's have two different takes on Pepperoni rolls, T&T's is cheese-less, completely reliant on the DELICIOUS bread they wrap around giant-sized pepperonis. Ianiro's, on the other hand, involves delicious bread, AND melty cheese, a winning combination in anyone's book. The husband and I don't agree on which is better, I prefer the simplicity of T&T's, and he prefers the melty goodness of Ianiro's, but really, let's face it, when you're talking about homemade italian bread, and perfectly seasoned pepperonis, is there really a wrong way? I think not.

Now, if you are unfortunately stuck residing somewhere outside a 200 mile radius of either of these two delicious bakeries (because I would SO drive 200 miles for a good pepperoni roll!), and in a location so white bread as to be completely devoid of immigrant bakeries, what are you to do? Suffer in silence, begrudging your locale? NO, my friends! Not if you're ingenuity is still intact...you make your own to hold you over until you can get into town, and get some deliciousness again.

Now, these pepperoni rolls are NOT as delicious as the one's they serve at my favorite Italian bakeries. And it's not because I'm not an Italian immigrant, it's because I'm using frozen bread dough here, and as good as it's gotten, nothing matches hand-kneaded bread in an Italian bakery. Again, this has nothing to do with laziness, it just never occurred to me before now to make my own bread. I think now that I have some more time, I might try it. When I do, I'll let you know how it goes.

Now, I don't know about you guys, but my husband has a job which affords him no lunch hour. He typically has 10-15 minutes to grab something in his car, between hospitals. Which either means fast food, or soggy bologna and white bread sandwiches, neither of which sounds like a good option to me. Put this together with my nostalgic longing for Italian baked goods, and my ingenious Mother (who came up with the idea), and you've got a winning recipe to makeover your lunchbox, or your lover's!

Now, you will notice a key difference in my original recipes, and the recipes I post from other websites, particularly in the measurements, or lack thereof. In true Southern style, I very rarely measure ingredients in family recipes. Mostly because my Mother never did, and neither did her mother, or hers, and so on and so on. I think there must be an edict somewhere that Southern women aren't allowed to measure ingredients when cooking savory dishes. It would be grounds for ejection in my Mother's kitchen, and I just can't risk that.

Also, I should note that while I prefer the cheese-less pepperoni rolls at T&T, when I make these at home I make them WITH cheese. The homemade bread is what really makes T&T's pepperoni rolls stand out, without that delicious bread, you really need the cheese.

Okay, onto the recipe.

Ingredients:
1 loaf of frozen bread dough, thawed (I use Rhode's, but only because that's all my evil, giant-box store carries)
1 stick of butter
Italian herbs (I use Italian seasoning, rosemary, and garlic powder...LOTS of garlic powder.)
Pepperoni
Shredded Cheese (I use whatever I have on hand, Parmesan, Asiago, Cheddar, whatever)

Directions:
Preheat Oven according to directions on your bread. I think last time I did 375, but I'm not sure that's what Rhode's recommends...sue me, I like to live adventurously. And everything turned out just fine.

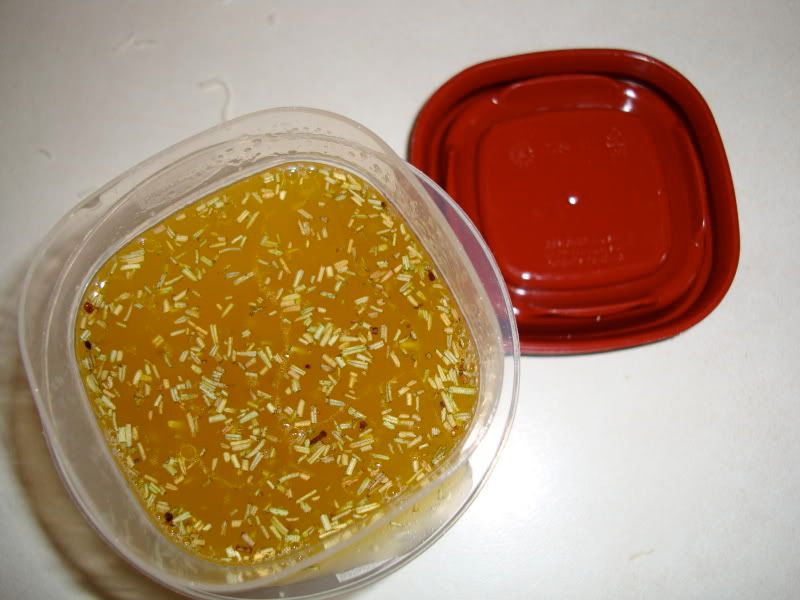
Melt your stick of butter in a bowl. Once melted, add your preferred herbs, and stir them together. Now, if like me, you thought 2 sticks of butter might be better than one, and are left with GOBS of melted herb butter, don't throw this stuff out! Place in small tupperware container, and stick in the fridge for next time you get the inkling to add some buttery herb deliciousness to your recipes.

Photobucket

Now, roll out your bread dough into a looooooong rectangle. This part is not easy, and requires a little muscle. Frozen bread dough does not particularly prefer to be rolled out, but don't worry about hurting its feelings, Just push a little harder, and use a little muscle. Incidentally, I'm 99.9% sure that this hard labor COMPLETELY makes up for the calories in the food you are about to eat. So, go with it, and enjoy your cardio. I typically break the loaf into two halfs, to make the last steps easier, which means I get TWICE the workout.

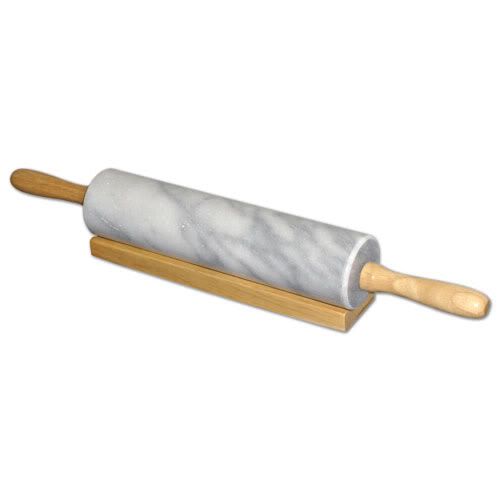
-This reminds me of an important tool you MUST have in your kitchen. A good, heavy, MARBLE rolling pin. I don't want to see any of you using those flimsy $2 wooden ones from your favorite big box store. NO. They just will not do. They don't work very well, and they always make me think of wooden splinters getting stuck in my food. Nasty. You need to invest in a good quality, marble rolling pin. It will make ALL the difference in the world for so many of the recipes I will share with you. So, take the money you're about to save on fast food lunches, and put it towards one of these babies:
Photobucket
Oh, and I just did a quick google search, and you can get one of these babies for $11, so no excuses!

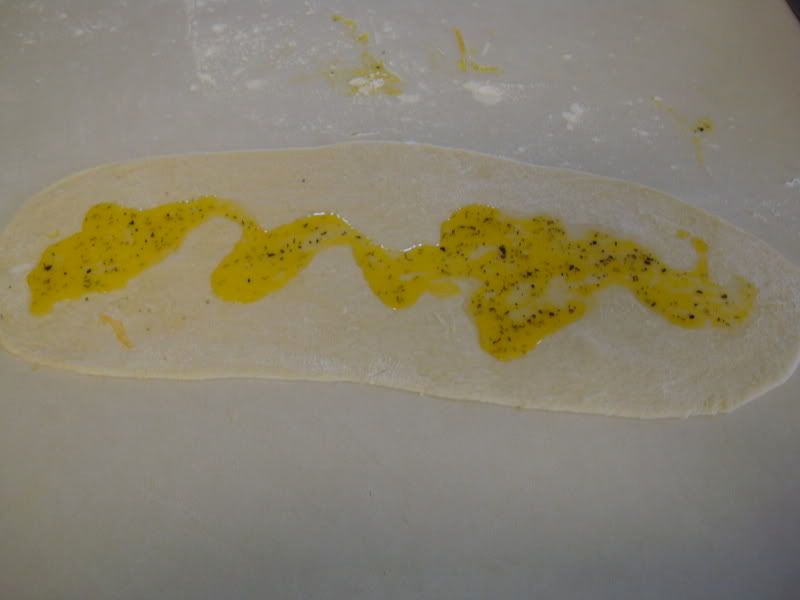
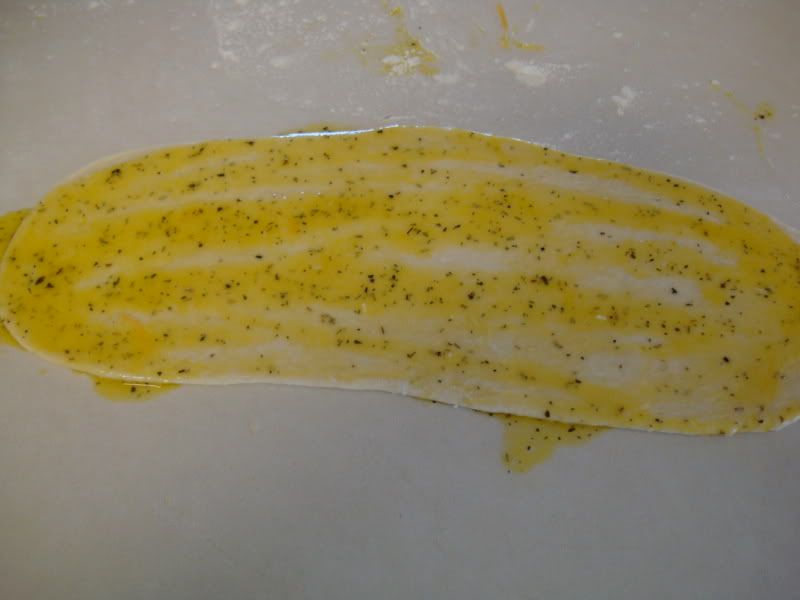
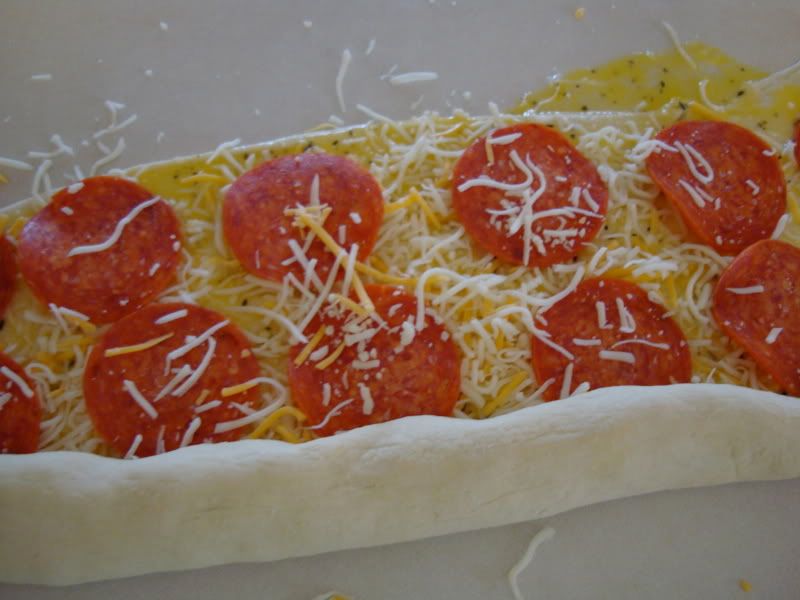
Once your dough is rolled out, spread some of the melted butter/herb mixture over it, until it looks nice and golden. Then, add some of your shredded cheese, sprinkling until you think there is enough. Then, add some more, just because. Layer your pepperonis, until you have enough to satisfy your craving. Add a bit more cheese, because you really can't have too much melty goodness.

Photobucket
Photobucket

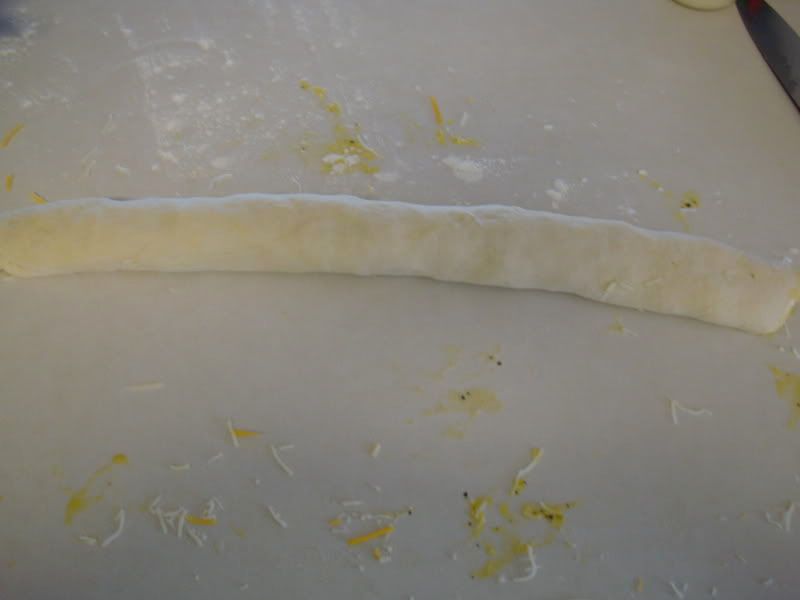
Then, you're going to roll this entire thing up, longways, kind of like a jelly roll. Go slow, the pepperoni makes it so that the bread doesn't easily stick to itself, and you don't want to dislodge it all.

Photobucket
Photobucket

Once it's all rolled, cut it into 3-5 inch sections, and place on greased baking sheet. Cut vent holes in the top of each pepperoni roll, spread on some more butter/herb mixture (because really, you can't have too much butter. And before you get your panties in a wad about calories, don't forget all the cardio you did, rolling out the dough).

Photobucket

Place in your hot oven, and bake until they look done. About 15 minutes or so, usually. They come out with pepperoni, and cheese sticking out the sides, and smelling HEAVENLY.

Photobucket

Place in a ziploc bag, and store in the fridge up to 1 week. Place one of these babies into your lover's (or your own!) lunchbox next week, and see how quickly your fast food bill starts to decline! Because who's going to trade one of these for grease laden fast food?

Sunday, June 13, 2010

Two more introductions...

Well, more like one new introduction, and a few more details on an old friend.

First for the new. It has been brought to my attention that I did not include my Mom on my initial cast of characters post. This was not because I'm lazy (see a recurring theme here, I am NEVER lazy...even when I am. Don't try to do the math there, just accept it as the gospel truth. This is, after all, MY revival), but because unfortunately, she happens to live 2000 miles away in the land of sunshine, and lollipops known as Ohio. One day, we, too, will get to live there again, with green grass, and yards larger than postage stamps, but for now, we're stuck 2000 miles away. Because of this distance, it's unlikely that she will be tasting many of my new recipes, but I would be remiss not to include her, because most of the "oldie, but goodie" recipes I'll post here are from her brain, and not my own. And, I am sending her some of the peanut butter cookies that I will be posting shortly. So, here she is, my beautiful Mom, who informed me today that her parents took her to ACTUAL Southern tent revivals when she was little, so if anyone can speak knowledgeably about fire, and brimstone, it's her.
Here she is, with my sweet little Ashlyn (aka The Tempter), when she was only 2 weeks old (Ashlyn, not my Mamma!)

Photobucket

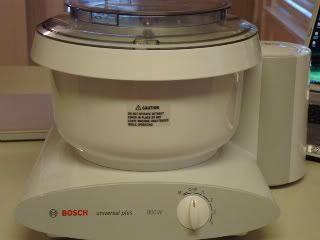
As for the old friend, it has come to my attention that many of you had not heard of the amazing machine that is the Bosch Universal Plus Mixer. Which is a sin. Seriously, if you love to bake, you MUST have a Bosch. Especially if you love bread. I could not make bread without this machine. Of course, it does much more than make bread, but it's why I HAD to have it. I won't even tell you the things I had to do to for Santa (aka my sweet Jonny) in order to have this amazing device come down the chimney. If I did that, we'd all need more than a revival to come out forgiven. Anywhoo...This device is simply wonderful. It's like a KitchenAid Stand Mixer on steroids. For bread, it kneads bread PERFECTLY in no-time flat, and most importantly, NO WORK for you! For large batches of cookies, it simply can't be beat. You can triple, and even quadruple your chocolate chip cookie recipe in here, with no problem. It also comes with a blender attachment, that makes the most powerful blender I've ever used. Not to mention the several other attachments you can purchase. I have the food processing attachment that allows me to grate cheese, potatoes, onions, and just about anything else you can think of quickly, and most importantly painlessly. I don't think anyone's missing that nice iron-y taste of blood in their latkes. I'm going to show you a few links/videos on the mixer so you can get acquainted, and then give you some time to plan what you need to do to for Santa in order to have this come down your chimney, but I'm only going to do it if you PROMISE me you won't faint when you see the price. I don't want to have to start putting legal disclaimers in here for the head injuries if you do. I'm not a doctor yet, I don't want to be uninsurable when I apply for that malpractice insurance! Also, you should know that these machines last FOREVER. Seriously, my mother-in-law's Bosch is over 20 years old, and still works as it it were brand new. Yes, TWENTY years old. That's almost as old as me, and still works like new, which, incidentally, is more than I can say for myself!

Okay, here is a good website that lists a lot of the features of the Bosch, but I'll warn you, it's wordy!

http://www.pleasanthillgrain.com/Bosch_Universal_Plus_Mixer_MUM6N10UC.aspx

Here are a couple of youtube videos of the Bosch in action. You'll have to excuse the uber weird people in the videos, but it's early in the morning, I'm not dressed, nor do I have make-up on, so I assure, a demonstration by me right now, would be even weirder.

Kneading Pizza Dough:


Making NINE loaves of bread at once: (there are three of these videos, and they are LONG, but it will give you the idea)


The blender attachment:


Next time I make a double batch of cookies in the Bosch, I'll make a video of it, to show you how awesome it is!

I promise to post the recipe for the AMAZING peanut butter cookies I made from Smitten Kitchen's website, they are really wonderful. Make them ASAP, and then don't get on the scale for at least a week.

Saturday, June 12, 2010

Peanut Butter Madness!

So, this week, both new recipes are desserts, and both new recipes involve peanut butter. Not sure why it happened that way this week, I just had one heck of a sweet tooth, and these two desserts just looked WAY too good to pass up. Both are courtesy of one of my two favorite food websites, www.smittenkitchen.com. (The other being the food queen herself, Ree Drummond of www.thepioneerwoman.com).

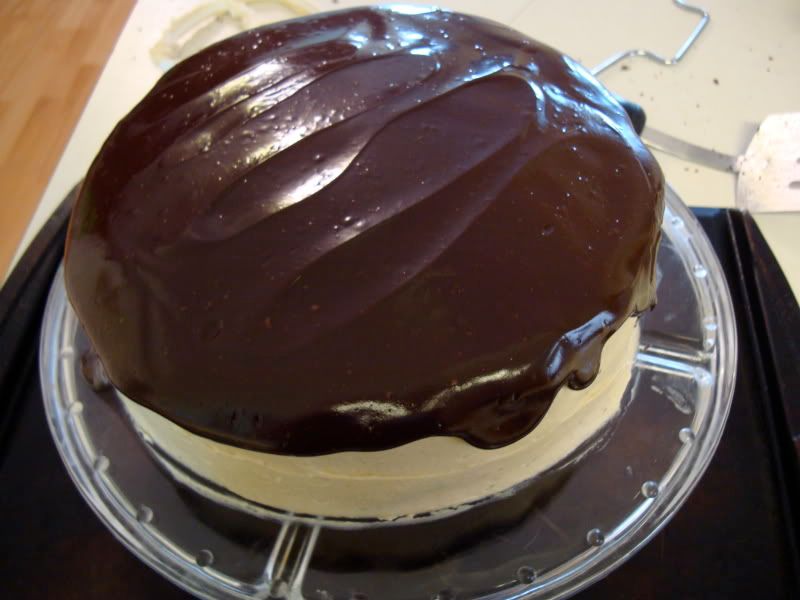
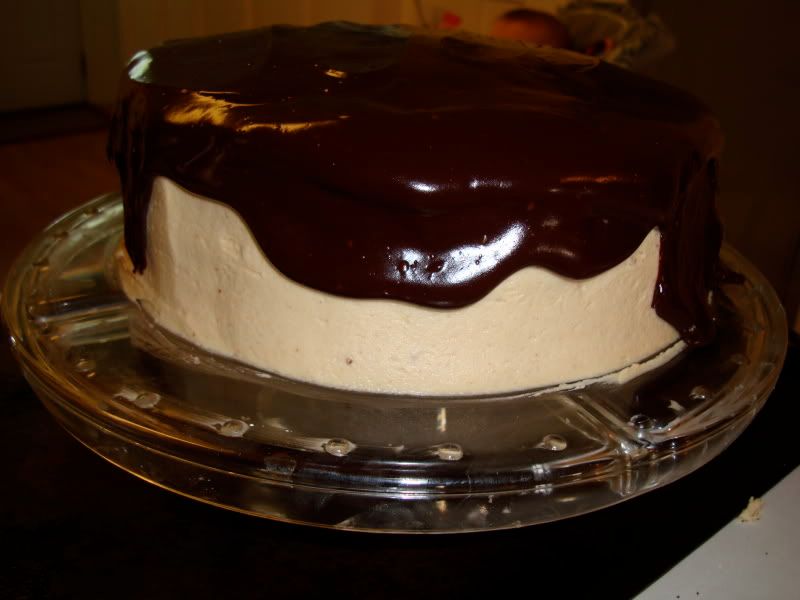
The first is a chocolate cake with peanut butter cream cheese frosting, and a chocolate peanut butter ganache that was TO DIE FOR. I mean, seriously, I could make buckets of this stuff, and eat it right out of the bowl. Heck, who needs a spoon? I'm not above sticking my face down in there, and licking it right from the bowl. Don't tell anyone, though please warn me if I have some on my nose. Seriously, if you make nothing else on this blog, MAKE THIS GANACHE. Spoon it over ice cream, put it on cupcakes, or brownies, or cheesecake, or a spoon, your lover, whatever floats your boat. It is DELICIOUS. I tried this recipe on The Family, and rave reviews followed. Nick, our resident ganache expert had two pieces. Without making cake soup by drenching it in milk. Which speaks VOLUMES for its deliciousness.

I must admit that I did not try the "from scratch" cake recipe on her website. Not because I'm lazy, or because I have MOUNTAINS of microbiology homework to do, only because I forgot the sour cream at the store. Am I the only one on the face of this planet who can go to the store with a detailed, organized list, and come home missing at least one item each and EVERY time I go to the grocery store? It's like a curse. Tell me I'm not alone. Anyway, I used a boxed, swiss chocolate cake from Duncan Hines, and the cake was still delicious. The cake is really just a vehicle for the frosting, and ganache, anyway. And even though I didn't make the from scratch version on her website, I know it's delicious, just the same way you know that your favorite Coach bag will always make you smile, or the same way you know that your little boy will have to go potty right AFTER you pass the last rest stop for 39 miles (or is that just my little man.) It just is. Trust me.

Now, her cake is MUCH more beautiful than mine. What can I say, I didn't level the cake correctly. Not because I'm lazy (again with the lazy, geez, give it a rest, would ya?), but because I happen to like the look of a nice, rounded top cake. Kind of homey, and old fashioned. And nothing speaks to a Southern girl like all things homey, and old fashioned. Unfortunately, this made my cake look a little lopsided, and allowed the ganache to run down the sides in a very uneven fashion. But, we have a saying in The Family about our Pampered Chef stoneware pans that fits pretty well in this situation, "the worse it looks, the better it cooks." Because let me tell you, all that extra ganache does beautiful, and magical things inside of your mouth. You won't even remember what the cake looked like anyway, because by the time you blink, it will all be gone.

Photobucket

Photobucket

I served this at the family Memorial Day BBQ, alongside these adorable red, white, and blue cupcakes that my son, Landon decorated. I think he has an eye for this already, don't you?

Photobucket


**Also important to note, that while it sounds, fancy, and inherently difficult, the ganache was a BREEZE to whip up. Probably the easiest thing I've ever made, and the most delicious, as well. So, don't be intimidated by it, it's not hard, at all.**

Chocolate Peanut Butter Cake a la Smitten Kitchen
-I have to say that this name just doesn't do this cake justice. It should be something like "The most delicious, peanut butter chocolate ganache explosion you've every put in your mouth," but that just wouldn't fit very well on the recipe card, now would it?

The Cake:
2 cups all-purpose flour
2 1/2 cups sugar
3/4 cup unsweetened cocoa powder, preferably Dutch process
2 teaspoons baking soda
1 teaspoon salt
1 cup neutral vegetable oil, such as canola, soybean or vegetable blend
1 cup sour cream
1 1/2 cups water
2 tablespoons distilled white vinegar
1 teaspoon vanilla extract
2 eggs


1. Preheat the oven to 350 degrees F. Butter the bottoms and sides of three 8-inch round cakepans. Line the bottom of each pan with a round of parchment or waxed paper and butter the paper.

2. Sift the flour, sugar, cocoa powder, baking soda, and salt into a large bowl. Whisk to combine them well. Add the oil and sour cream and whisk to blend. Gradually beat in the water. Blend in the vinegar and vanilla. Whisk in the eggs and beat until well blended. Scrape down the sides of the bowl and be sure the batter is well mixed. Divide among the 3 prepared cake pans.

3. Bake for 30 to 35 minutes, or until a cake tester or wooden toothpick inserted in the center comes out almost clean. Let cool in the pans for about 20 minutes. Invert onto wire racks, carefully peel off the paper liners, and let cool completely. (Deb note: These cakes are very, very soft. I found them a lot easier to work with after firming them up in the freezer for 30 minutes. They’ll defrost quickly once assembled. You’ll be glad you did this, trust me.)

4. To frost the cake, place one layer, flat side up, on a cake stand or large serving plate. Spread 2/3 cup cup of the Peanut Butter Frosting evenly over the top. Repeat with the next layer. Place the last layer on top and frost the top and sides of the cake with the remaining frosting. (Deb note 1: Making a crumb coat of frosting–a thin layer that binds the dark crumbs to the cake so they don’t show up in the final outer frosting layer–is a great idea for this cake, or any with a dark cake and lighter-colored frosting. Once you “mask” your cake, let it chill for 15 to 30 minutes until firm, then use the remainder of the frosting to create a smooth final coating. Deb note 2: Once the cake is fully frosting, it helps to chill it again and let it firm up. The cooler and more set the peanut butter frosting is, the better drip effect you’ll get from the Chocolate-Peanut Butter Glaze.)

5. To decorate with the Chocolate–Peanut Butter Glaze, put the cake plate on a large baking sheet to catch any drips. Simply pour the glaze over the top of the cake, and using an offset spatula, spread it evenly over the top just to the edges so that it runs down the sides of the cake in long drips. Refrigerate, uncovered, for at least 30 minutes to allow the glaze and frosting to set completely. Remove about 1 hour before serving.

Peanut Butter Frosting
Makes about 5 cups

10 ounces cream cheese, at room temperature
1 stick (4 ounces) unsalted butter, at room temperature
5 cups confectioners’ sugar, sifted
2/3 cup smooth peanut butter, preferably a commercial brand (because oil doesn’t separate out)

1. In a large bowl with an electric mixer, beat the cream cheese and butter until light and fluffy. Gradually add the confectioners’ sugar 1 cup at a time, mixing thoroughly after each addition and scraping down the sides of the bowl often. Continue to beat on medium speed until light and fluffy, 3 to 4 minutes.

2. Add the peanut butter and beat until thoroughly blended.

Chocolate-Peanut Butter Ganache
Makes about 1 1/2 cups

8 ounces seimsweet chocolate, coarsely chopped
3 tablespoons smooth peanut butter
2 tablespoons light corn syrup
1/2 cup half-and-half

1. In the top of d double boiler or in a bowl set over simmering water, combine the chocolate, peanut butter, and corn syrup. Cook, whisking often, until the chocolate is melted and the mixture is smooth.

2. Remove from the heat and whisk in the half-and-half, beating until smooth. Use while still warm


Here is the link to smittenkitchen's webpage, where you will find much more beautiful photography, and more expert advice than I could ever give!

http://smittenkitchen.com/2008/08/chocolate-peanut-butter-cake/

Monday, June 7, 2010

Cast of Characters.

Well, I suppose the best way to introduce the blog would be to introduce the relevant cast of characters in my revival.

Kelley (Me): Just like the parishioners at a good, old fashioned, Southern tent revival, I am on a quest. Not a religious quest, but perhaps a spiritual one. (Oh come now, tell me I'm not the only one who finds that great, home cooked food, feeds my soul) I'm a wife, a stay-at-home Mom, a part-time student, a lover of all things delicious, and a Southern girl at heart.

Photobucket

Shelby (my stove/double oven range): Yes, I named my range, and yes, I just introduced my range BEFORE my husband, or my children. Sue me. What can I say? She plays a VERY important role in this here revival. If you saw my old stove, you'd understand. Also pictured is my beautiful pink Kitchen-Aid stand mixer, which was previously unnamed, but will be referred to as "Betty" from here on out. What can I say, there's something in a name. The bowl is missing, because it was in use at the time of this photo. Betty here sees a lot of action. Maybe she needs a revival the most.


Photobucket

Jonathon: My sweet husband, who has graciously offered to help me taste these recipes, and to nod his head and smile, with gusto, like the parishioners shouting "Say it again, Father," "Hallelujah," and "Amen." At least that's what he'd better do, heaven forbid we start hearing things about fire, and brimstone.

Photobucket

Landon: My firstborn son. 4 years old. The most picky eater on the planet. Not likely to taste my creations, more likely to sit in the back, thinking "why did my Mom drag me here? Doesn't she know these pews make my butt hurt?" aka "Why can't I have Mac & Cheese, again?"

Photobucket

Ashlyn: My sweet daughter. 9 months old. She's just there to look pretty. And to act as the evil tempter, tempting me to abandon my quest in order to squeeze her sweet cheeks, and play peek-a-boo. Sometimes she will succeed. What can I say? I'm only human, and the devil is very good at his job.

Photobucket

The Family: Otherwise known as the in-laws, who would never be caught dead at a revival, because they need no quest, they've found what they love, and it's mostly Mexican, and uber healthy. But, I will sneak in some creations to family gatherings, and take their advice to heart, and when it's good, I'll share it here!

Photobucket

My Bosch: Another, as yet, unnamed appliance whose importance cannot be understated. The absolute BEST tool in my kitchen when it comes to bread-making, large batches of cookie dough, or just about anything else. Santa thought I was a REALLY good girl, when he brought this baby down the chimney.

Photobucket