Sunday, November 21, 2010

Cookie Craze Day 3: {Life Changing Peanut Butter Cookies}

Photobucket

Printer-Friendly Recipe


Okay, I know I'm cheating a little bit today, just linking to another recipe on the blog, but I spent last week flying cross-country by myself, with both kiddies, and have been recovering and visiting.  My Mom and I will be in the kitchen all day tomorrow, baking up a storm, and conjuring up nostalgic recipes from my Christmases past, so I promise to have several new cookies up this week.

For now, revisit THIS POST for those Life-Changing Peanut Butter Cookies.  They really are that good!

Sunday, November 14, 2010

Cookie Craze Day 2: {Russian Teacakes}

Photobucket

These cookies are known by many names.  Russian Teacakes, Mexican Wedding Cookies, Snowballs, Italian Butter Nuts, and Swedish Teacakes, just to name a few.  Apparently many nations want to claim these not-too-sweet delectable bites, and no one is sure just which nation made them first!  My son has christened them "little white ball cookies," which is not only accurate,  but quite politically correct.  Maybe I've got a budding politician on my hands?   At any rate, I've always called them Russian Teacakes.  I'm not sure why that's the name that sticks with me the most, maybe because one of my closest friends from 5th grade on is Russian.  Or maybe because that's what my Mom called them in her recipe book.  Really, it doesn't matter what you call them, as long as you MAKE them!

These cookies do have nuts, specifically pecans, as one of the main ingredients.  This is important not only for those of you with allergies to nuts, but also to those who don't typically like nuts.  Personally, I can't stand nuts.  In fact, the only nut I will actually eat is a pistachio.  But, I LOVE these cookies.  I think it's because the nuts are so finely ground, they become almost a meal-like consistency, and are used sort of like a flour.  You're going to get the best essence of the nuts, without the unpleasantness of actually biting into a nut.  But, because you cannot tell by looking at them that they are full of nuts, you need to be particularly proactive if you have any family members or friends with nut allergies.  Last Christmas, we had a close call with my nephew who is allergic to nuts, and didn't realize these cookies contained them until he was about 3 cookies in.  Luckily, he has a very mild allergy, and was left with just a sore belly all night, instead of something more serious.  But, it did open my eyes a little, so if you know someone with a nut allergy, be sure to advertise the ingredients of these babies!

Also, I'm not sure if you remember THIS POST on the quintessential nature of snapping beans on the front porch, but take a second to review, and then think of the rolling of these cookies as the Christmas version of bean-snapping.  Yes, it takes a little bit of time to do, but it's repetitive and relaxing motion ushers in the Christmas season much like snapping beans on the front porch ushers in the summer season.  So, throw on some holiday music, and get rolling...literally!  Embrace it, people!

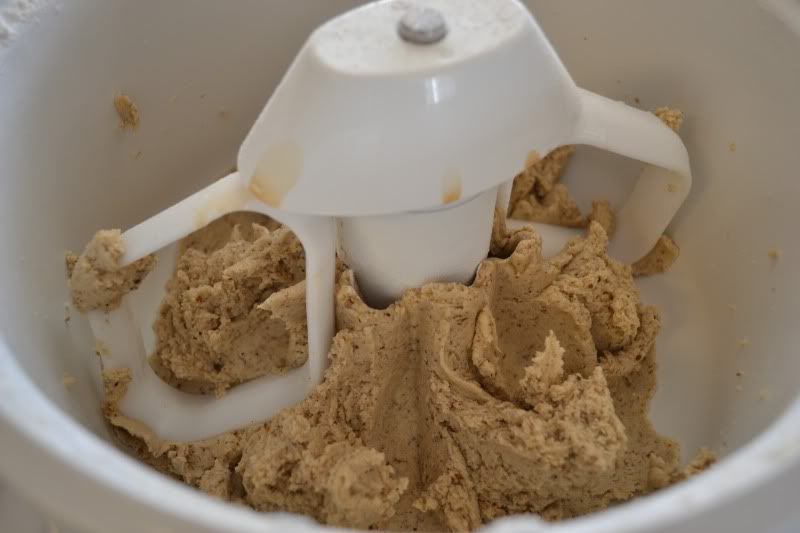
This dough is very thick, and starts out really crumbly.  So, you're REALLY going to want to do this in a stand mixer, or in a BOSCH if you have one.  If you are not lucky enough to own a Bosch, now is a really great time to start lobbying your husband Santa to put one underneath your Christmas tree.  Sexual Favors, batting my eyes always works for me, but feel free to use whichever devices you have at your disposal.  I assure you, this baby is well worth it!  So be VERY NICE this year...or maybe, be a little bit NAUGHTY!  Whatever you do, get yourself on Santa's nice list this year!

{Russian Teacakes}

Ingredients:
1 cup butter
1/2 cup powdered sugar (plus extra for dusting!)
1 tsp vanilla
2 1/4 cup self-rising flour
1/4 tsp salt
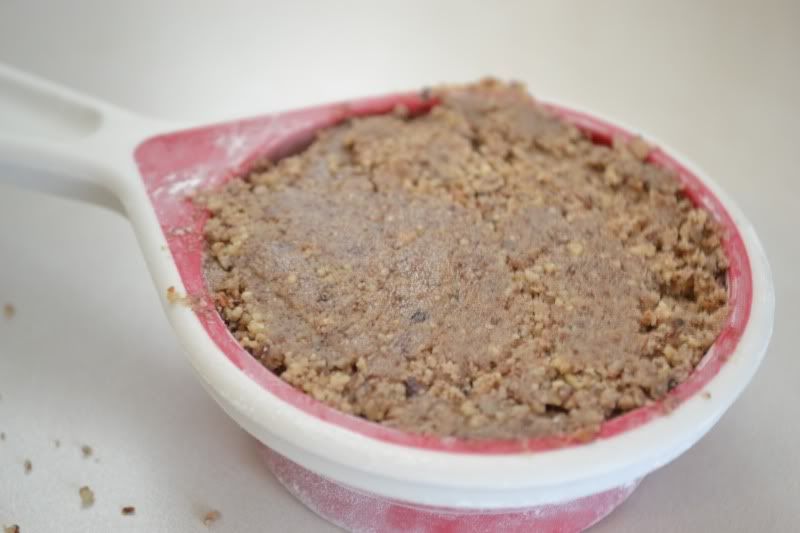
3/4 cup crushed pecans


-First, you're going to need to grind up your nuts into a meal-like consistency.  I purchase my pecans in already smashed up bits, because it's cheaper this way.  But even those aren't smashed up enough.  I still have to throw them in my Magic Bullet, and grind 'em up some more!  So, feel free to use whatever kind of pecans you have on hand, whole, halves, or pieces, because you're going to grind them up really fine.
-Important note here, you will measure the 3/4 cup AFTER you grind the nuts, not before!  I use the Magic Bullet for this task, because one of the small cups full of pecan pieces yields just the right amount of ground up nuts for this recipe.
-Place your nuts in your Magic Bullet, or Food Processor, or Chopper of any kind.
Photobucket
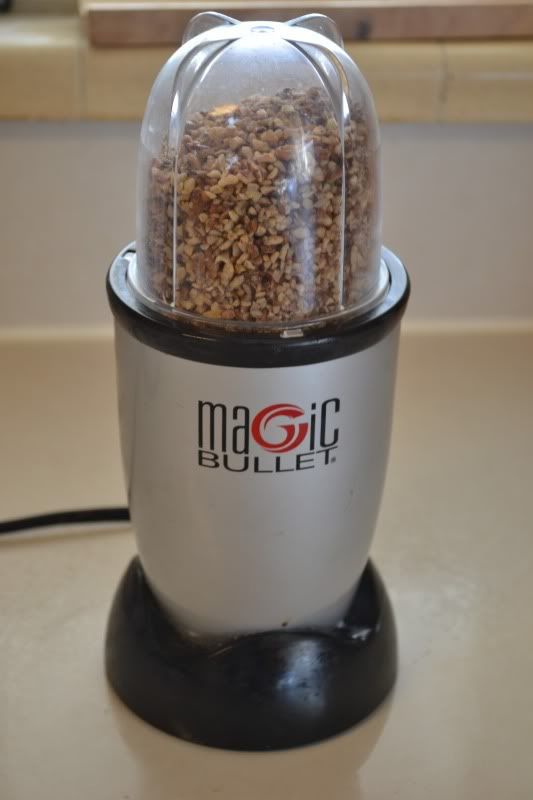
-Pulse your nuts until they reach a meal-like, almost pasty consistency.
Photobucket
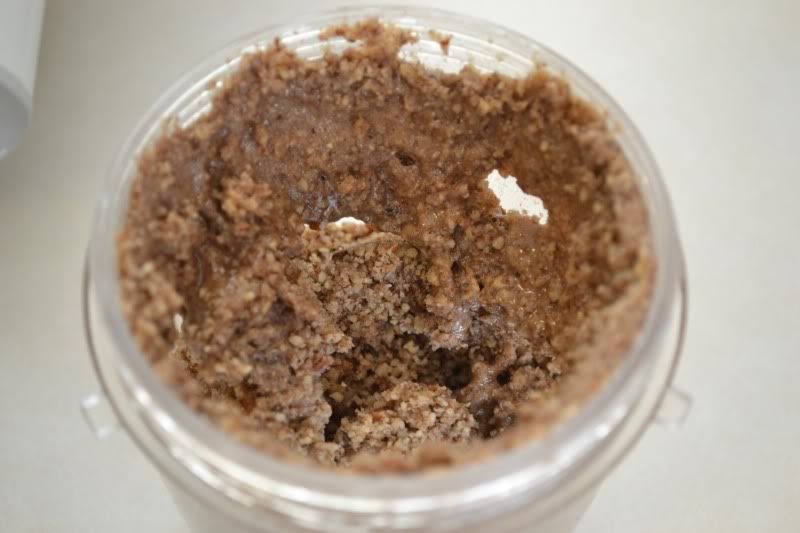
-The nuts will now pack down just like brown sugar.  So, press them into your measuring cups just like brown sugar to get the proper amount.
Photobucket
-Place all ingredients into your mixing bowl.
Photobucket
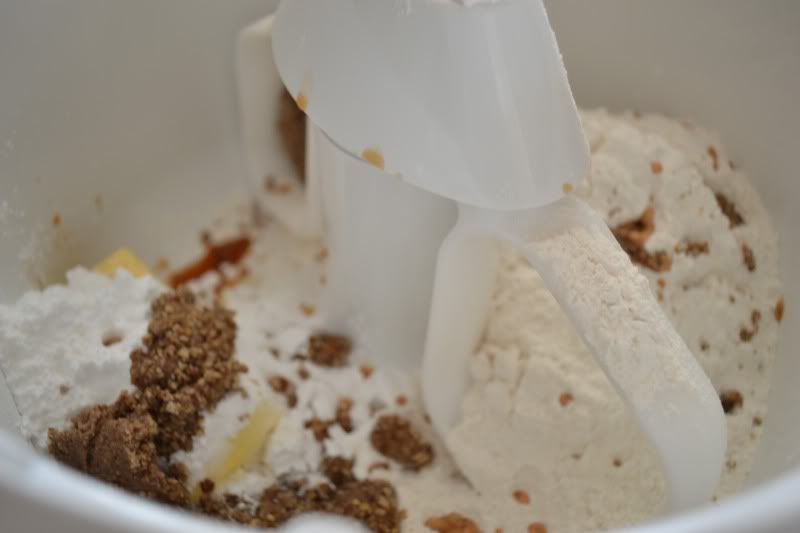
-Mix until you've got a thick dough.  At first, it will be very powdery, and you'll be convinced it's not going to come together.  But, just as you begin to curse me for getting you into this mess, it will happen beautifully.
Photobucket
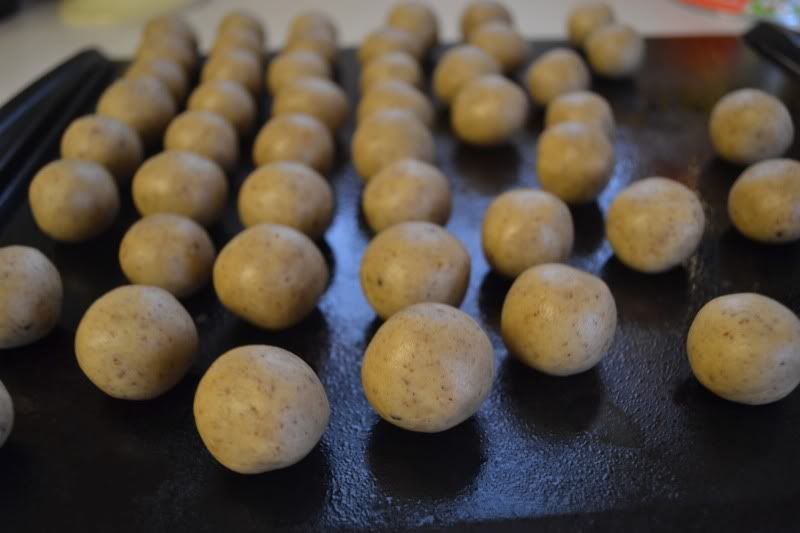
-Now, you're supposed to chill the dough for 1 hr.  This makes the dough easier to handle for rolling, but I'm almost NEVER patient enough for this step.  Sometimes, I stick it in the freezer for 15 minutes, other times, I throw it in the fridge for anywhere from 10-60 minutes, and other times still, I roll it out immediately, as is.
-After letting the dough chill (or skipping this step if you were born with a missing patience gene, like I was!), you're going to pre-heat the oven to 400*.
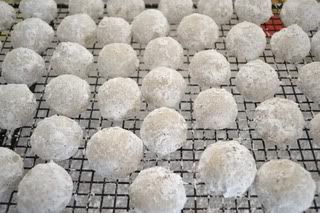
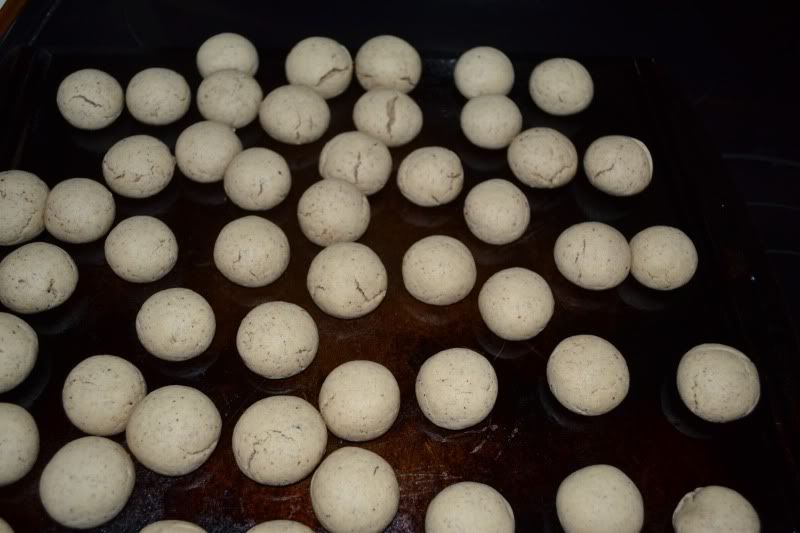
-Now start rolling your dough into 1/2" balls.
-Don't break out the measuring tape or anything, the actual size of the balls is not nearly as important as making sure that all of them are the SAME size.  
-Place your balls on a large cookie sheet.  These cookies don't really rise very much, so you can really cram 'em in there!
Photobucket
-Bake for 8-10 minutes, until just set.  You don't want them to get too dark on the bottom.
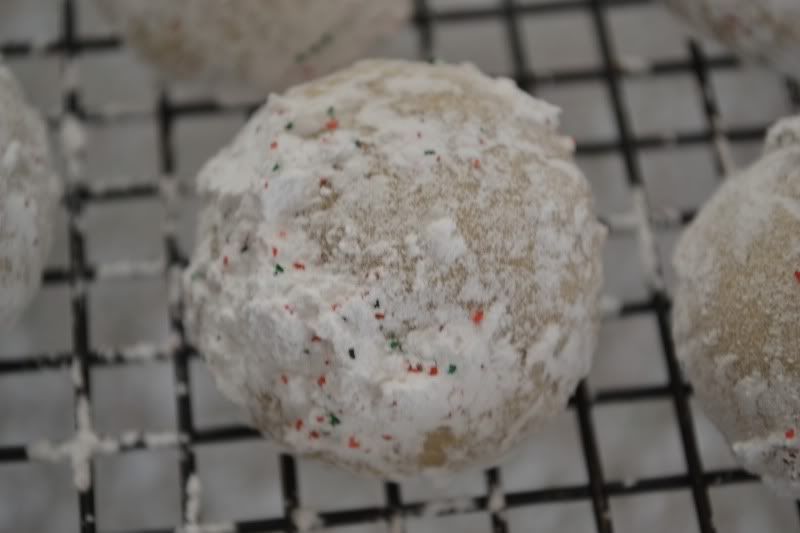
-You can see that I made my cookies too large (about 1"), and they cracked during baking.  But, don't worry, once they're coated in powdered sugar, you'll never see the cracks!
Photobucket
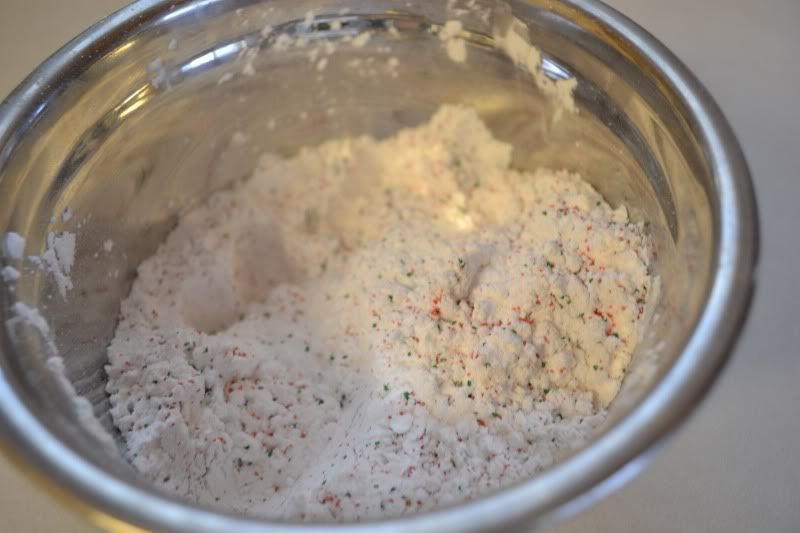
-While your cookies bake, get your dusting sugar ready.  Place powdered sugar in a bowl large enough to roll cookies in.  Just to be festive, I usually take my powdered sugar, and add a whole mess of red and green sugar to the bowl.
Photobucket
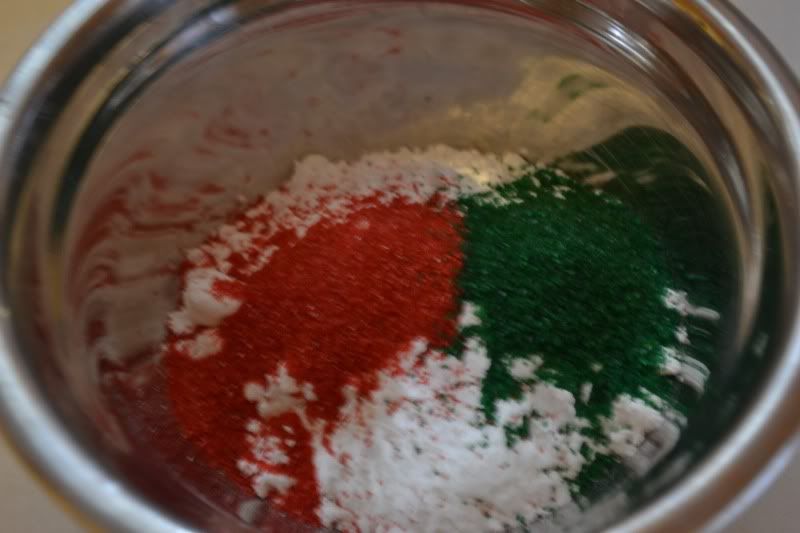
-I just stir it around with my hands, and then the cookies have a subtle hint of the season when all is said and done!
Photobucket
-You're going to roll the cookies in the powdered sugar twice. 
-You roll them the first time when they are about 3 minutes out of the oven.  You want them to still be hot, but have a couple of minutes to set.  It's important to note that during this first rolling, the cookies will be Very Delicate.   You must roll them VERY carefully, or they will break.  If one does break, just pop it in your mouth, and no one will be the wiser (except maybe your hips!).
Photobucket
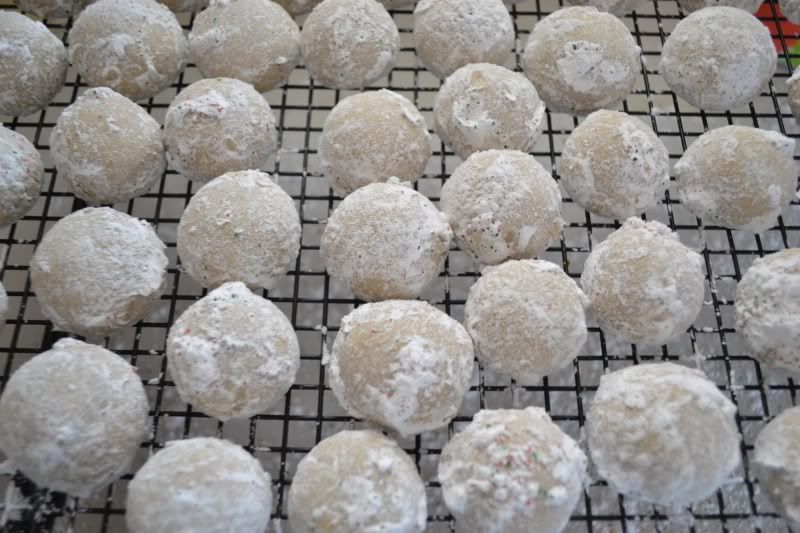
-After the first rolling, you will see that the cookies are still poking through the sugar.  So, you're going to let them sit about 5 more minutes, and then roll 'em again baby!  This time, the sugar will stick even more, and they'll get that beautiful bright white color you're looking for!
Photobucket
Photobucket
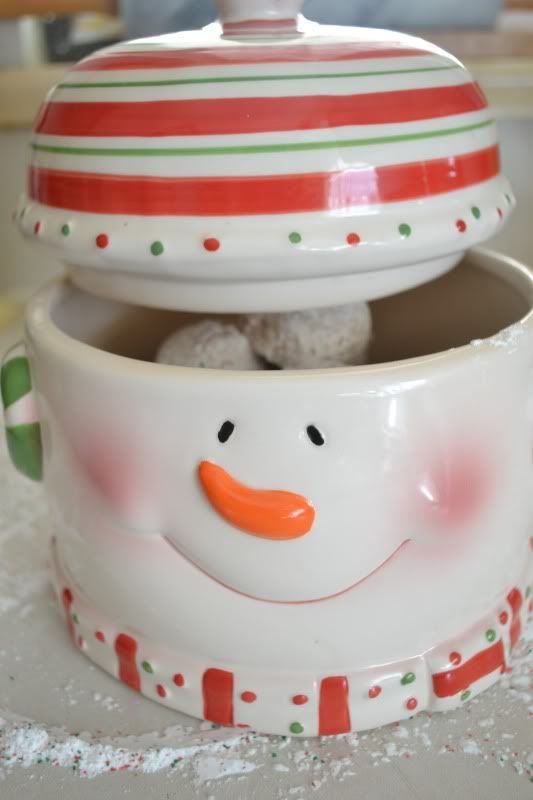
-Now, you can either place them in the absolutely cutest cookie jar you can find....
Photobucket
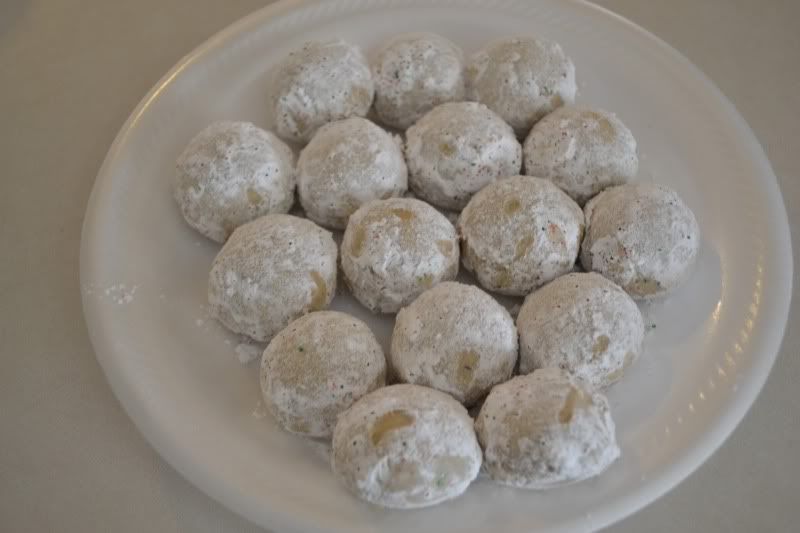
-Or you can put them on the ugliest paper plate you can find, and give them away, so that you don't eat them all!
Photobucket
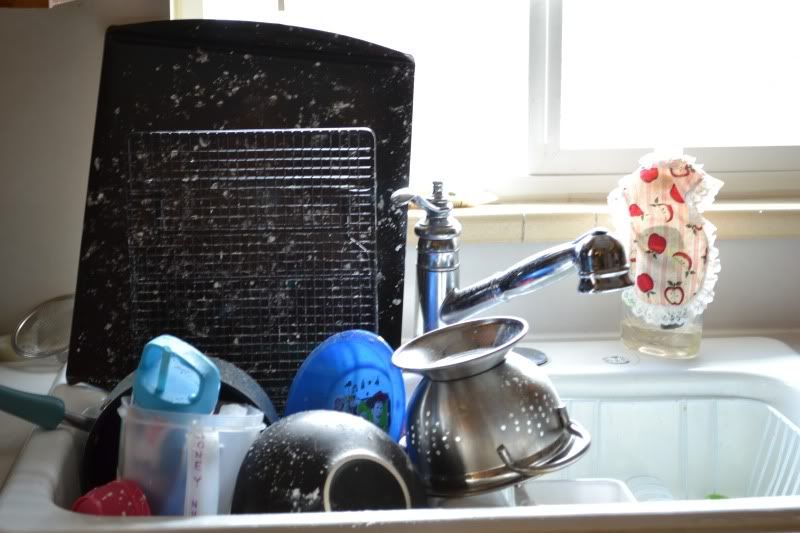
-And you should DEFINITELY go sit down, have a couple of cookies, and pretend that your sink doesn't look like this:
Photobucket

Tuesday, November 9, 2010

Cookie Craze Day 1: {Pumpkin Chocolate Chip Cookies}

Photobucket


Welcome to a new series, here at Kelley's Kitchen Revival!  Today kicks off the COOKIE CRAZE!

I don't know about the traditions at your house, but in this house, Thanksgiving Day is when we debut our trays of beautiful Christmas cookies for the first time.  It's exciting and fun, and above all, it's DELICIOUS!

I want to make sure that you are all prepared for the Cookie Craze on November 25th, and throughout the holiday season, so I will be baking (and posting!) up a storm for you!  First up, is a classically fall, and amazingly delicious cookie that we affectionately refer to as the "Chunkin' Cookie" in our family.  (A quick combo of CHocolate and pUNKIN, in case you haven't had your morning Coca-Cola, yet!).

Interestingly enough, although I absolutely adore pumpkin pie, and I'm obsessed with chocolate chip cookies, up until a few years ago, I had never even tasted a pumpkin chocolate chip cookie.  In fact, I didn't even know these beauties existed.  Lucky for me, however, my incredibly smart brother-in-law, Granger, married a beautiful and AMAZING woman, named Anne, who has become more than my sister-in-law, but also my very best friend, and who is also the brains behind of these delectable delicacies.  In fact, Anne has become so famous in The Family for these cookies, that she often wonders if we have forgotten that she knows how to cook other delicious food items (like O-Balls, and Green Bean Casserole), since these are her #1 request.

And for good reason.   These cookies embody everything that a perfect cookie should be.  For one, they are GINORMOUS (yes, it's a word...if you don't believe me, go watch Elf!).  For two, they are fluffy, and soft, and perfectly textured.  And they combine two of the very best flavors in the world, pumpkin and chocolate.  Now, if you are my awesome sister-in-law, Anne, you will choose the decadent Ghiradelli Milk Chocolate chips, that are twice the size of the regular ones.  But, if you're like me, and rotten to the core, you'll choose semi-sweet, normal-sized morsels, because you like the slight bitterness they impart.  Or, if you can be an in-di-vi-du-al, and choose any other kind of chocolate chip you prefer. Regardless of what kind of chip you prefer, one thing is certain, you MUST bake these cookies.  Join the cookie craze!

Oh, and you also MUST marvel at my beautiful, and photogenic Anners!

Anne and I at Thanksgiving Dinner, 2008

Photobucket

Perhaps what's MOST amazing is that she makes these amazing treats while chasing after two of the most beautiful baby boys you ever did see!

Photobucket

Okay, enough gushing from me, onto the part you came here for...The COOKIES!

One important note, Anne informed me that while you could theoretically use pumpkin pie spice, in place of the ones chosen here, this particular blend of spices produces a MUCH more delicious cookie.  I can't attest to the pumpkin pie spice version, though, because I know better than to mess with perfection, or to question Anne when it comes to Chunkin' Cookies!


Chunkin' Cookies


Ingredients:
2 1/4 cups of flour
1 tsp salt
1 tsp nutmeg
1 tsp allspice
1tsp cinnamon
1 tsp baking powder
1/2 tsp baking soda
1 tsp vanilla
2 eggs
1 cup melted butter
1 cup sugar
16 oz pumpkin puree
2 cups chocolate chips


-Preheat oven to 375*
-Beat eggs, add sugar, pumpkin puree, vanilla, and melted butter.  At this point the batter will be very thin.  Much like a boxed cake mix.  It will probably also smell like baby food.  Never fear, I promise it will be delicious, and not at all reminiscent of baby food in the end!
Photobucket
-In a separate bowl, combine flour, salt, nutmeg, all spice, cinnamon, baking soda, and baking powder.  Take a deep breath, and inhale the BEAUTIFUL scents filling the air.
Photobucket
-Add flour mixture to wet ingredients, one cup at a time.
-Even after you add your flour, this will still be very thin, compared to most cookie doughs.  Much like a from-scratch cake batter.  Do not fear, you will still churn out beautiful, fluffy chunkin cookies when it's all said and done.
Photobucket
-Add chocolate chips
Photobucket
-Use large cookie/ice cream scoop to place onto cookie sheets.  It's important you make these cookies LARGE.  I typically only fit about 6 of these on each cookie tray, instead of the usual 12.
Photobucket
-Bake for 15-20 minutes until firm, and just golden on the bottom.
-Serve, and marvel at your delicious handiwork!
Photobucket
-Congratulations, you've officially joined the cookie craze!

Monday, November 8, 2010

Customer Service is NOT dead! {Shameless Product Plug}

Okay, I know that this is a cooking blog (that has been severely lacking in the cooking, of late!), and not an infomercial, but I had such a GREAT experience with GE customer service the past two weeks, that I felt compelled to share. It is my hope that by generating some great publicity for a company providing superior customer service, other companies will be more inclined to follow suit, placing their customer satisfaction over their profits.

I haven't been shy about my love of Shelby (my GE Profile double oven range), from the day she showed up on my doorstep. But, ours has been a relationship of love and hate. I just LOVED what she was supposed to do for me, but I HATED the fact that she could rarely do it. First, the convection system wasn't working appropriately. No big deal, cute little repair guy came out and replaced the sensor on the spot. Problem solved.

But then, my cakes weren't cooking. 45 minutes later, they'd still be raw inside, but burnt on the outside. Then, when they finally did cook, they sunk in the middle. There is little in life more depressing than making the extra effort to make a cake from scratch, and seeing it fall as soon as you pull it out of the oven. So, the cute little repair man made another trek to my home. It seemed that Shelby was in need of a new control panel. The week before I was scheduled to make 2 pans of Halloween Treats for a party. But, no worries, he told me, it only takes 3 days to have the part shipped, and he could come back out, pronto.

Alas, it was not to be. When I called to check on the status, I was informed that the control panel, Shelby's heart and soul, was backordered! For two WEEKS! When I lamented to the agent on the phone about my troubles, she immediately transferred me to Julie, a fabulous customer service specialist, who searched and searched, trying to locate an extra part somewhere, anywhere, for my beloved Shelby. When she was unable to find a part, and I was beginning to think that all was lost, she uttered six words that shocked, surprised, and delighted me.

"Let's get you a new oven."

Yes, I will let that sink in for a moment. A giant corporation, an oven that was now 5 months old, and well past the 90 day return policy, absolutely no screaming or yelling from this feisty Southern gal, and still, a BRAND SPANKIN' NEW OVEN!

The entire process was wonderful from start to finish. It did take 7 days for the new oven to come in, and I did have to make my Halloween treats without the benefit of an accurate oven thermometer, but just like Julie promised, last week, I had a brand spankin' new oven delivered right to my doorstep. Not only that, but the wonderful delivery agents unhooked my old oven, took it out to the the truck, then completely unwrapped, set up, and installed the new one, making sure she worked like a charm (which she did).

I could not be happier with the customer service I received from GE, and I really felt that service so great deserved a glowing, public review. Thanks for bearing with me there!

Oh, and in case you were wondering, this glorious new oven is still going to be known as Shelby. They have the same heart, the same soul, and I think Shelby (the first) would have wanted it that way. Not to mention, I'm not creative enough to come up with another name that conveys such beauty, and marvelous engineering.