This week, we're going to round out the 3 most sought after "'n recipes," by posting the recipe for true, Southern style biscuits 'n gravy, which are a Sunday morning staple in my house. Sunday mornings always mean a few things in my house, and have since I was a little girl. Southern Sunday mornings mean old-school country music on my iPod:

Southern Sunday mornings mean family time. Time for laughing, and playing, and taking walks, and just enjoying each other's company. And, Southern Sunday mornings mean light, fluffy biscuits covered in a delicious creamy sausage gravy.
What's funny, is that as a child, I wasn't the biggest fan of biscuits, and refused to even try the gravy. But, now, few things evoke the feelings of home, and family, inside of me like biscuits 'n gravy. And the only trouble I have with them is stopping myself from eating the whole pan.
A few notes about this recipe. First, these ain't no Pillsbury canned biscuits. They are a whole different breed of biscuit (and a much better one, at that!). They have a much lighter texture, which means no rolling them out, or using cookie cutters in the process. The consistency of the dough, is more like the consistency of a batter, and I've included two videos of the process in order to let you get a feel for the actual consistency of this dough. One of the best things about the biscuits is that you can get them on the table in 15 minutes, which is pretty amazing. If you don't have time to make the gravy, or simply aren't craving it, today, my favorite way to serve them (other than with gravy) is with some grape jelly, and butter.
The other thing you should know is that Southern biscuit recipes are sacred. They have been passed down from generation to generation, and as such, you should feel sublimely lucky that I've included them here. We're all family now, and I love sharing these recipes with you.
Also, before we start these biscuits, we need to have a little chat about a certain Southern staple. You may want to brace yourself here. Have a seat, take a deep breath, and remind yourself of our little chat about health (
HERE!). Now, butter aside, this here ingredient may be the single most important tool in my kitchen, and is a staple in Southern-style kitchens across the United States. I can still remember the metal container that my Mom kept her bacon grease in, as I was growing up. Yes. I said bacon grease. In all it's fatty, delicious glory.
Every time you make a pound of bacon, just pour the remaining grease into your container of choice (I have been meaning to buy a prettier one, but haven't gotten around to it yet), seal it up, and save it! Now, bacon grease doesn't necessarily
have to be refrigerated. I know this because my Mom's bacon grease lived (and still lives) in her spice cabinet. And in 26 years, I've never gotten sick from a recipe involving her bacon grease. However, as I did just finish a microbiology series, and I know about all those lovely little creatures that can grow in/on our food, I choose to keep mine in the refrigerator, where it seems a little safer. Where you decide to keep yours is between you, and your own level of OCD! I can't underestimate the flavor that this stuff brings to the table. It's pretty amazing, and I use it in a number of recipes, including the sausage gravy you'll see here today, fried potatoes, ham, eggs, all kinds of delicious things.
Now, I'm aware that this concept is foreign to many of you, and may take some time to fully digest. The Husband about passed out when he was helping me to pack up my apartment when we were engaged, and he came across my bacon grease. He was disgusted, and almost lost his hand when he tried to throw it out! But, as he would attest to you today, that jewel of deliciousness has never left our kitchen since, and is worth every ounce of controversy it creates. Just trust me on this one.
The biscuits are also a really FUN recipe to let the kids help out with. Something about smooshing that dough/batter around in their little fingers just gets them tickled pink! Though it's a little messy to clean up, faces like these make it all worth the mess:

Now, onto the recipes!
Mamal's Southern Biscuits
Hallelujahs:Incredible, Fast, Easy, Delicious, BUTTERMILK!
Hellfires:Can't come up with a single one.
Ingredients:
Self-Rising Flour
Sugar
Canola/Vegetable Oil
Buttermilk
Water
-First, you're going to pre-heat your oven to 500*. Yes, 500.
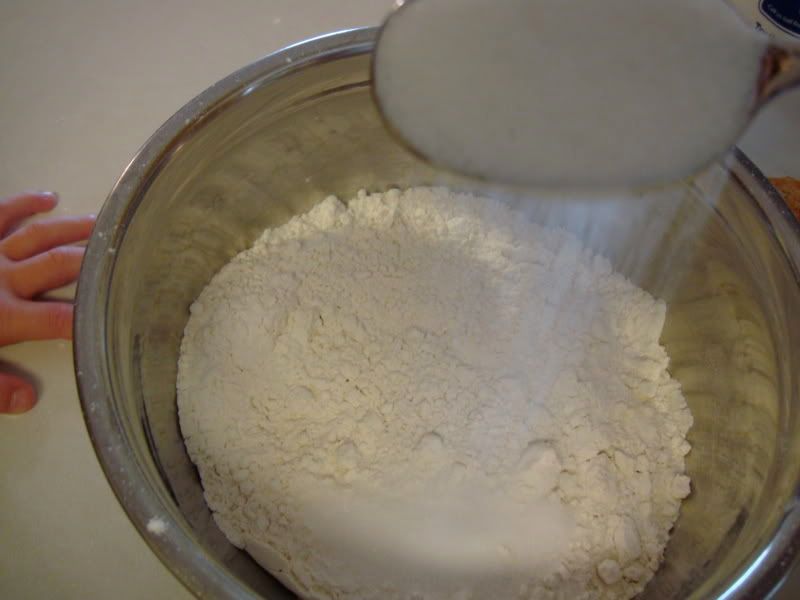
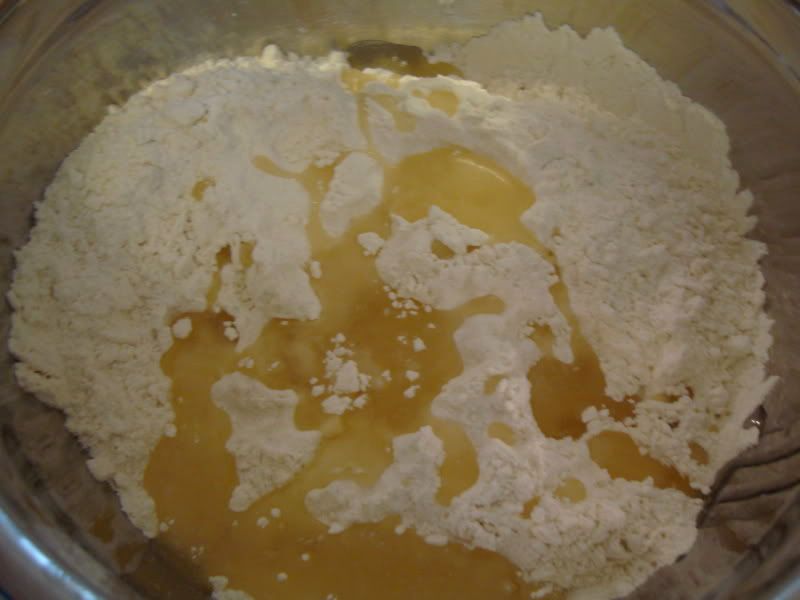
-While your oven pre-heats, begin making your biscuits, by pouring self-rising flour into your mixing bowl. Again, no measurements here, the only important thing is the consistency at the end. If I absolutely
had to guess, I'd say there's probably about 4 cups of flour here.
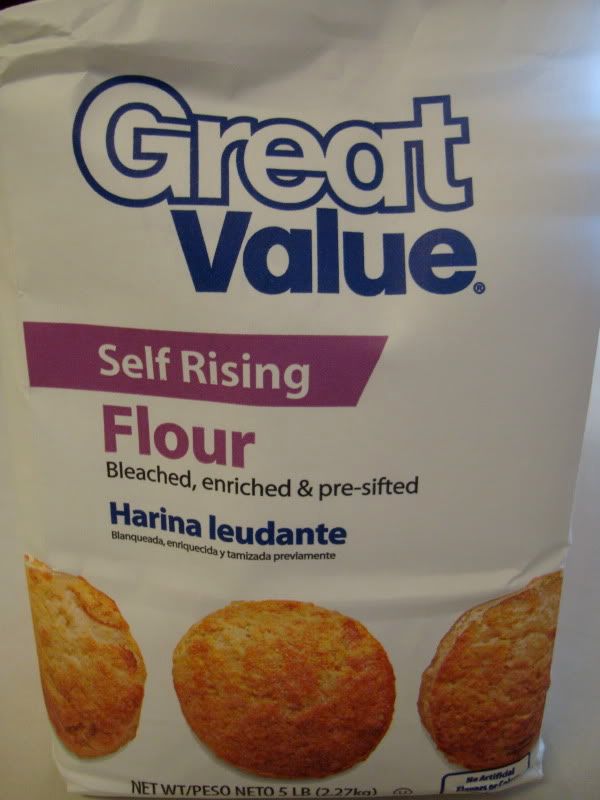
-Using self-rising flour is VERY important here. If you talk to most Southern cooks (all of my family included) they will insist that not only is self-rising flour a necessity, but a specific
brand of self-rising flour (Hudson Cream, or Gold Medal). But, if I'm being 100% honest (which I always am), I have made these biscuits with just about every kind of self-rising flour out there, and have found no difference between the "good stuff," and old reliable Great Value brand flour. So, the thrifty chick in me reigns, and Great Value is what I had in the house today. As long as it says "Self-Rising" on the front of the bag, you should be A-OK.
-Next, you're going to add some sugar. For the size of bowl I made this day, I added about 4 tablespoons (regular tablespoons you eat with, not measuring spoons) to my flour. Experiment with it, and don't stress, it won't make a huge difference. My uber healthy sister-in-law, Andrea, substitutes honey for the sugar, and even that works out fine!
-Next comes some oil. I use vegetable oil, and canola oil interchangeably. Again, whatever you have on hand. Another few tablespoons full (regular spoons, not measuring spoons). A good rule of thumb is to use about the same amount of oil, as sugar.
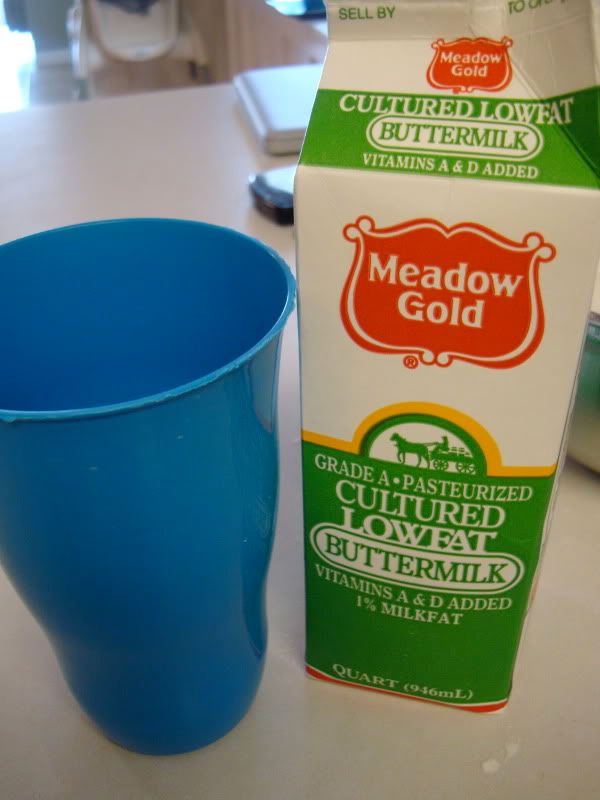
-Now for the good part. The buttermilk. Ah, buttermilk, the greatest smell in the history of the earth, and one of my favorite ingredients.
-For reasons that I do not understand, you are going to mix buttermilk, and water in equal parts. So, you're going to fill a cup (again, a regular drinking cup, not a measuring cup) halfway full with buttermilk, and then add enough water to fill it completely. Stir it up really good before adding it to your bowl.
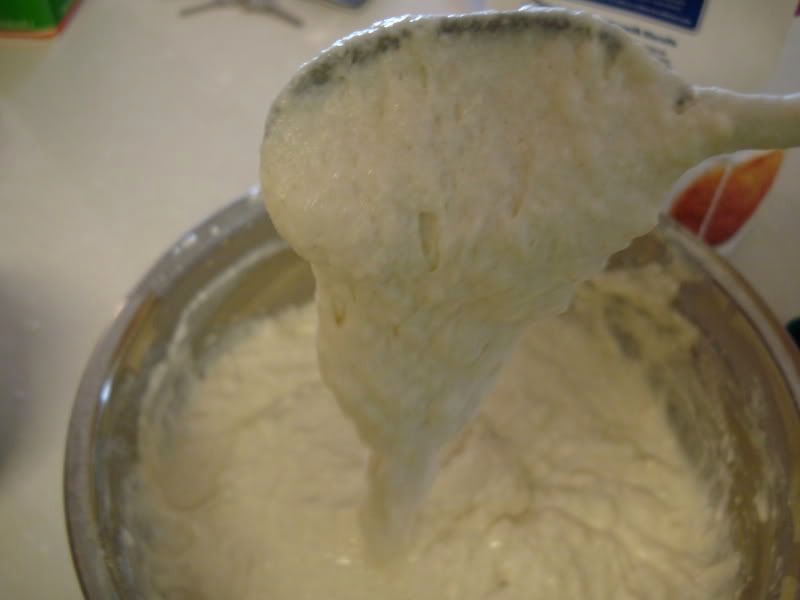
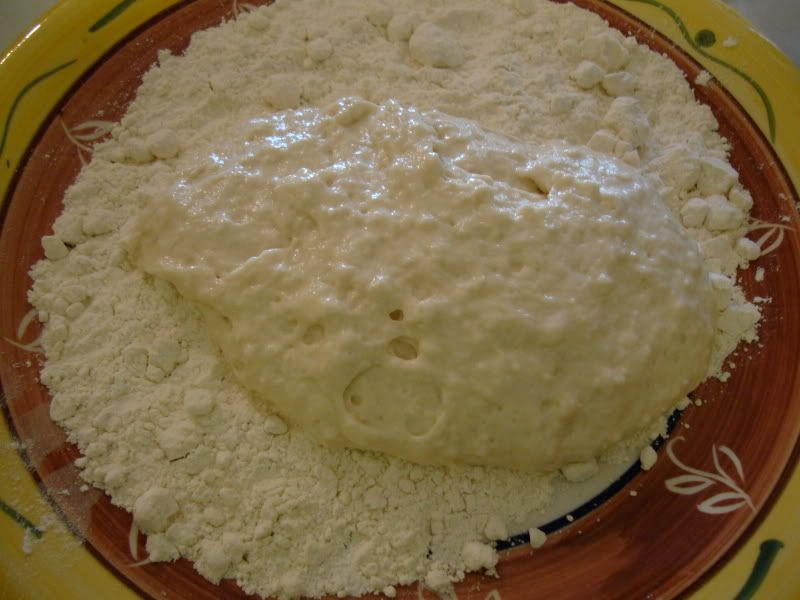
-Add it to the bowl, and stir well. Try not to overmix, and don't forget, you want a very different consistency than you're used to. Almost a very thick pancake batter:
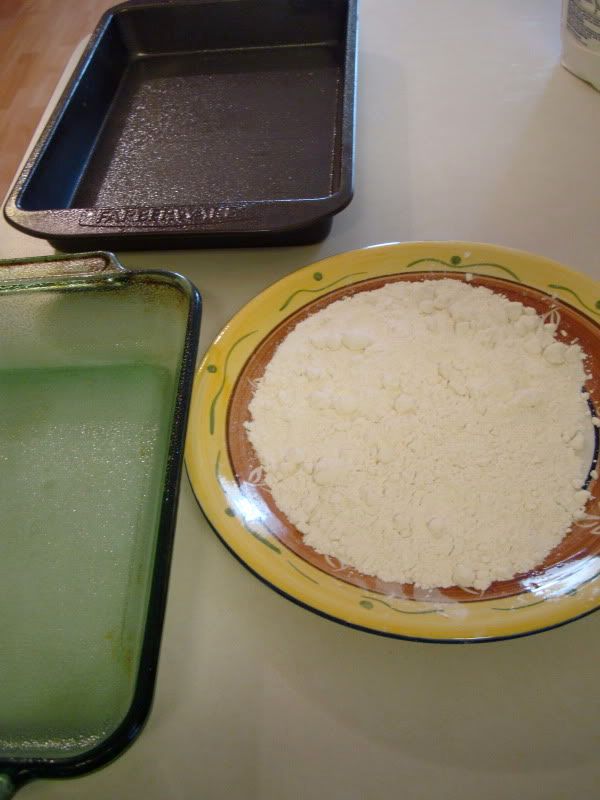
-Next, you're going to spray your pans with cooking spray. There are two kinds of pans that work really well for this recipe. Glass pans, and Cast Iron pans. I occasionally use a metal brownie pan (as you'll see in the following photo), but the results aren't nearly as good as with the glass pan. The bottoms tend to brown faster than the tops. Sometimes, I even use a glass pie pan, when I have a small batch to do.
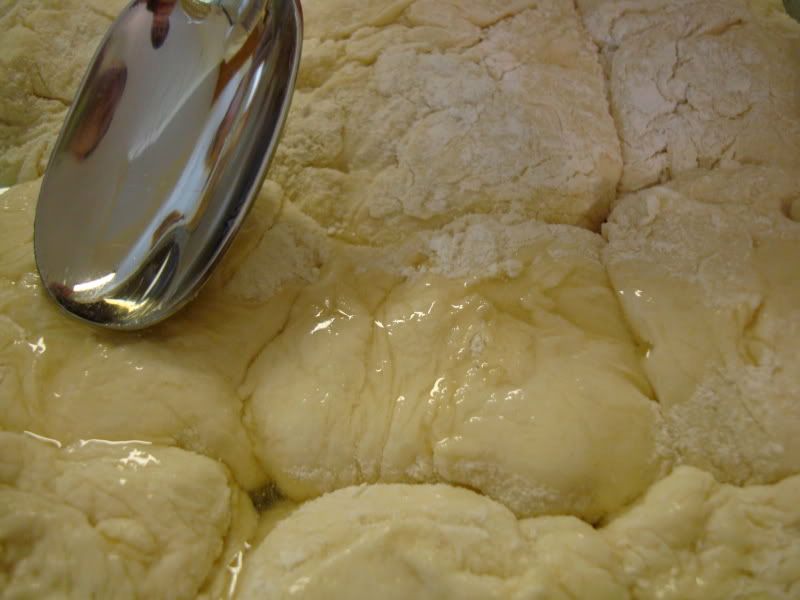
-Now, add some more self rising flour onto a large plate.
-Now, turn out a small portion of your dough, onto the floured plate.
-The next steps are sort of difficult to explain, so I've included two videos to show you what to do. Basically you're just going to fold up the corners of your dough, from the bottom, pulling up some of that flour, and patting it into the dough. Then, you'll pinch off a biscuit sized corner, and place it in your pan. Watching the videos should also help you to see the consistency you're looking for here, but please, don't take note of my clashing apron, and PJ pants!
And, one more time:
-Next, you're going to drizzle some more oil (veggie or canola), on the top of your biscuits, and kind of rub it in with the back of your spoon.
-Now, place the pans in your 500* oven, and set the timer for 10 minutes. They may take 2 minutes more, or even 2 minutes less, depending on your oven, just keep an eye on them. You want the tops, sides, and bottom to be a beautiful golden brown.
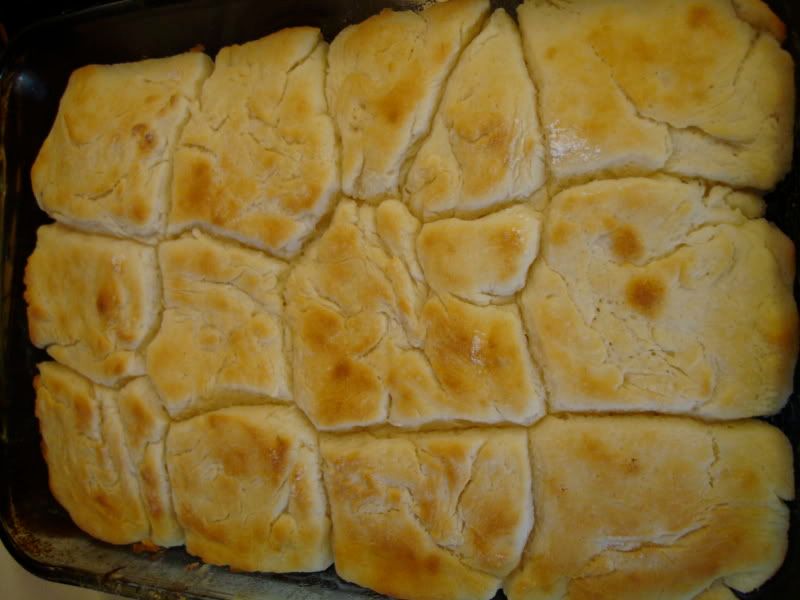
-If the bottoms of the biscuits, and the insides seem to be cooking faster than the top, you can always turn on the broil function, and broil the tops for 5 minutes, too.
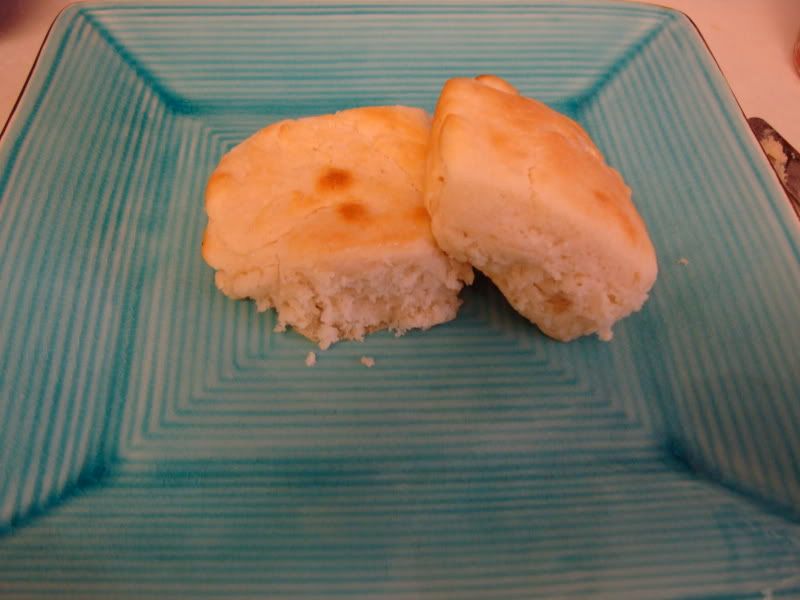
-Turn them out onto a platter, let them cool for a couple of minutes, and enjoy with some butter, some jelly/jam, some gravy, or just plain!
Southern Sausage Gravy
Ingredients:
1 lb of ground sausage (I like Jimmy Dean)
1-3 tablespoons of bacon grease (optional)
Several tablespoons of flour
Milk
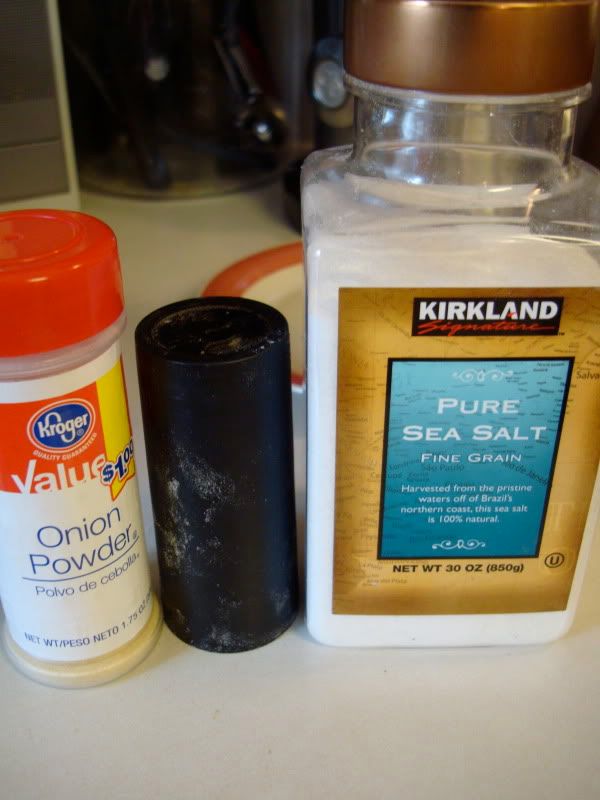
Salt/Pepper to taste
Onion Powder to taste
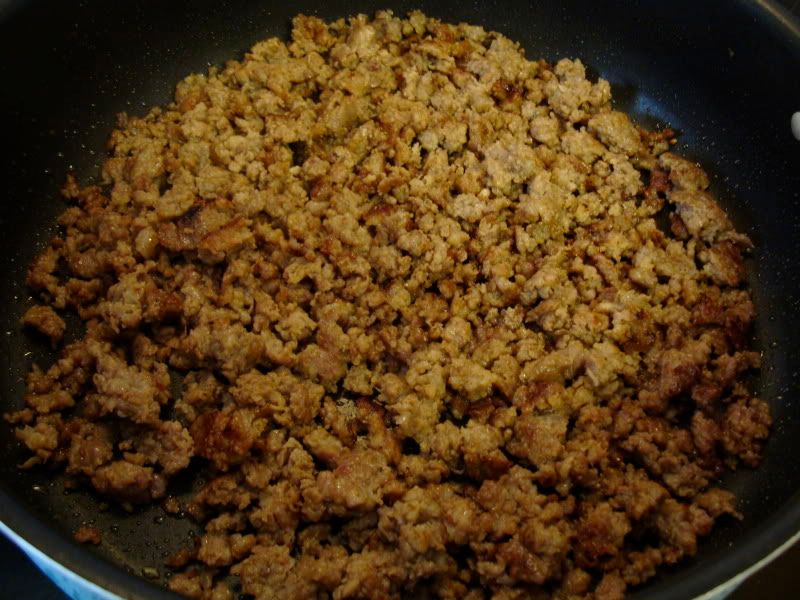
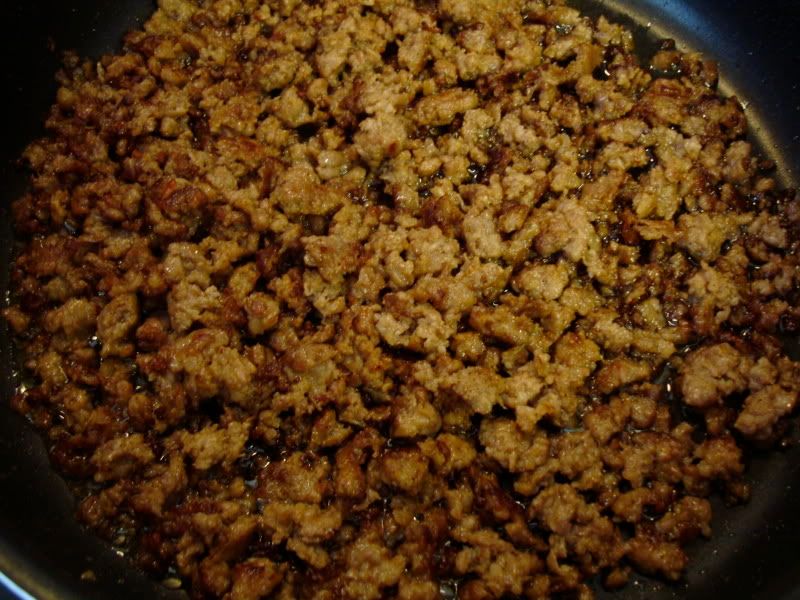
-First, you're going to brown off your sausage, breaking it up with your spatula as you go. I really like Jimmy Dean's regular sausage for this, but you can use whatever brand, and flavor you like best (italian, maple, etc).
-Once your sausage is browned, you're going to add your bacon grease. The reason for this is twofold. First, the sausage doesn't really make a whole lot of grease by itself, which makes it slightly difficult to get the right consistency, and amount of gravy. Second, the depth of flavor that the bacon grease adds is downright amazing!
-Just drop a few tablespoons into the pan, and mix it around with your whisk, or spatula until it melts.
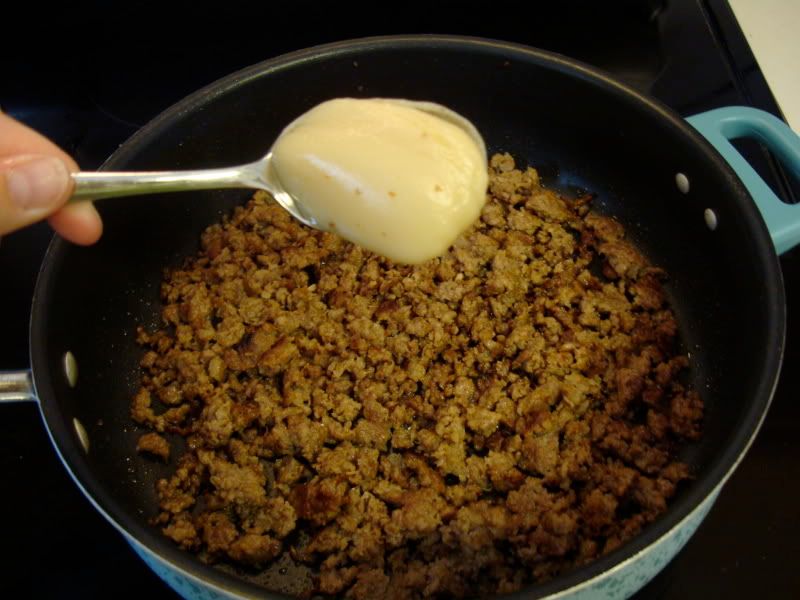
-Can you see how much more grease we have to work with here?
-Next, you're going to sprinkle in a few tablespoons of flour, in order to make a roux. The amount is going to vary, based on the amount of grease you've got, and the thickness of the roux. The important thing here, is to whisk almost constantly once you've added your flour.

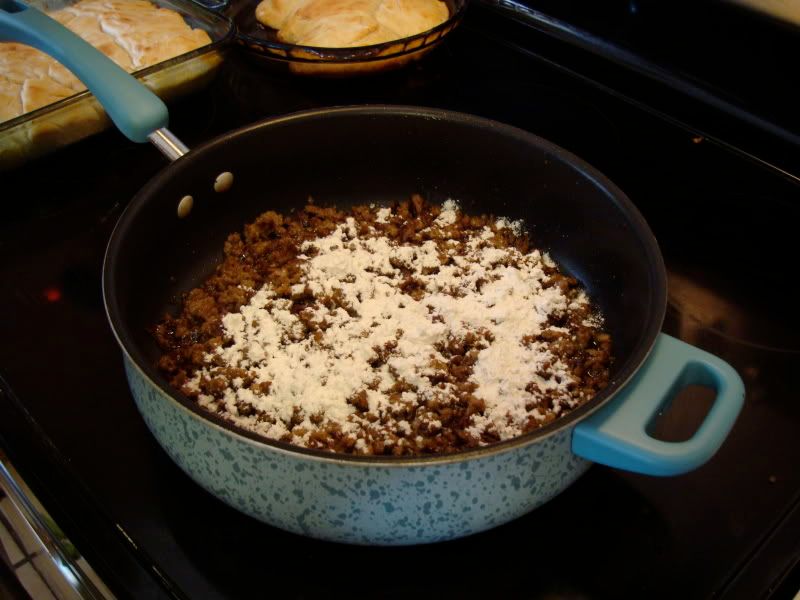
-Continue whisking your roux on medium heat until it turns a deep, golden brown color. You're going to want to whisk this for at least 7-10 minutes in order to cook out some of the flour flavor. Do not stress if it gets clumpy, just keep whisking, and stop worrying!
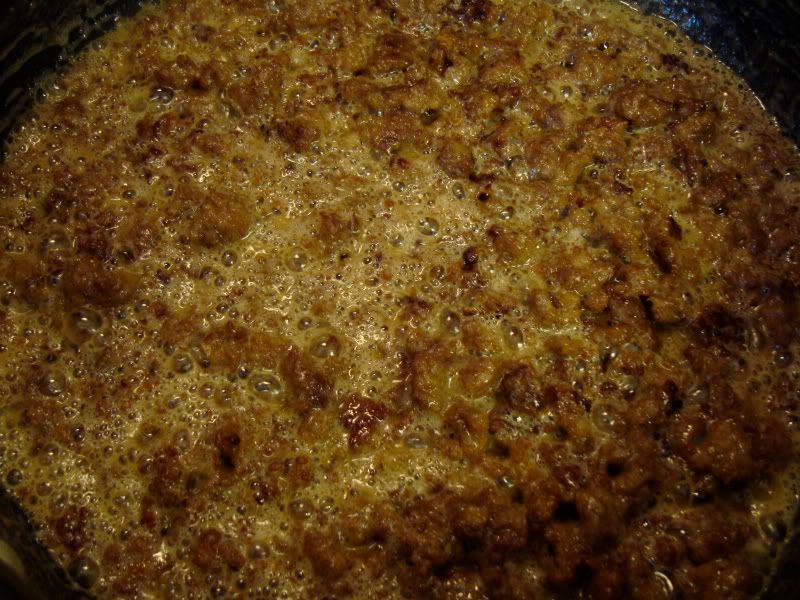
-Next, you're going to add your milk, and begin whisking right away. You're probably going to add the milk in several batches, unless you have perfect guesstimating skills (which I do not). The amount is going to vary based upon how thick you prefer your gravy.
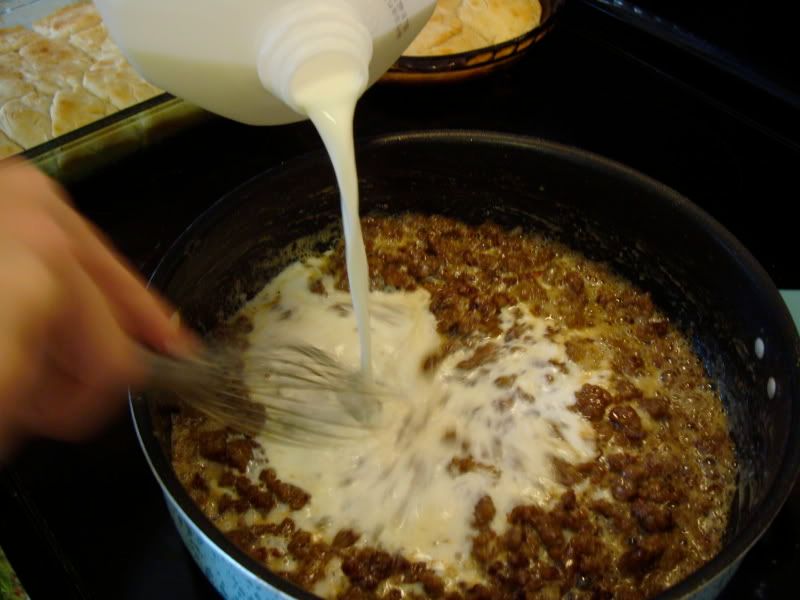
-Now, I can't stress enough that you do NOT need to flip out if your mixture gets all clumpy, like this:
-Just take a deep breath, and add some more milk, whisking some more as it begins to come together. This is a VERY forgiving recipe.
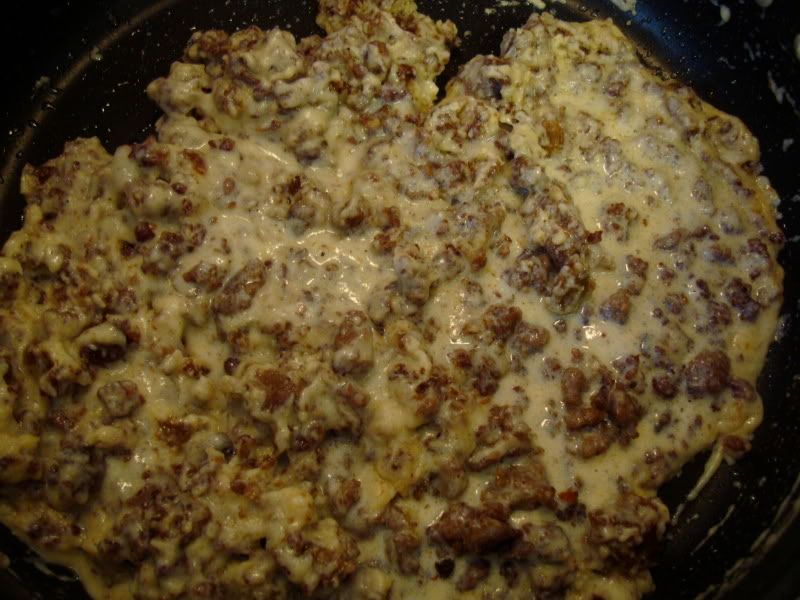
-After you've added your first batch of milk, you're going to add your seasonings, to taste. Salt, Pepper, and Onion Powder. You don't need a lot of onion powder. Start small, and taste as you go. Same for the salt, and pepper.
-Keep adding your milk, and whisking until you've achieved the texture of gravy that you like. I tend to like a thicker gravy than my Mom, who prefers hers more runny. This is YOUR party, so you get to choose.
-For me, I like the gravy to coat the back of the spoon, nice and thick, like so:

-Now, if you get to the end and your gravy still tastes a little bit flour-y, don't fret. Continue cooking over low/medium heat, and add a little bit more salt. The salt will cut the flour flavor, and the cooking will continue to cook it out.
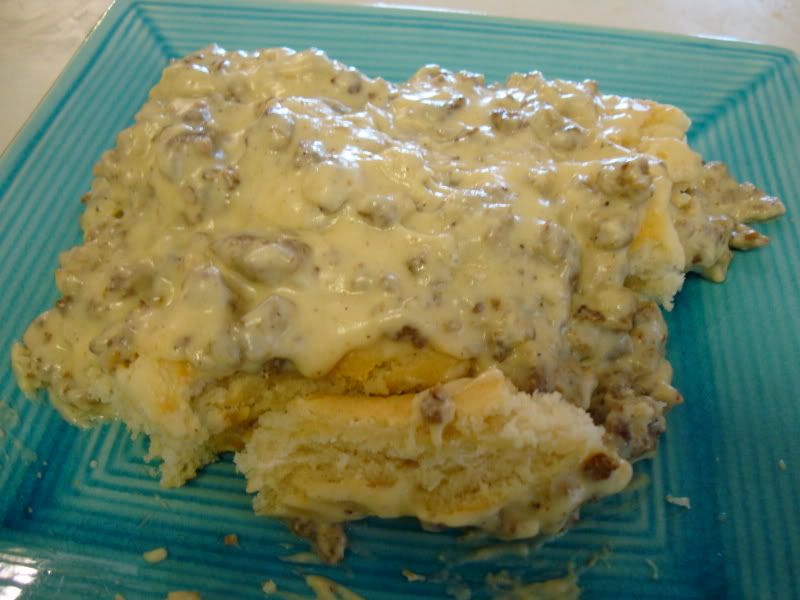
-Next, you're going to pour this deliciousness over your fluffy biscuits, and DIG IN! There are a few methods to this.
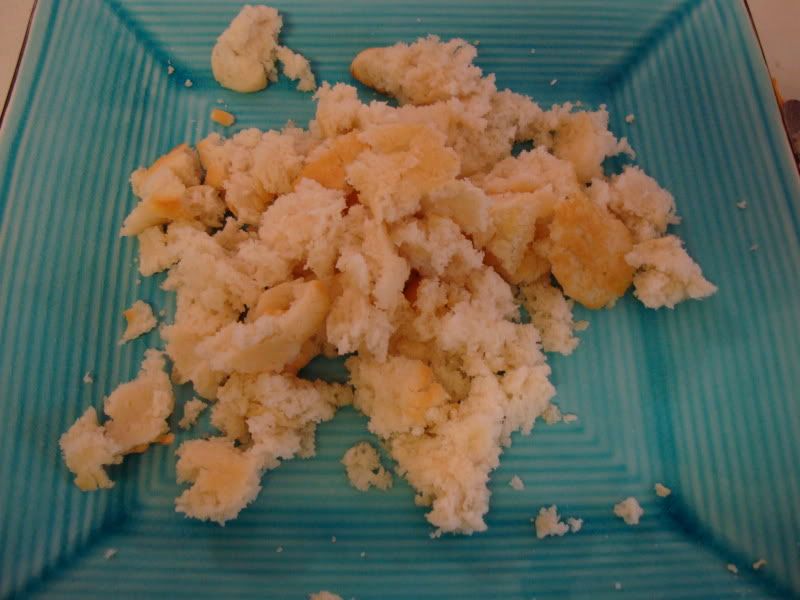
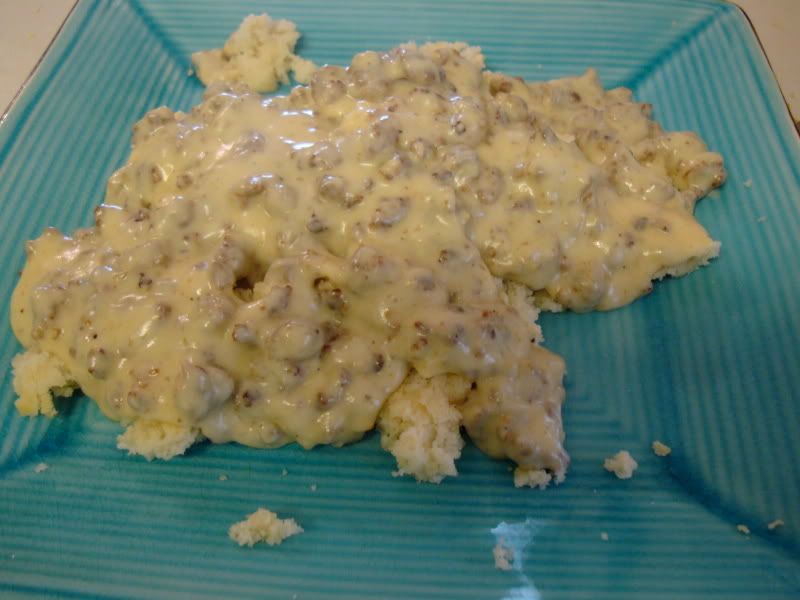
-First, the method I prefer, which involves crumbling the biscuits into bite-sized pieces before pouring the gravy over top. This makes it easier to eat, in my opinion:
-Next, the method The Husband prefers. Leave your biscuits whole, and place them on the plate, pouring the gravy over top. This requires you to do some cutting with your fork, which is just too much work for me.
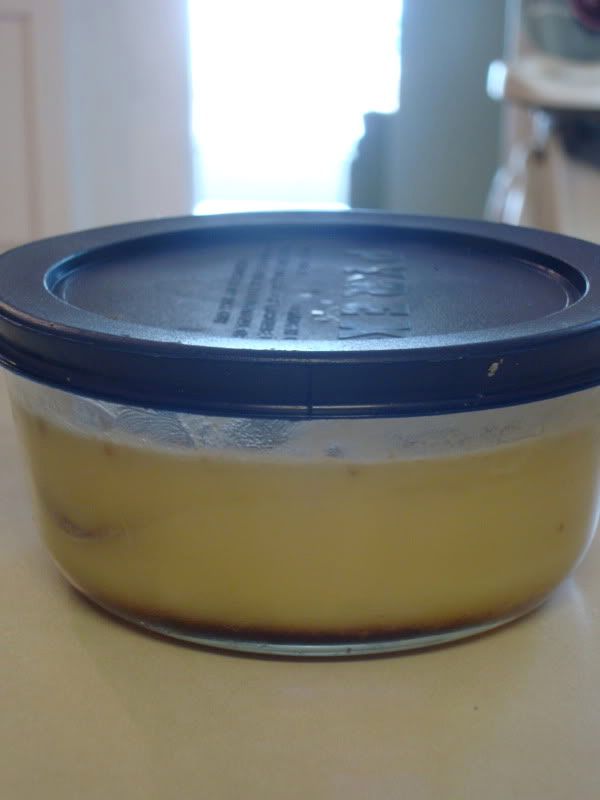
-Alternately, you can place the gravy in a little container, and dip the biscuits into it, if you're into that sort of thing.
-This recipe is popular with every member of our family, including the littlest one!

I hope you have a GREAT Southern Sunday, or whatever day of the week you choose to make these!
Plain Text Recipe
Mamal's Southern Biscuits
Ingredients:
Self-Rising Flour
Sugar
Canola/Vegetable Oil
Buttermilk
Water
-First, you're going to pre-heat your oven to 500*. Yes, 500.
-While your oven pre-heats, begin making your biscuits, by pouring self-rising flour into your mixing bowl. Again, no measurements here, the only important thing is the consistency at the end. If I absolutely
had to guess, I'd say there's probably about 4 cups of flour here.
-Using self-rising flour is VERY important here. If you talk to most Southern cooks (all of my family included) they will insist that not only is self-rising flour a necessity, but a specific
brand of self-rising flour (Hudson Cream, or Gold Medal). But, if I'm being 100% honest (which I always am), I have made these biscuits with just about every kind of self-rising flour out there, and have found no difference between the "good stuff," and old reliable Great Value brand flour. So, the thrifty chick in me reigns, and Great Value is what I had in the house today. As long as it says "Self-Rising" on the front of the bag, you should be A-OK.
-Next, you're going to add some sugar. For the size of bowl I made this day, I added about 4 tablespoons (regular tablespoons you eat with, not measuring spoons) to my flour. Experiment with it, and don't stress, it won't make a huge difference. My uber healthy sister-in-law, Andrea, substitutes honey for the sugar, and even that works out fine!
-Next comes some oil. I use vegetable oil, and canola oil interchangeably. Again, whatever you have on hand. Another few tablespoons full (regular spoons, not measuring spoons). A good rule of thumb is to use about the same amount of oil, as sugar.
-Now for the good part. The buttermilk. Ah, buttermilk, the greatest smell in the history of the earth, and one of my favorite ingredients.
-For reasons that I do not understand, you are going to mix buttermilk, and water in equal parts. So, you're going to fill a cup (again, a regular drinking cup, not a measuring cup) halfway full with buttermilk, and then add enough water to fill it completely. Stir it up really good before adding it to your bowl.
-Add it to the bowl, and stir well. Try not to overmix, and don't forget, you want a very different consistency than you're used to. Almost a very thick pancake batter.
-Next, you're going to spray your pans with cooking spray. There are two kinds of pans that work really well for this recipe. Glass pans, and Cast Iron pans. I occasionally use a metal brownie pan (as you'll see in the following photo), but the results aren't nearly as good as with the glass pan. The bottoms tend to brown faster than the tops. Sometimes, I even use a glass pie pan, when I have a small batch to do.
-Now, add some more self rising flour onto a large plate.
-The next steps are sort of difficult to explain, so I've included two videos to show you what to do. Basically you're just going to fold up the corners of your dough, from the bottom, pulling up some of that flour, and patting it into the dough. Then, you'll pinch off a biscuit sized corner, and place it in your pan. Watching the videos should also help you to see the consistency you're looking for here, but please, don't take note of my clashing apron, and PJ pants!
-Next, you're going to drizzle some more oil (veggie or canola), on the top of your biscuits, and kind of rub it in with the back of your spoon.
-Now, place the pans in your 500* oven, and set the timer for 10 minutes. They may take 2 minutes more, or even 2 minutes less, depending on your oven, just keep an eye on them. You want the tops, sides, and bottom to be a beautiful golden brown.
-If the bottoms of the biscuits, and the insides seem to be cooking faster than the top, you can always turn on the broil function, and broil the tops for 5 minutes, too.
-Turn them out onto a platter, let them cool for a couple of minutes, and enjoy with some butter, some jelly/jam, some gravy, or just plain!
Southern Sausage Gravy
Ingredients:
1 lb of ground sausage (I like Jimmy Dean)
1-3 tablespoons of bacon grease (optional)
Several tablespoons of flour
Milk
Salt/Pepper to taste
Onion Powder to taste
-First, you're going to brown off your sausage, breaking it up with your spatula as you go. I really like Jimmy Dean's regular sausage for this, but you can use whatever brand, and flavor you like best (italian, maple, etc).
-Once your sausage is browned, you're going to add your bacon grease. The reason for this is twofold. First, the sausage doesn't really make a whole lot of grease by itself, which makes it slightly difficult to get the right consistency, and amount of gravy. Second, the depth of flavor that the bacon grease adds is downright amazing!
-Just drop a few tablespoons into the pan, and mix it around with your whisk, or spatula until it melts.
-Next, you're going to sprinkle in a few tablespoons of flour, in order to make a roux. The amount is going to vary, based on the amount of grease you've got, and the thickness of the roux. The important thing here, is to whisk almost constantly once you've added your flour.
-Continue whisking your roux on medium heat until it turns a deep, golden brown color. You're going to want to whisk this for at least 7-10 minutes in order to cook out some of the flour flavor. Do not stress if it gets clumpy, just keep whisking, and stop worrying!
-Next, you're going to add your milk, and begin whisking right away. You're probably going to add the milk in several batches, unless you have perfect guesstimating skills (which I do not). The amount is going to vary based upon how thick you prefer your gravy.
-Now, I can't stress enough that you do NOT need to flip out if your mixture gets all clumpy.
-Just take a deep breath, and add some more milk, whisking some more as it begins to come together. This is a VERY forgiving recipe.
-After you've added your first batch of milk, you're going to add your seasonings, to taste. Salt, Pepper, and Onion Powder. You don't need a lot of onion powder. Start small, and taste as you go. Same for the salt, and pepper.
-Keep adding your milk, and whisking until you've achieved the texture of gravy that you like. I tend to like a thicker gravy than my Mom, who prefers hers more runny. This is YOUR party, so you get to choose.
-For me, I like the gravy to coat the back of the spoon, nice and thick.
-Now, if you get to the end and your gravy still tastes a little bit flour-y, don't fret. Continue cooking over low/medium heat, and add a little bit more salt. The salt will cut the flour flavor, and the cooking will continue to cook it out.
-Next, you're going to pour this deliciousness over your fluffy biscuits, and DIG IN!


