Saturday, July 31, 2010

Pioneer Woman Pot Roast

The Pioneer Woman has NEVER let me down. Seriously, I have never made a Pioneer Woman recipe and not been impressed. And this pot roast is no exception. It's delicious, moist, fresh, and amazing. I think the herbs really take it up a notch. Even if you don't normally like pot roast, you MUST try this pot roast. Tonight. And if you've never heard of The Pioneer Woman, crawl out from under your rock CLICK HERE, and be amazed! The photography, the cooking, the witty banter, it's all fantastic!

This roast does take a little bit more prep than the typical pot roast that you just throw in a pan, but the work you do before putting it in the oven is really what elevates this roast to another level. Now, although it pains me to disagree with the pot roast aficionado herself (Pioneer Woman, of course!), I have found one serious flaw in her pot roast doctrine. She declares that she does not include potatoes in her pot roast, because she finds them to be mealy, and dumb. However, the potatoes, after soaking up all of the delicious juices from the meat, and other veggies are, in fact, my favorite part of a pot roast. So, of course, I included them in my rendition. Also, I happen to like my pot roast to be more juice than gravy, so I add a lot more beef broth than she does. Now, PW notes that you can use wine in the pot roast as well, and I think some red wine would be DIVINE here. However, I happen to live in a state which restricts the sale of wine (and any other alcoholic beverage except beer) to the state liquor store. And since I'm sure that taking my 4 year old son, and 10 month old daughter into the liquor store would win me Mother-of-the-Year, I stick with plain old beef broth here, and it's STILL delicious!

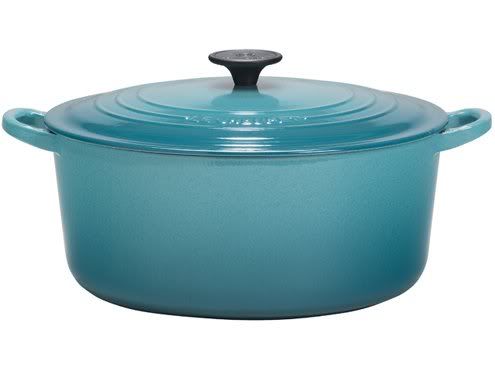
Also, a quick little tip about a key kitchen tool for this pot roast, and dozens of other recipes. I, like many other home-cooks, am DYING for a Le Creuset French oven like this one:
Photobucket

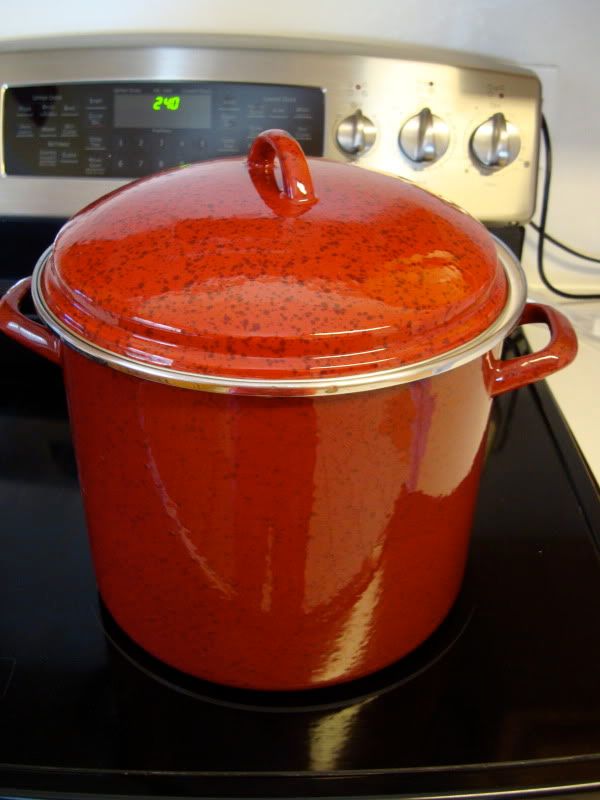
Unfortunately, my pocket book (and my husband!) is not dying to drop $270 on one pot. However, my husband is a pretty amazing man. You don't think he'd leave me wavering, without another tool to conquer the same job, do you? Of course he wouldn't! So, for Christmas last year, I found this beauty under the tree. She comes from my other culinary hero, Paula Deen.
Photobucket

This bad boy can go from the stovetop, to the oven, and back again! It's great for browning veggies (as you'll see in a moment), and braising meat, and making soup, and just about all the things that the amazing Le Creuset brags about doing. All for a grand total of...$29! That's right, almost 1/10th the cost! So, if you're in need of oven safe cookware, and have not yet hit the lottery, put on your best dress, and head on down to Wal-Mart, and pick up one of these babies. You will NOT be disappointed!

Now, onto the FOOD!

Hallelujahs:Delicious, beautiful, literally falls apart it's so tender, smells heavenly!
Hellfires:A little bit more work than the average pot roast, you have to smell it for 3 hours before eating!


Pioneer Woman Pot Roast

-Place a couple of tablespoons of oil in the bottom of your pan, and heat it up!
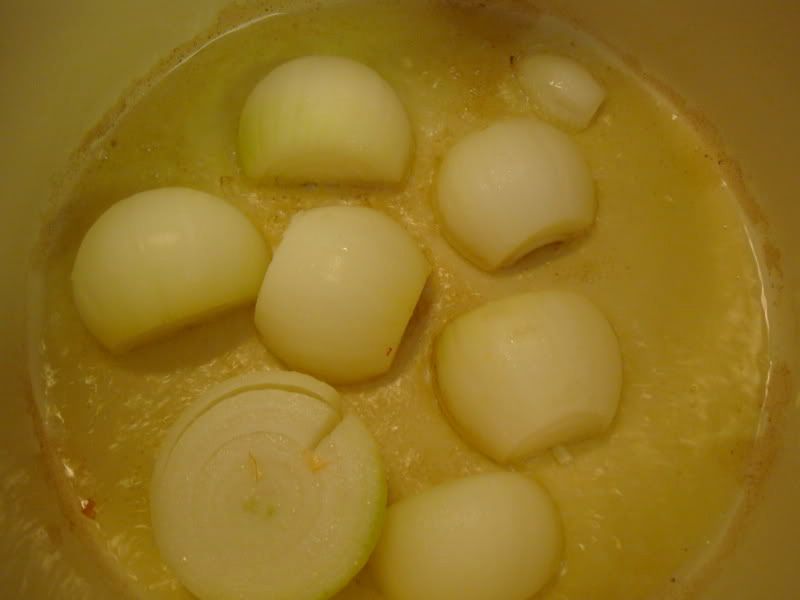
-Add in 2-3 small onions, halved, and brown on two sides. This can happen fast, be careful not to burn them!
Photobucket

-While your onions are browning, take a few carrots, and wash them, peel them, and cut them on the bias. Because it looks much more rustic, and homemade that way.
-When the onions are done, take them out of the pan, and add in the carrots. You're going to sear these as well, getting a nice, rustic browning on them. For some reason I did not take a picture of this, but it looks BEAUTIFUL when done!
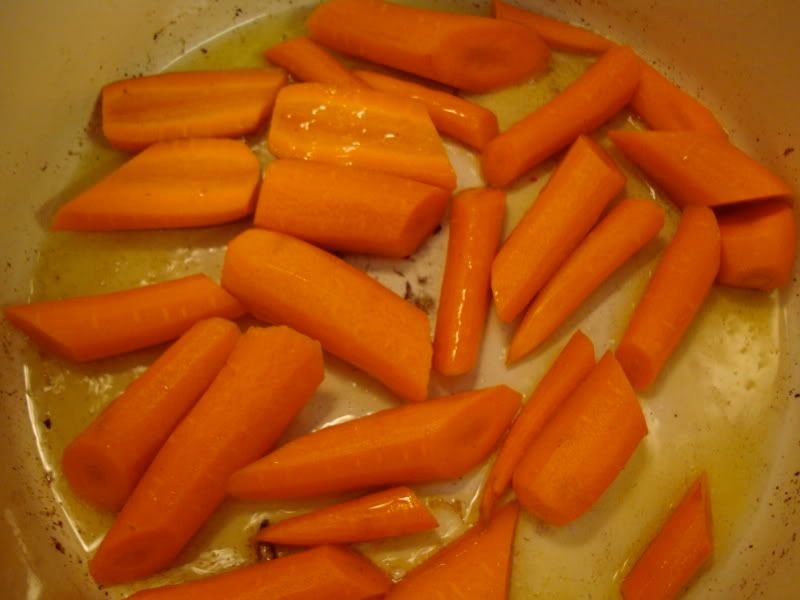
Photobucket

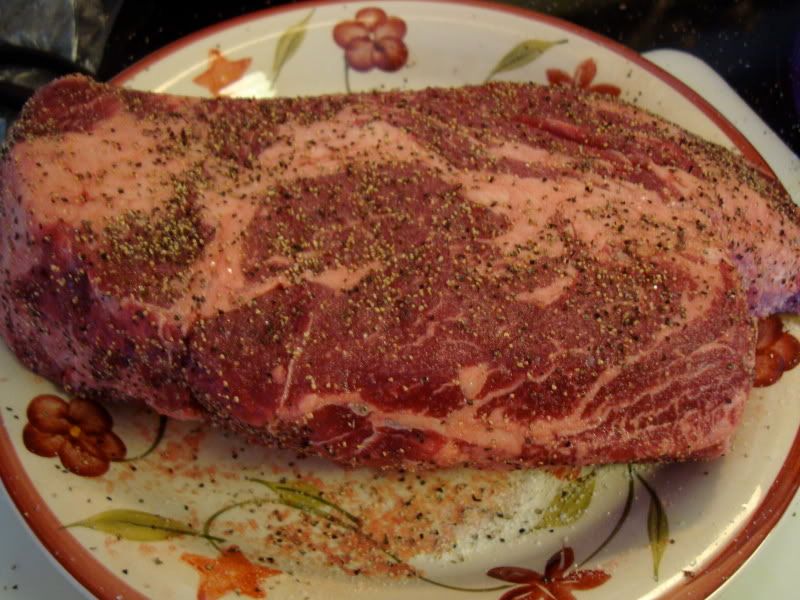
-When the carrots are browning, salt and pepper your chuck roast. You want to be VERY generous with your salt and pepper here. Like my inspiration, the PW, I prefer Kosher Salt here, because it seems to "stick" well to the meat. Of course, all I had this day was sea salt, which worked just fine, too:
Photobucket
-Remove the carrots, and place in a bowl with the onions.
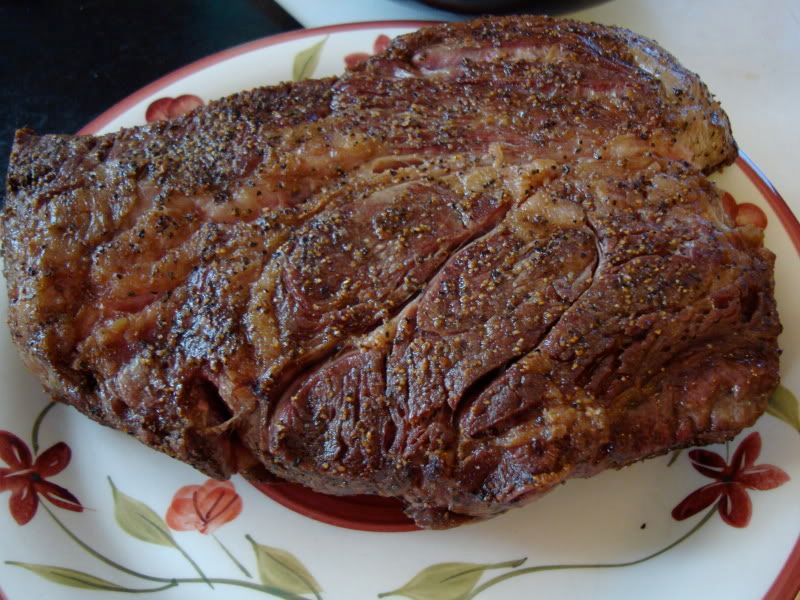
-Sear your chuck roast on all sides. You want your pan HOT for this. You're going to want to get a nice, deep, brown sear on it. The more brown bits on the bottom of the pan, the better! It takes about 2-3 minutes per side to achieve this. PW says 1 minute, but she must be cooking with gas, because even with my amazing Shelby, it takes at LEAST twice this. Be patient, it's worth the wait.
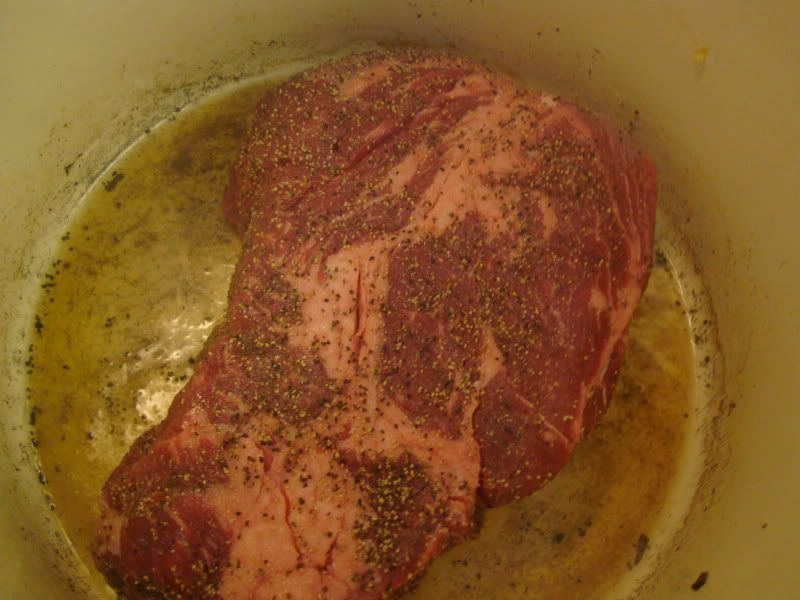
Photobucket

-Be sure to grab some tongs, and hold it up to sear the short sides of your meat, too.
-The seared meat:
Photobucket
-Now, add about 1-2 cups of your beef broth (or wine, if you're into that kind of thing...which I would be if I could get it in my grocery store!), and whisk away, loosening up all of those delicious brown bits on the bottom of your pan.
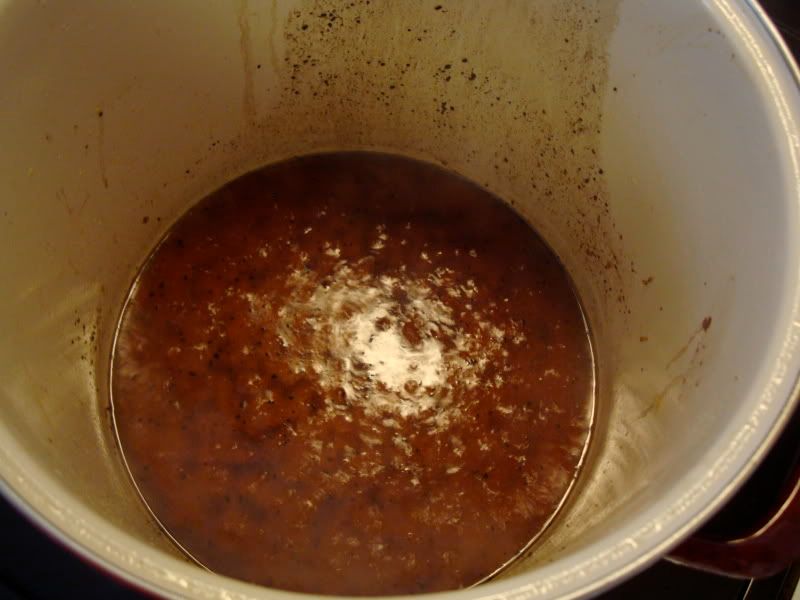
Photobucket

-Now, we're going to add our garlic. Have I mentioned our love of garlic in this house? It's almost unhealthy. Except that garlic is VERY healthy! So, although PW's recipe doesn't call for garlic, I add a healthy dose of it. At least 4 cloves. Incidentally, is my grocery store the only one who has started selling purple garlic recently?! Anyone know what the deal is here?
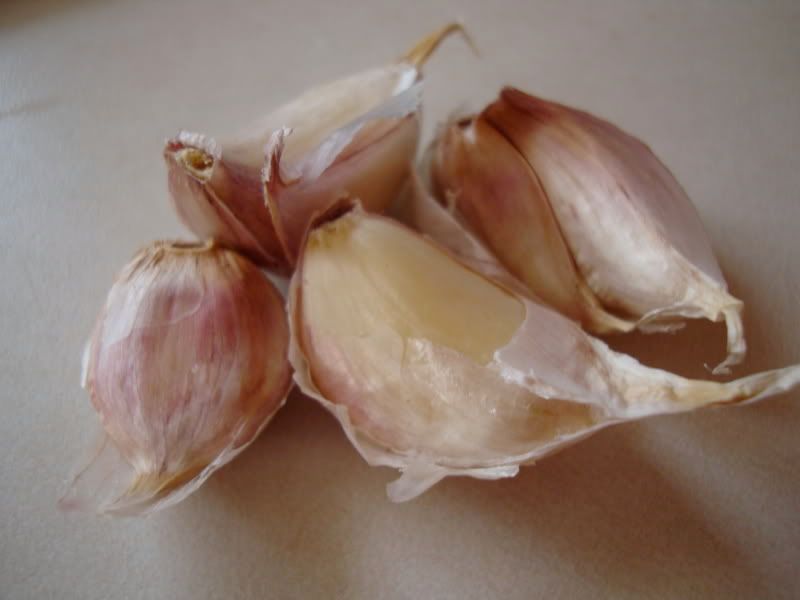
Photobucket
-Just throw it in that handy dandy garlic press we discussed a few posts back, and you're good to go! No peeling necessary.
-Now, if you're feeling rebellious, like me, slice yourself some potatoes. However many you like. Nevermind PW's hatred for roasted potatoes, trust me, they are soft, and flavored and DELICIOUS. Totally worth it!
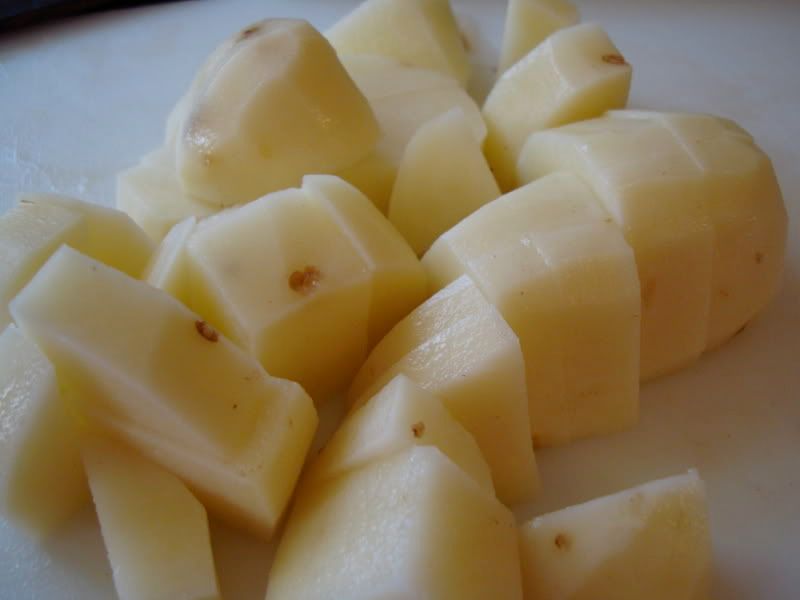
Photobucket
-Add your chuck roast back into the pan, then throw in the potatoes, carrots, and onions.
-Add another box of beef stock. I prefer stock to broth. It's a richer flavor.
-Now, for the best part! Add your herbs! I have made this with both fresh, and dried, herbs, and trust me, BOTH are delicious! I do about a palmful of rosemary, and a hair less thyme.
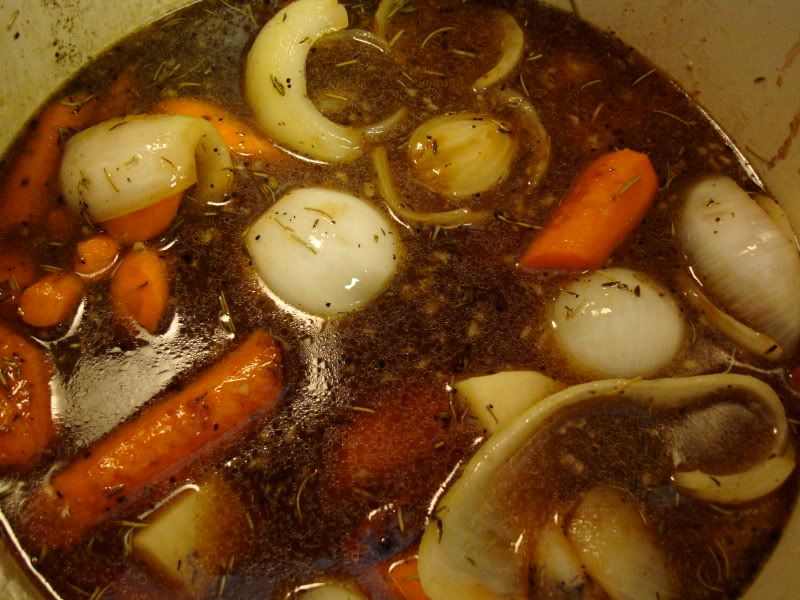
Photobucket
-Cover that baby up, and pop it in your oven for at least 3 hours at 275 degrees. Note, when I made this, my roast was much larger than 3 lbs, and I was in a hurry, so I did it at 350* for 3 hours, and it was just as tender, and delicious. In Microbiology they call these "equivalent treatments," meaning it's okay to cook it for less time at a higher temperature!
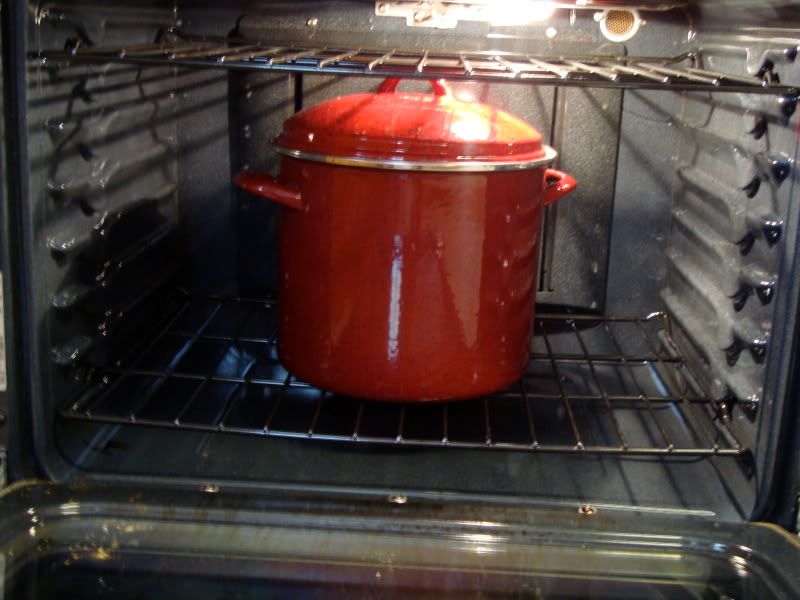
Photobucket

-The hardest part of this recipe is leaving that beauty in the oven for 3 hours while you smell it's heavenly scent all day. But it is WELL worth the wait!
-After 3 hours, the broth has cooked down just enough for the meat to poke its little head through at the top. See it there?
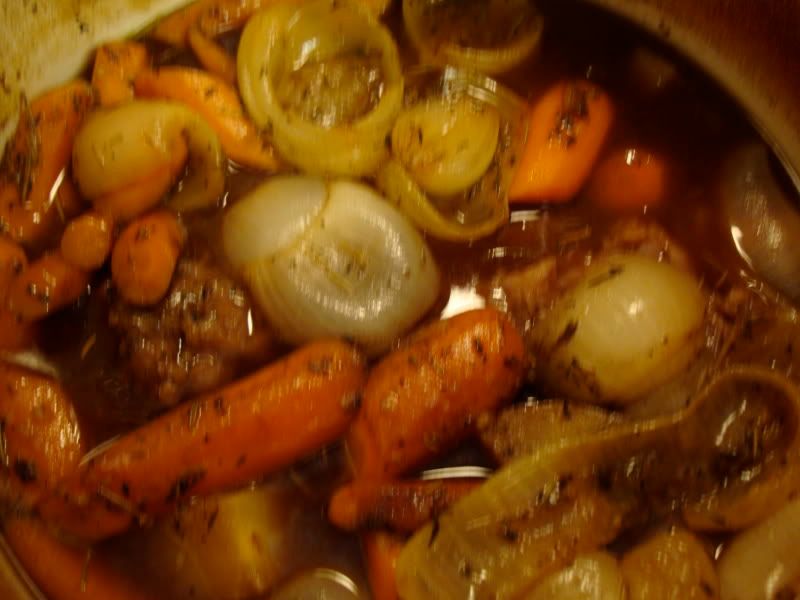
Photobucket
-Stick your fork in there, pull yourself off a big hunk (no knives necessary here), and put it on your plate. Ladle on some vegetables and broth, and be ready to be in comfort food heaven!
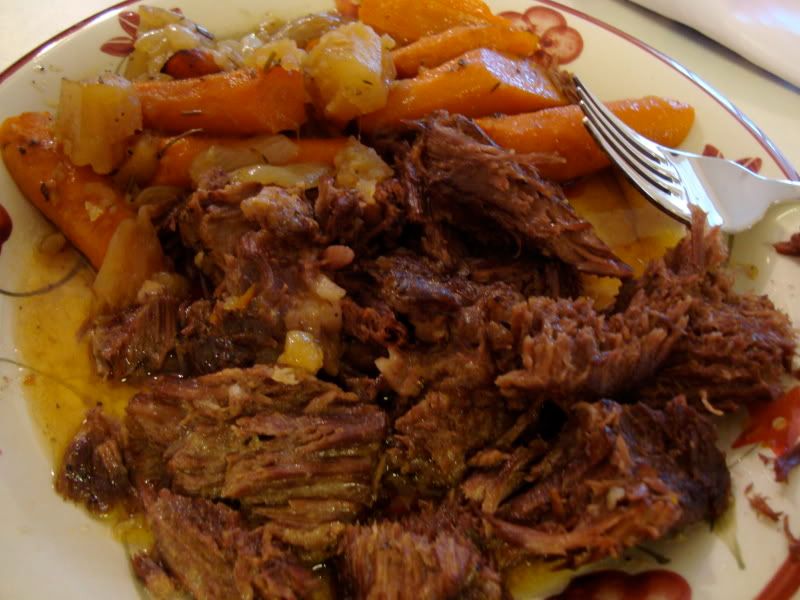
Photobucket


Plain Text Recipe


Pioneer Woman Pot Roast


Ingredients:
3-3.5 lb Chuck Roast
Salt and Pepper
Carrots (however many you like, 3-5)
2-3 small onions, peeled, and halved
2 boxes beef stock (I use the small Swanson boxes because that's what Wally World carries)

2-4 garlic cloves
Rosemary
Thyme
Olive Oil


-Place a couple of tablespoons of oil in the bottom of your pan, and heat it up!
-Add in 2-3 small onions, halved, and brown on two sides. This can happen fast, be careful not to burn them!
-While your onions are browning, take a few carrots, and wash them, peel them, and cut them on the bias. Because it looks much more rustic, and homemade that way.
-When the onions are done, take them out of the pan, and add in the carrots. You're going to sear these as well, getting a nice, rustic browning on them. For some reason I did not take a picture of this, but it looks BEAUTIFUL when done!
-When the carrots are browning, salt and pepper your chuck roast. You want to be VERY generous with your salt and pepper here. Like my inspiration, the PW, I prefer Kosher Salt here, because it seems to "stick" well to the meat. Of course, all I had this day was sea salt, which worked just fine, too.
-Remove the carrots, and place in a bowl with the onions.
-Sear your chuck roast on all sides. You want your pan HOT for this. You're going to want to get a nice, deep, brown sear on it. The more brown bits on the bottom of the pan, the better! It takes about 2-3 minutes per side to achieve this. PW says 1 minute, but she must be cooking with gas, because even with my amazing Shelby, it takes at LEAST twice this. Be patient, it's worth the wait.
-Be sure to grab some tongs, and hold it up to sear the short sides of your meat, too.
-Now, add about 1-2 cups of your beef broth (or wine, if you're into that kind of thing...which I would be if I could get it in my grocery store!), and whisk away, loosening up all of those delicious brown bits on the bottom of your pan.
-Now, we're going to add our garlic. Have I mentioned our love of garlic in this house? It's almost unhealthy. Except that garlic is VERY healthy! So, although PW's recipe doesn't call for garlic, I add a healthy dose of it. At least 4 cloves. Incidentally, is my grocery store the only one who has started selling purple garlic recently?! Anyone know what the deal is here?
-Just throw it in that handy dandy garlic press we discussed a few posts back, and you're good to go! No peeling necessary.
-Now, if you're feeling rebellious, like me, slice yourself some potatoes. However many you like. Nevermind PW's hatred for roasted potatoes, trust me, they are soft, and flavored and DELICIOUS. Totally worth it!
-Add your chuck roast back into the pan, then throw in the potatoes, carrots, and onions.
-Add another box of beef stock. I prefer stock to broth. It's a richer flavor.
-Now, for the best part! Add your herbs! I have made this with both fresh, and dried, herbs, and trust me, BOTH are delicious! I do about a palmful of rosemary, and a hair less thyme.
-Cover that baby up, and pop it in your oven for at least 3 hours at 275 degrees. Note, when I made this, my roast was much larger than 3 lbs, and I was in a hurry, so I did it at 350* for 3 hours, and it was just as tender, and delicious. In Microbiology they call these "equivalent treatments," meaning it's okay to cook it for less time at a higher temperature!
-The hardest part of this recipe is leaving that beauty in the oven for 3 hours while you smell it's heavenly scent all day. But it is WELL worth the wait!

Original recipe can be found at: http://thepioneerwoman.com/cooking/2008/01/2008_the_year_of_the_pot_roast/

Wednesday, July 28, 2010

Preview Post (I'm such a tease!)

Okay, it's been 10 days since my last post...WAY too long! Unfortunately, I am on my way to class again right now, so I'm just going to post a couple of preview pictures of two recipes I am going to post in the next day or so! I am such a tease, but I promise it will be well worth the wait!

1) Pioneer Woman Pot Roast (the BEST roast you've ever had!)
Photobucket
2) Tiramisu Cake (Does it get any better than the best dessert you've ever had, in cake form?)
Photobucket

Sunday, July 18, 2010

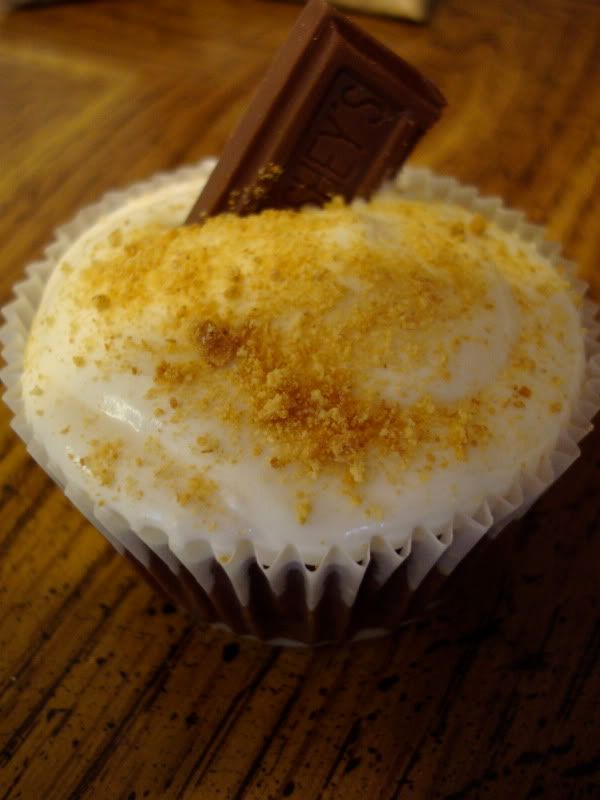
S'mores cupcakes, Four Ways!

Photobucket

Is there anything more quintessentially American than sitting around a fire pit with some good friends, and making some delicious s'mores? Who would have thought that three things as simple as graham crackers, marshmallows, and Hershey bars, could combine to make something so amazing as a s'more?

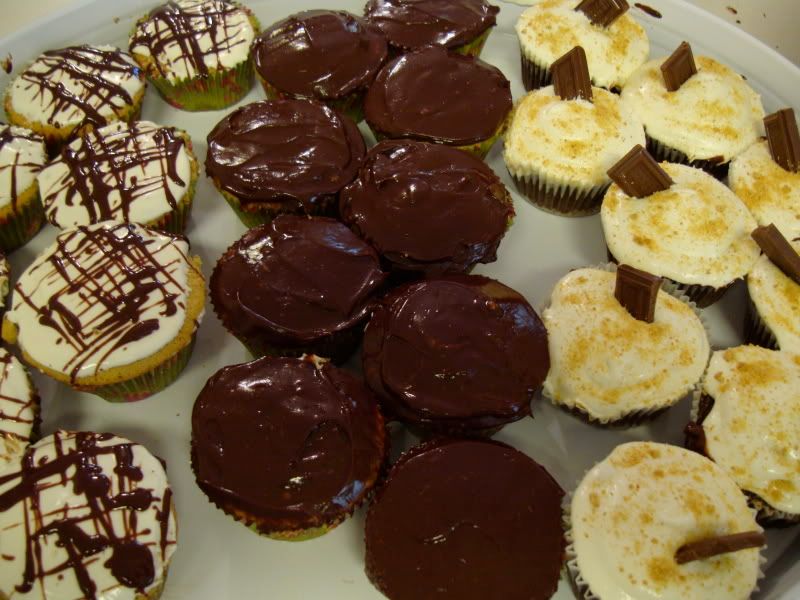
And combining a s'more with a cupcake? Genius. Really. Right up there with Einstein, and his theory of relativity. Now, there are several schools of thought on how to best turn a s'more into a cupcake. Chocolate cake, with marshmallow frosting, and crumbled graham crackers, graham cracker cake with chocolate frosting, and marshmallow filling, graham cracker cake with marshmallow frosting, and chocolate filling...The list goes on, and I decided to try them all!

Photobucket

Now, originally, I was planning on posting all of the recipes for the cupcakes here, in detail, but then I served the cupcakes to The Family, at Sunday dinner, and one version was such a far and away winner that it seemed almost silly (and LONG) to share the others. Want to know the funniest thing about it? The winner was the cupcake that I didn't make from scratch! The chocolate cupcake with marshmallow frosting, and crumbled graham crackers. At the end of the post, I'll provide a link to the from-scratch graham cracker cupcakes, and a few general tips, but mostly, I'll cover the winning version. I tried this version two ways, one with graham cracker crusts pressed into the bottom of each cupcake liner, and one without. The one with the graham cracker crust was definitely better!

Hallelujahs: Amazing, Easy (a boxed mix, could it get any easier than that?), ADORABLE!
Hellfires: Very sweet. The frosting is more sugar, and less marshmallow that I had expected, but regardless, it is DELICIOUS. However, you can definitely only eat one at a time. Unfortunately, it also requires a graham cracker crust. See Cheesecake post for my thoughts on those.

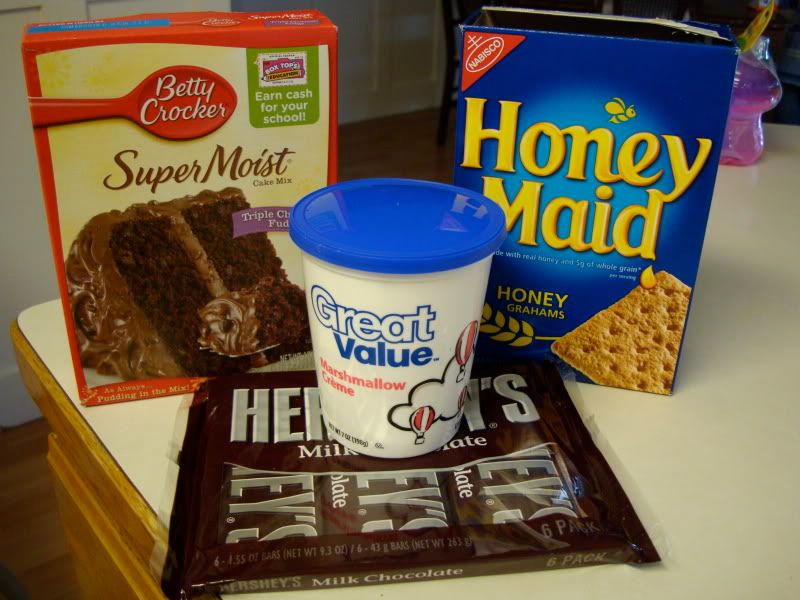
When something involves these ingredients, how can it NOT be good?
Photobucket

-Note: Okay, yes, I cheated, and used a boxed mix. But, when something tastes this good, who cares?! Also, give me a break, I was making 4 different kinds of cupcakes. I needed a little helping hand, and Betty is my right hand woman. She's always there when I need her. Betty Crocker, that is.

S'More Cupcakes

Graham Cracker Crust
1 package of graham crackers, crushed (3 packages per box, only use one package)
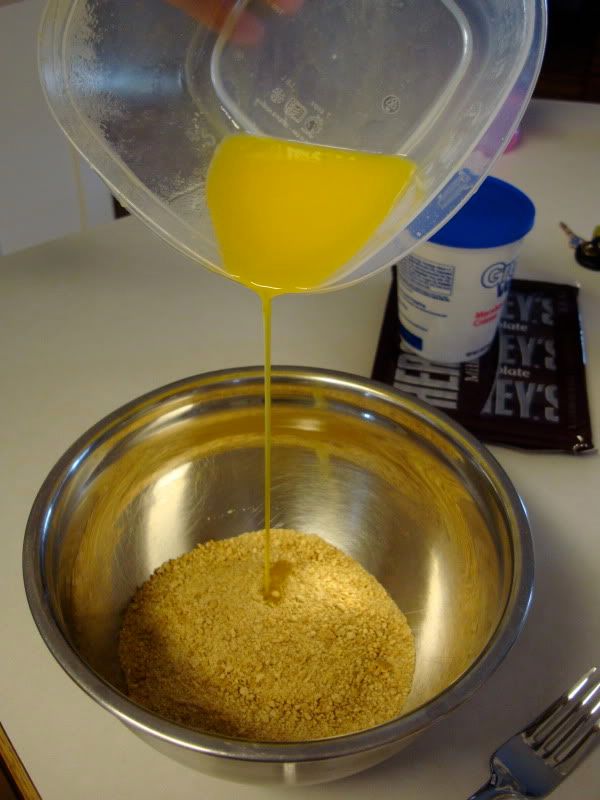
1 stick of butter, melted
1/2 cup of sugar

-Combine the crushed graham crackers, sugar, and melted butter.
Photobucket
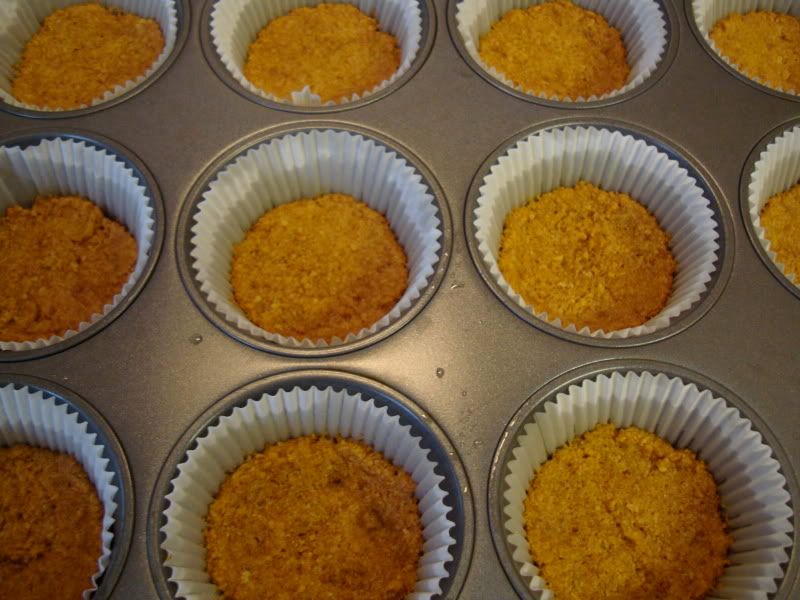
-Press about 1 tbs of the mixture into each cupcake liner
Photobucket
-Place in oven at 350* for about 5 minutes, to pre-bake the crusts, and prevent them from getting soggy.
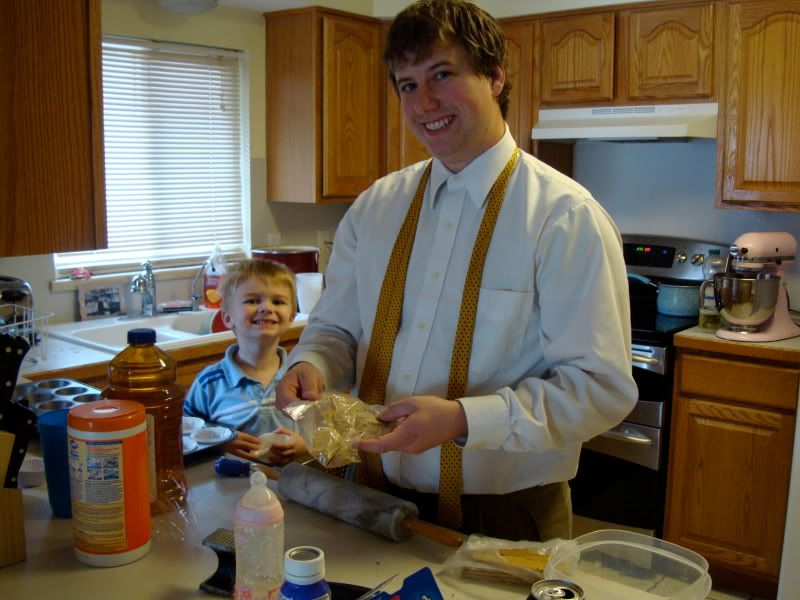
-And if you hate making graham cracker crusts as much as I do, be smart about this. Put your two favorite men to work, and make them do it for you! (Aren't I a lucky woman?)
Photobucket

Cupcakes
1 box of Chocolate Cake Mix, prepared as directed
-I used a Betty Crocker Triple Chocolate Fudge Mix, which called for some oil, water, and 3 eggs.
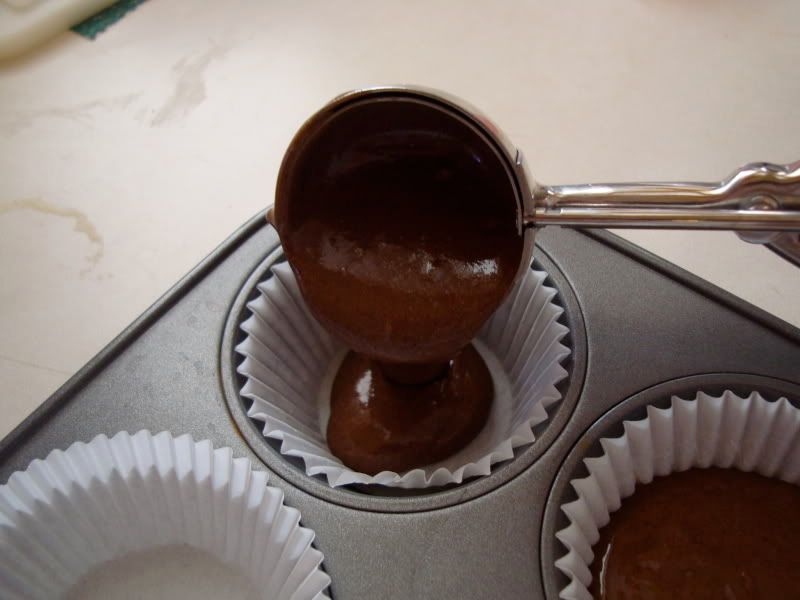
-Mix up your cupcake batter, and pour into pre-baked liners.
-This is where we'll highlight another must-have tool we've talked about before. Remember way back in the peanut butter cookie post? We introduced the pampered chef scoop? Well, there are two sizes of that scoop. The larger size is PERFECT for cupcakes. 1 full scoop perfectly fills the cupcake tins 2/3 full. Seriously, I LOVE these things!
Photobucket
-Once your cupcake liners are full, place in the oven, and bake, following the directions on your cake mix.
-Tip: I always set the timer for my cupcakes at least 5 minutes earlier than the box tells me to. There's nothing more frustrating than dry, burnt cupcakes.
-Allow cupcakes to cool completely before frosting.

Marshmallow Creme Frosting
2 sticks of butter
2 cups of powdered sugar
1 tsp vanilla
14 oz of marshmallow cream

-Mix all ingredients in your stand mixer
-Place into Ziploc bag, cut off the tip, and pipe onto cupcakes. Or, if that's not your style, grab a knife, and ice them the old fashioned way.

Decoration
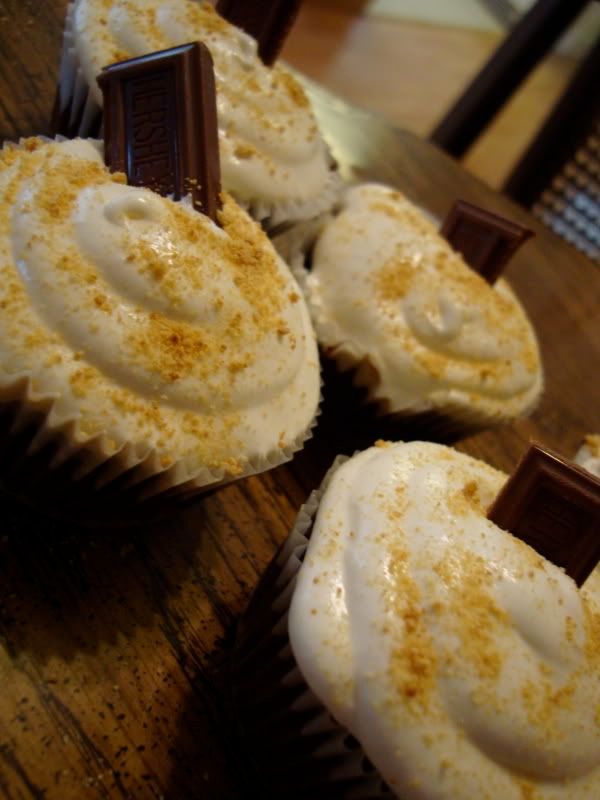
-Once your cupcakes are frosted, dust with crushed graham crackers, and 1 rectangle of your Hershey Bars
Photobucket

Recipe for Marshmallow Creme frosting can be found here: http://sewdarncute.typepad.com/sew_darn_cute/2007/04/smores_cupcakes.html

Okay, if you decide you MUST try the other variations with the graham cracker cupcakes, instead of chocolate cupcakes, here are a few tips.
1) I found the recipe for the graham cracker cupcakes from here: http://find.myrecipes.com/recipes/recipefinder.dyn?action=displayRecipe&recipe_id=1255031
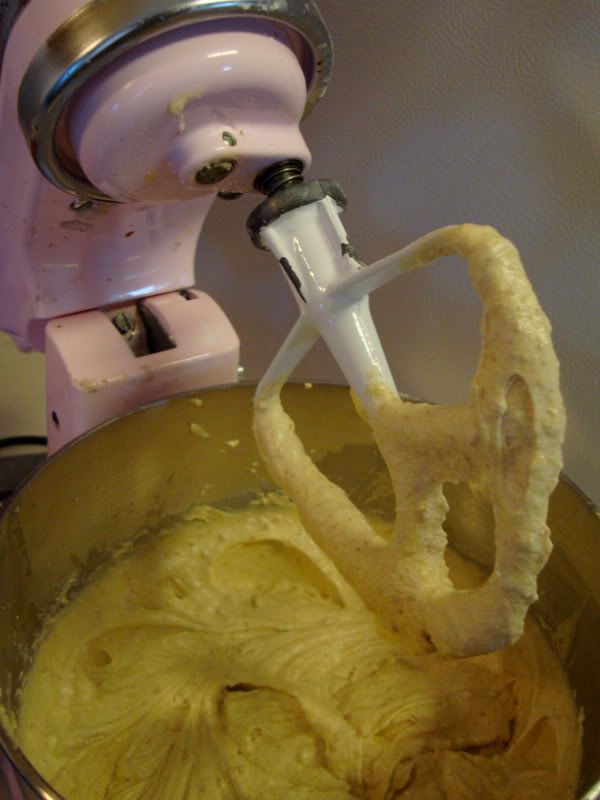
2) A note about from-scratch cake batters in general. They are MUCH thicker than boxed mix recipes. Don't be alarmed, it makes for a much denser, more delicious, cake. See how it sticks to the mixer paddle, here? MUCH thicker, and that's okay!
Photobucket
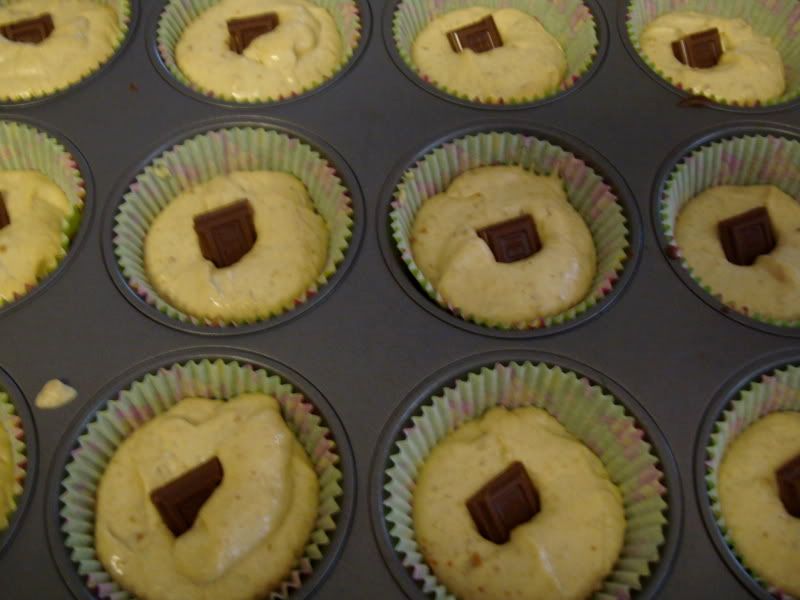
3) For variations, I tried these 2 ways. For the first 12, I inserted a square of a Hershey's bar into the center of each before baking:
Photobucket
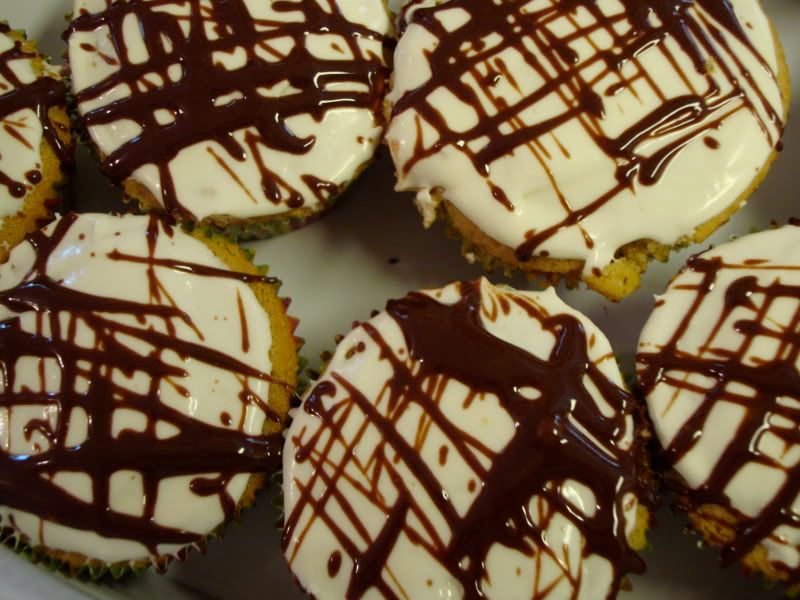
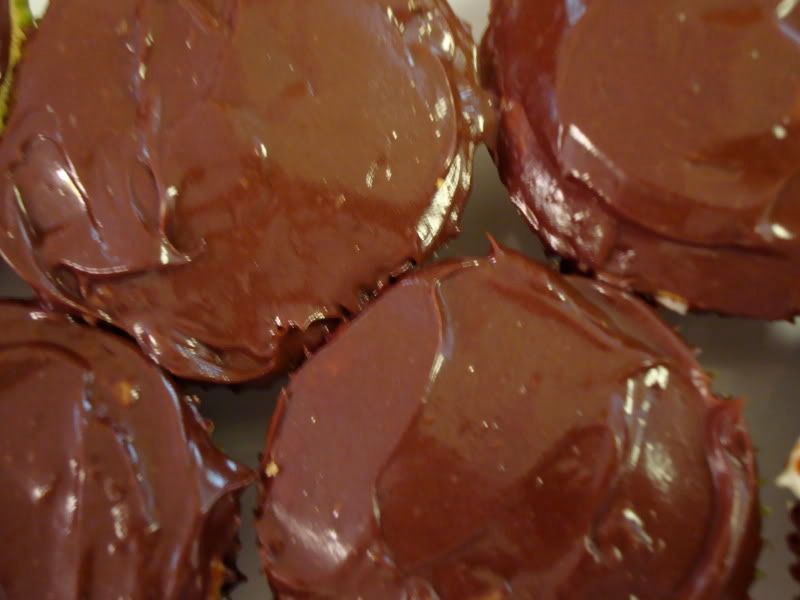
They were iced with the Marshmallow creme frosting listed in the winning recipe, and then drizzled with chocolate ganache for artistic effect (you'll see why I'm a pre-med major, and not an art major).
Photobucket
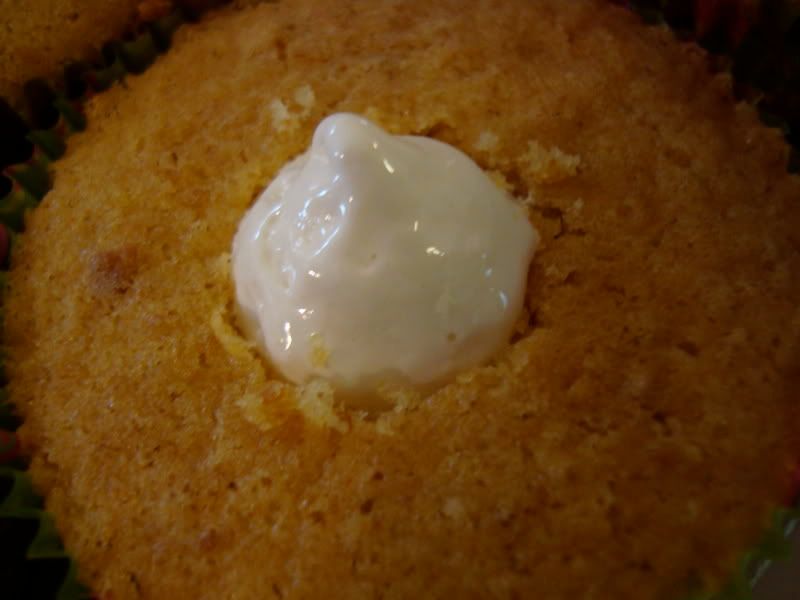
-For the second option, I baked them with nothing in the center, and then when they were cooled, I cut out a section in the middle of each cupcake, and filled with plain, marshmallow creme (NOT the frosting). Then, I frosted them with chocolate ganache.
Photobucket
Photobucket
-And one more quick note about the ganache. Normally, I make my ganaches with semi-sweet chocolate because I love that deep, slightly bitter flavor to them. However, in this case, it just did not work with this recipe. I think next time I make this recipe, in order to stay true to the inspiration (the s'more) I will use Hershey's milk chocolate in order to make the ganache.

Good Luck with your s'more cupcakes! I hope they turn out beautifully!

Plain Text Recipe

S'More Cupcakes

Graham Cracker Crust
1 package of graham crackers, crushed (3 packages per box, only use one package)
1 stick of butter, melted
1/2 cup of sugar


-Combine the crushed graham crackers, sugar, and melted butter.
-Press about 1 tbs of the mixture into each cupcake liner
-Place in oven at 350* for about 5 minutes, to pre-bake the crusts, and prevent them from getting soggy.

Cupcakes
1 box of Chocolate Cake Mix, prepared as directed

-I used a Betty Crocker Triple Chocolate Fudge Mix, which called for some oil, water, and 3 eggs.
-Mix up your cupcake batter, and pour into pre-baked liners.
-Once your cupcake liners are full, place in the oven, and bake, following the directions on your cake mix.
-Allow cupcakes to cool completely before frosting.

Marshmallow Creme Frosting
2 sticks of butter
2 cups of powdered sugar
1 tsp vanilla
14 oz of marshmallow cream


-Mix all ingredients in your stand mixer
-Place into Ziploc bag, cut off the tip, and pipe onto cupcakes. Or, if that's not your style, grab a knife, and ice them the old fashioned way.

Decoration
-Once your cupcakes are frosted, dust with crushed graham crackers, and 1 rectangle of your Hershey Bars

Friday, July 16, 2010

Eat-Out-At-Home: DiRusso's Italian Sausage Sandwiches

Photobucket

This is another recipe born out of my deep longing for home food.  You know, it's kind of funny, I've lived in Utah for 6 years now, and I still call Ohio home.  And one thing my home state does well, is food.  Especially fair food.  Utah has no clue what fair food is, and let me tell you Utahns something very important.  Pay close attention here.  Krusteaz scone batter does NOT a funnel cake make, nor do Costco corn dogs make true fair food.  Now, my Mom's absolute favorite fair food is this delicious conglomeration of sausage, and red sauce, and mozzarella cheese, and delicious bread....all wrapped up in a square of tin-foil so you can take it with you all over the fair.  Otherwise known as the DiRusso's Italian Sausage Sandwich.

Photobucket

My Mom tells me that DiRusso's now sells their amazing sausages in the frozen food sections of the local grocery stores, so she can replicate them at home.  Unfortunately, my local grocery stores have not responded to my repeated requests to stock my favorite home foods, in particular the Ohio trifecta (Pierre's Cookie Dough Ice Cream, Dan Dee Cheesies, and DiRusso's Italian Sausage).  Lucky for me, my sweet Mamma always has her house stocked with the trifecta each time I come home for a visit. However, when I'm craving it here, in Utah, I've got to find some other way to satisfy my desires than hopping a plane to Ohio, because that would get old, and very expensive!

These sandwiches are delicious, and VERY easy to make.  While we may not have the DiRusso's brand sausage here (which does make a difference, by the way), we do have a couple of really good brands.  My favorite?  Colossimo's original sausage.  They used to sell it at Costco, but lately I've only seen the Red Wine version, which I don't like nearly as much.  I find it at Smith's now.  It's more expensive, but worth it in the end.  You can use whatever type of sausage you like, mild, hot, sweet, etc, but I prefer a mild sausage for this, the sweet just doesn't have the same "pop!" I like in the mild.

Also, you will notice that I add the vegetables in two phases.  There is a good reason for this.  You add the first batch in right at the very start, because you want your sausage to pick up the flavors from them.  It will really infuse into them, and change the flavor, for the better.  But, you don't want to add them all at once, because you will be adding water to them, and you don't want to be stuck with soggy veggies.  These sandwiches are incredibly simple to make, you'll be shocked at what great flavor you can get from such simple ingredients.

On a housekeeping note, if you scroll to the very bottom of this post, you can find a plain-text version of this recipe. I'm still working out the kinks of a print function.

Hallelujahs: Simple, Fresh Ingredients, Easy, Delicious
Hellfires: I can't think of any, other than the fact that Utah doesn't stock DiRusso's Italian Sausage.
Variations: Next time, I think Jon and I are going to sear them on the grill first, so we can get that smokey flavor in here, too.

Italian Sausage Sandwiches


5-6 Italian Sausages
1 Large Onion
2 Bell Peppers (whatever colors you have on hand)

Salt/Pepper to Taste
1 Jar of your Favorite Spaghetti Sauce (or homemade if you're feeling really daring)
Mozzerella Cheese
Sub Rolls


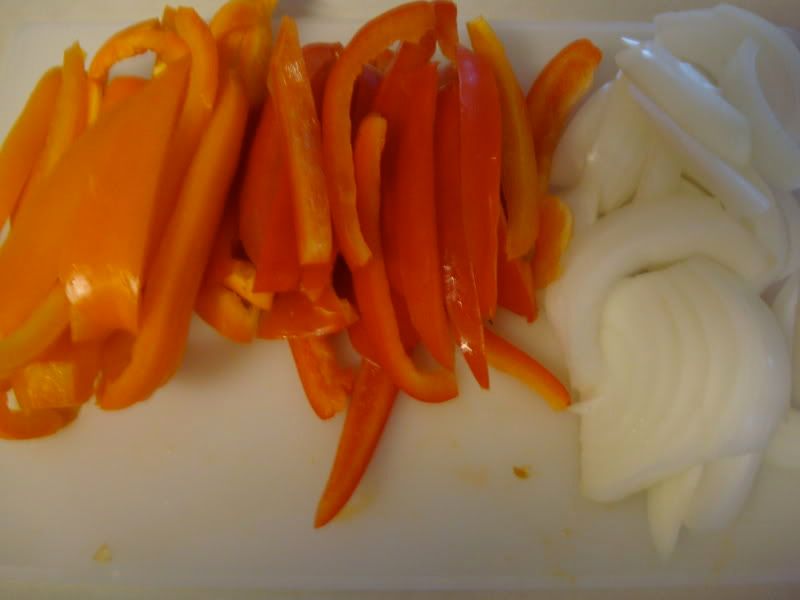
-Slice your vegetables.Photobucket
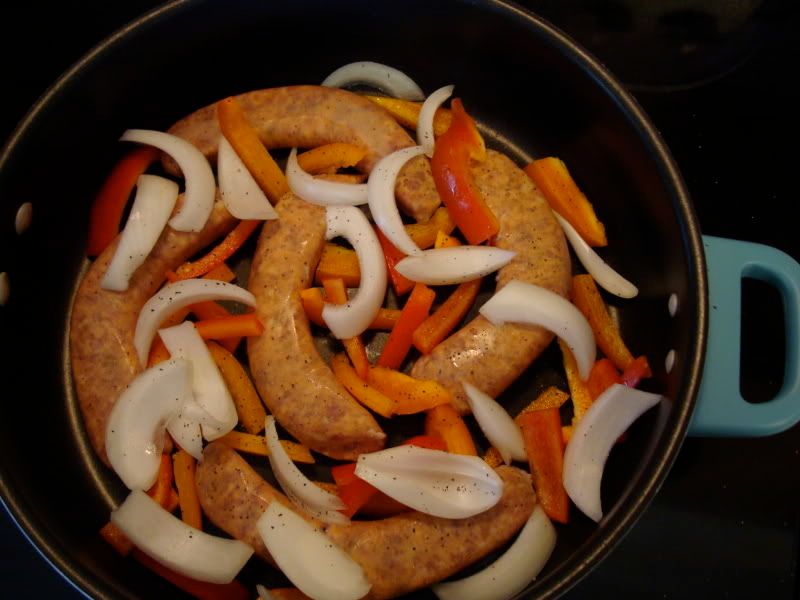
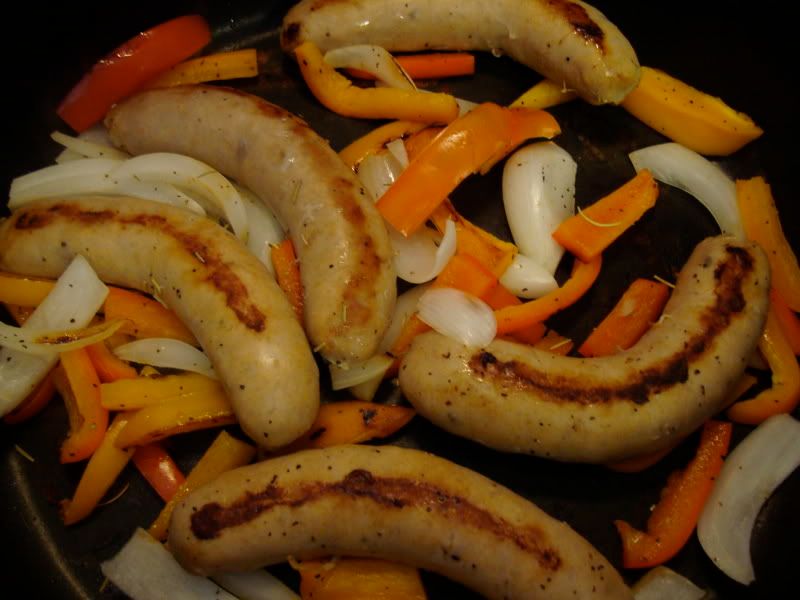
-Place sausages, and half the vegetables in a frying pan on medium heat.
Photobucket
-Add Salt and Pepper to taste
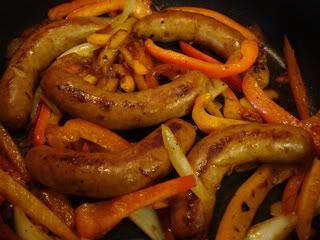
-Sear the sausages on each side. You want to get some brown bits on the bottom of the pan (from the sausage, AND the veggies), without burning them.
Photobucket
-Add 1-1 1/2 cups of water to deglaze pan. Cover the sausages and turn heat down to 3-4. Simmer for about 20 minutes or so.
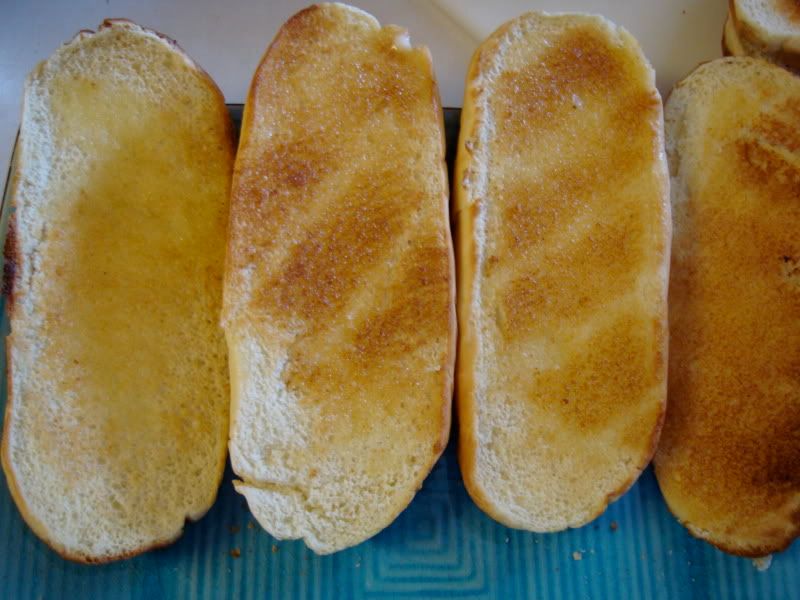
-Meanwhile, Toast your rolls
Photobucket
-Once sausages have simmered in water for approximately 20 minutes, remove lid, and increase heat so that the water evaporates.
-Add in the rest of your vegetables, and heat until hot, but still crisp.
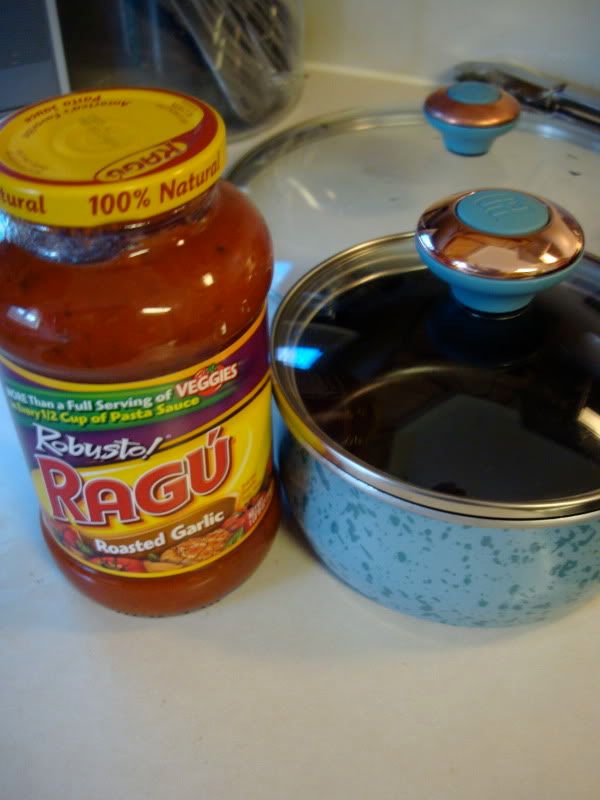
-Heat your spaghetti sauce in a saucepan on the stove (or in the microwave)
Photobucket
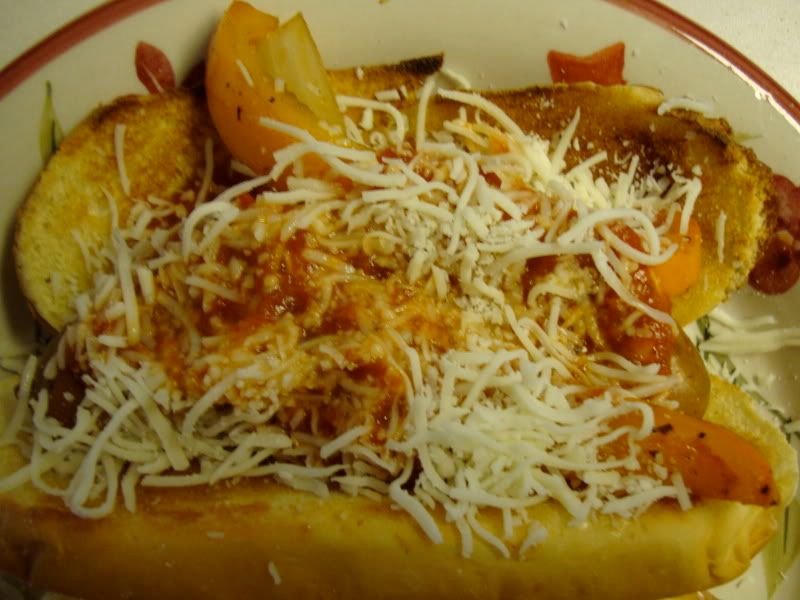
-Once the sausages, and sauce are finished, make your sandwich! Place the sausage on the roll, add some cheese, then some sauce, then more cheese, and your veggies. If, like me, you're picky, and like the flavor of the veggies, but not biting into one, leave them out. You'll still have all the flavor of them cooked into the meat!
-If your cheese isn't melting, you can place these under the broiler, for a couple of minutes, too.
Photobucket

Plain Text Recipe:

Italian Sausage Sandwiches
5-6 Italian Sausages
1 Large Onion
2 Bell Peppers (whatever colors you have on hand)
1 Jar of your Favorite Spaghetti Sauce (or homemade if you're feeling really daring)
Mozzerella Cheese
Sub Rolls


-Slice your vegetables.
-Place sausages, and half the vegetables in a frying pan on medium heat.
-Add salt and pepper to taste.
-Sear the sausages on each side. You want to get some brown bits on the bottom of the pan (from the sausage, AND the veggies), without burning them.
-Add 1-1 1/2 cups of water to deglaze pan. Cover the sausages and turn heat down to 3-4. Simmer for about 20 minutes or so.
-Meanwhile, Toast your rolls
-Once sausages have simmered in water for approximately 20 minutes, remove lid, and increase heat so that the water evaporates.
-Add in the rest of your vegetables, and heat until hot, but still crisp.
-Heat your spaghetti sauce in a saucepan on the stove (or in the microwave)
-Once the sausages, and sauce are finished, make your sandwich! Place the sausage on the roll, add some cheese, then some sauce, then more cheese, and your veggies. If, like me, you're picky, and like the flavor of the veggies, but not biting into one, leave them out. You'll still have all the flavor of them cooked into the meat!
-If your cheese isn't melting, you can place these under the broiler, for a couple of minutes, too.

Wednesday, July 14, 2010

New York Style Cheesecake, Blackberry Sauce, and a correction!

First things first, in going through my last post, I realized there was a typo on the chicken alfredo recipe.  It should have read 2 tablespoons of cream cheese, instead of 2 ounces of cream cheese.  This is not a huge gaffe, and really won't have too big of an effect on your sauce, as 2 tablespoons of cream cheese equal 1 ounce of cream cheese, and I usually add a little over one ounce, but I just wanted to be sure I had all of the correct measurements on the blog.  So, I've changed the post, and highlighted the new amounts in yellow.  Sorry for the confusion!

Now, onto the REAL reason you've come to this blog today:


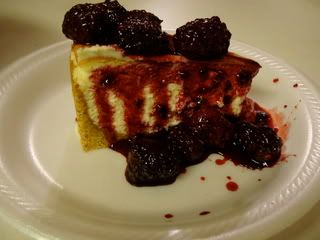
Photobucket

Seriously is there anything that isn't better in New York?  Pizza, shopping, and DEFINITELY cheesecake.   I have never even been to New York, and I already love it.  With all of the dining options, late-night menus, pizza, and cheesecake (and shopping!) I think we could be very happy together.  But, I'd have to live outside of the city on a ton of land, I'm a country girl at heart.  The only thing I can't figure out, NY style pizza is thin, and crispy, as opposed to Chicago's tall, deep-dish variety.  But NY Style cheesecake, is tall, and deep, like Chicago's pizza.  Random, huh?

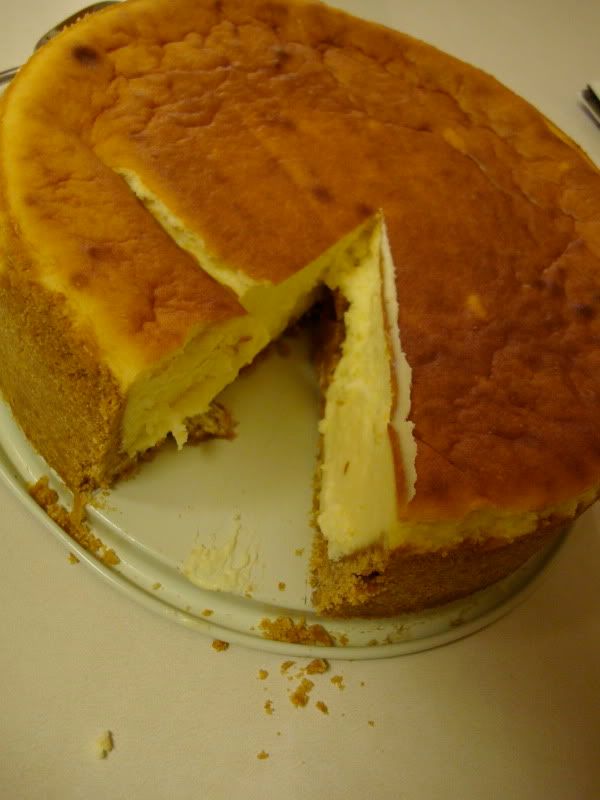
Cheesecake and I get along VERY well.  Just ask my hips, and my thighs.  The four of us (Myself, my hips, my thighs, and my cheesecake) are thick as thieves.  Which brings us to an important point.  The two T's of cheesecakes. A perfect cheesecake should be tall, and thick.  The taller, the better.  This particular cheesecake, from Smitten Kitchen, almost overflowed my springform pan, which is just how it should be.  A perfect cheesecake should also be thick, and dense, not gooey, like the stuff you buy in a tub at Wally World.  This particular cheesecake fits the bill for both categories.  It's tall, and thick, and dense, and delicious!

A couple of notes about this cheesecake recipe.  The recipe calls for the oven to start at 550*, and to brown the top of the cheesecake for 10-12 minutes at that temperature.  However, my cheesecake was more than brown after only 5 minutes, and  even after reducing the oven temperature to 200*, it still got a little more brown than I would have preferred.  So, you may want to play around with your oven a little bit to find the sweet spot.  All that really means is more cheesecake, and who can argue with that?

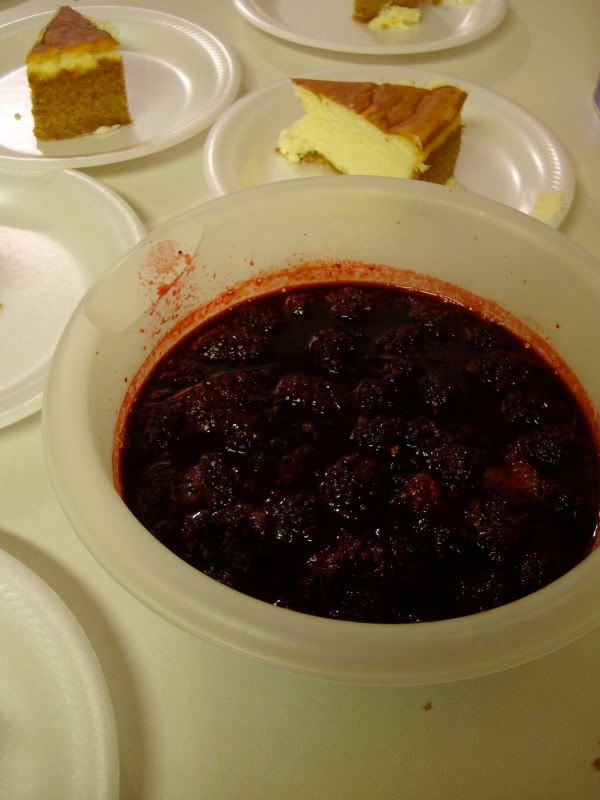
Personally, I'm a naked cheesecake kind of girl.  Yes, I said naked.  Go ahead, take a second, and do the Beavis n' Butthead laugh, I'll wait.  Got it out of your system?  Good.  Now, back to the task at hand.  I happen to like naked, unadulterated cheesecake.  It allows you to get the full effect of the sweet, tangy, creamy goodness, without interrupting the smoothness by some other concoction on the top.  However, many in The Family prefer to make their sweets include a 'healthy' serving of fruits and vegetables (carrot cake, anyone?  I mean really, carrots in cake?!), and this blackberry topping by the Pioneer Woman was so beautiful, I was inclined to oblige.  And it couldn't have been easier to make!  Considering my brother-in-law, Keith, was eating it alone, after he'd finished his 2nd piece of cheesecake, I think it's safe to say it was a huge success!

New York Style Cheesecake
from: Smitten Kitchen
Note:  I prefer an intense, cream cheese taste in my cheesecakes.  Because of this, I like a VERY light flavor of citrus in my cheesecake.  Just kind of a hint of it in the background that makes you go, 'hmmm, what's that?'  Accordingly, I adjusted the amount of orange/lemon zest when I made the cheesecake.  I used maybe 1/4 teaspoon of each.  But, I will list the original measurements here, in case you prefer a more 'in your face,' citrus flavor.

Hallelujahs: Delicious, Tall and Thick, and difficult to mess up!
Hellfires: Graham cracker crust. I love the taste, but pressing graham cracker crusts into the bottom of pans is my absolute LEAST favorite baking chore ever. It's like the seventh circle of hell. But this was delicious enough to make it worth it. Also, waiting for it to cool before eating is torture of the worst kind! I mean, really, some cheesecake recipes call for 12-18 HOURS?!?! Of course, I couldn't wait that long, I only waited 5 hours, and it was still delicious. Don't tell the cheesecake gods, though, okay?
Crumb Crust:
15 sheets of Graham Crackers
1 stick of melted butter
1/2 cup of sugar

1/4 teaspoon of salt

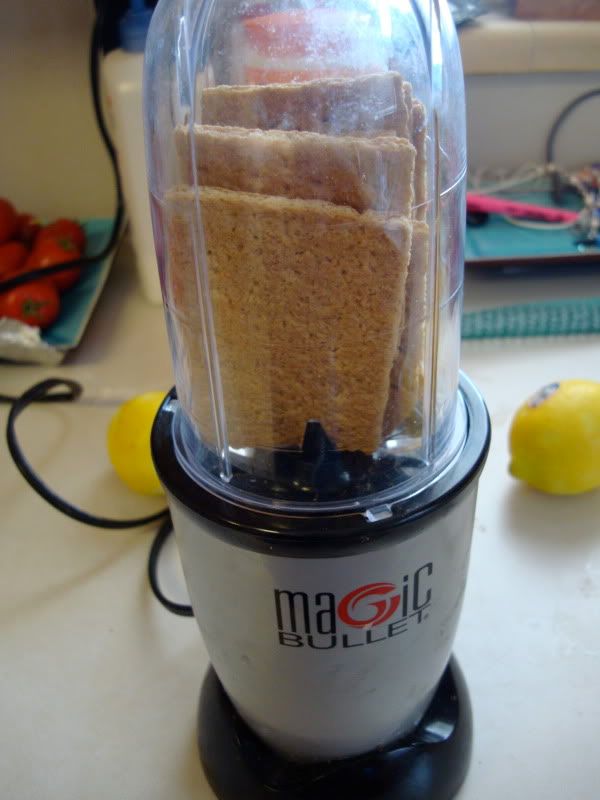
-Crush graham crackers into crumbs. Most people use a food processor. I happen not to own a food processor, so I tried several methods of this. First, I placed some graham crackers into my magic bullet:

Photobucket

-This did NOT work very well. It was loud, and left LOTS of large chunks. I do not recommend this method.
-Then I tried just crushing them with my fingers. Again, not very useful.
-Finally, I placed them in a ziploc bag, and used that handy marble rolling pin I told you about. This worked the best.
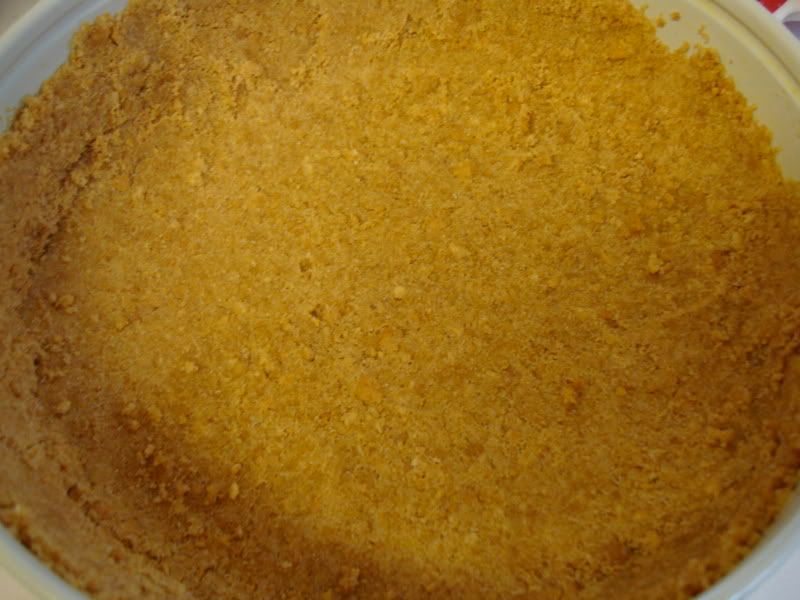
-Once your graham crackers are crushed, mix all ingredients, and press into bottoms/sides of your springform pan.
-Note: It really is important for a cheesecake to use a springform pan. I bought mine at good, old Wally World for around $10. So, while it's necessary to have a springform pan, it is not necessary to have a $30 or $40 Williams-Sonoma springform pan.

Photobucket

Cheesecake
(5) 8-ounce packages of cream cheese, softened 
1 3/4 cups of sugar
3 tablespoons of all-purpose flour
1 teaspoon each, lemon zest, and orange zest
5 eggs
2 egg yolks
1/2 teaspoon of vanilla


-Preheat oven to 550*.
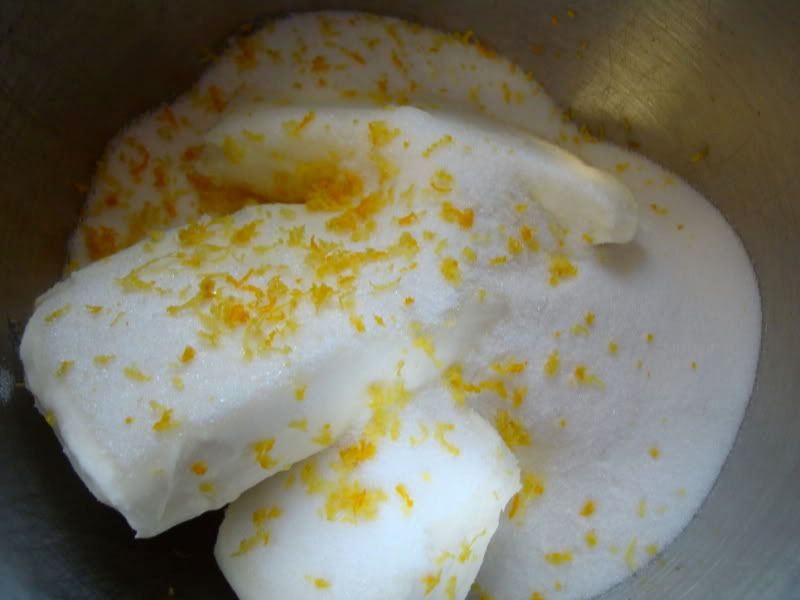
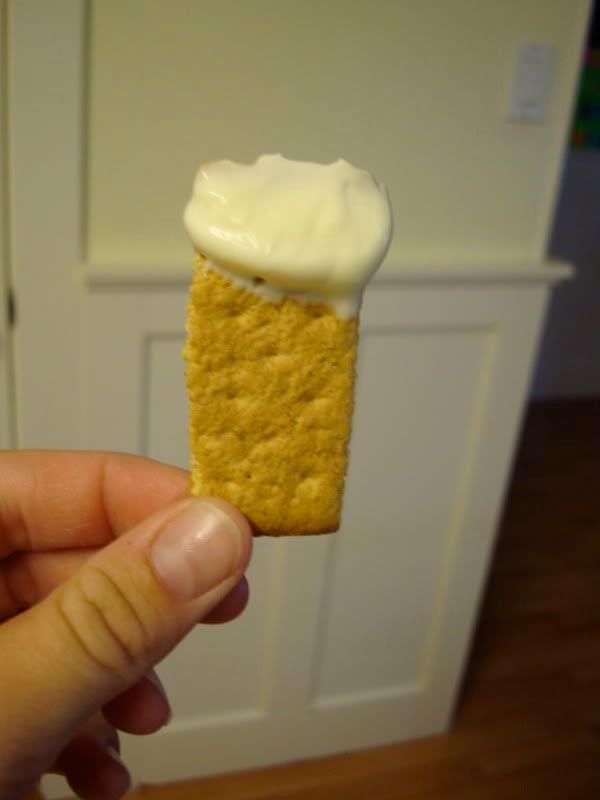
-Cream together cream cheese, flour, sugar, and zests until light and fluffy:

Photobucket


Photobucket
-Add Vanilla.
-Add eggs, and yolks, one at a time.
-Scrape down bowl between eggs/yolks to be sure there are no stripes of unmixed cream cheese in there.
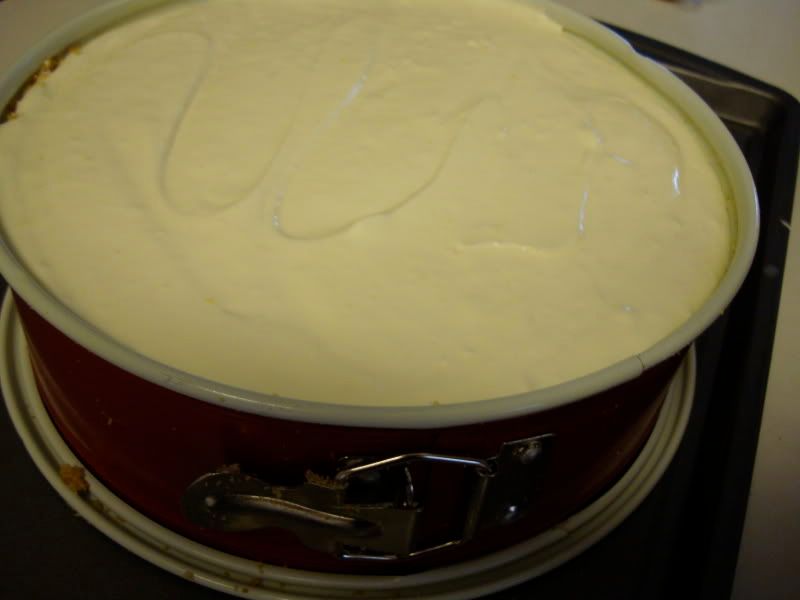
-Pour into springform pan.

Photobucket

-I had a ton of batter left over that just wouldn't fit in my springform pan. And you just KNOW I couldn't let that goodness go to waste. So, if you happen to have some leftover batter, and some left over graham crackers, this is a very good way to make use of them (recycle, recycle!):

Photobucket

-Place springform pan on cookie sheet with lip in order to catch any drips.
-Brown at 550* for 5-10 minutes
-Turn down oven temperature to 200* (I left my oven door open for about 5 minutes to reduce the temperature), and bake for about 1 hour.
-Note: even when done, your cheesecake will still jiggle. The top will be firm to the touch when done, but will still jiggle, all in one piece, like Jello, when done. So don't leave it in there until it's not moving at all, or it will be overdone.
-Allow cheesecake to cool completely on a baking rack before placing in refrigerator.

Photobucket
-Note: I have NEVER had a cheesecake not crack. Water bath, or no water bath. Just tell your type-A self to stuff it, and enjoy the goodness without worrying about the cracks. Just call it "homey, and old-fashioned," and all will be right with the world. Or, just pour the blackberry sauce all over the top, and no one will be the wiser!
-Chill in your fridge for 6 hours before serving. If you can wait that long. If not, I won't tell!

Photobucket


Blackberry Sauce

Hallelujahs: Fast, easy, only three ingredients, delicious
Hellfires:None.


2 packages of blackberries (mine were 12 oz each)
A couple of handfuls of sugar (to taste!)
5 or 6 tablespoons of water


-Place all ingredients in a saucepan, and bring to a boil.

Photobucket

-Allow to boil (while stirring) for about 4-5 minutes.
-Remove from heat, and serve.
    -Note, the original PW recipe calls for completely cooling the blackberry sauce, but really, who can wait for that?  I mean, I suppose if you were efficient and made it right after placing the cheesecake in the fridge, you'd have no trouble.  But, if you're a procrastinator like me, and you make it after the cheescake's ready, and 5 hungry faces are staring at it, like ravenous wolves, you can go ahead, and serve it hot, right off the stove.  Think of it like hot fudge on ice cream.
     -Oh, and speaking of ice cream, if you have some of this leftover (of which I had a TON), save it, place it in the refrigerator, and pour it over your ice cream, when you need a treat later in the week.  Because there won't be any cheesecake left over.  At all.  It's just too good.

Photobucket


Original Recipes can be found at: http://smittenkitchen.com/2010/04/new-york-cheesecake/ and http://thepioneerwoman.com/cooking/2010/07/blackberry-cheesecake/
Sunday, July 11, 2010

Eat out at home: Chicken Alfredo, and Macaroni Grill Rosemary Bread

Photobucket


I know, the title of this thread is a bit of an oxymoron. How can one eat out, at home? I'm here to tell you that you can enjoy food that is delicious, and just as good as your favorite chain restaurant right in your own kitchen, and without a significant amount of fuss, either.

These ideas were born of The Husband and I's affinity for eating out, and our bank statement's aversion to it. Adding it all up one month, we were simply shocked to find out how much money we were spending on eating out. Now don't get me wrong, a nice dinner date, with your loved one is an absolute must in my book, but we were eating out (with the kids in tow) at least 3-4 times per week, adding up to a staggering $500-$600 per month. Ouch, right? So, I decided to find a way to enjoy some of our favorite restaurant meals, at home, and the amount of money we're saving is insane!

The first recipe that we've pretty much perfected was a weekly staple in our house prior to the big switch; macaroni grill chicken alfredo, along with their absolutely to die for rosemary bread.

The sauce recipe is actually the first recipe that I got from one of my in-laws, back when my husband and I were still engaged. We went up to Idaho to visit The Husband's brother, Dayne, and his wife, Sarah made us some alfredo sauce that rivaled any restaurant. This is no easy task, as I've tried just about every brand of jarred alfredo sauce on the store shelves, and found them to be downright disgusting. I won't even use them in a pinch. So, a big thank you to Sarah, for jump-starting this recipe!  Sarah is also famous, in The Family, for her salsa, and italian bread recipes!

Photobucket

Now, I do have to apologize in advance that I don't have any "finished product" photos of the delicious rosemary bread. I decided to set the bowl outside to rise, since it was nice and warm, and forgot all about it for several hours. The wind blew off the towel, and I was left with a crusty, nasty mess. So, I couldn't actually bake it. What can I say, we all make mistakes! But, take my word for it, this bread is delicious, and it goes so perfectly with the chicken alfredo that I just didn't want to skip it until I had time to make it again. Now, I used to be VERY intimidating by bread making. All those artisan loaves just struck fear into me, and visions of sore arms after hours of kneading. But this bread could not be more simple. Easy to make in either your Kitchen-Aid, Bosch, or other electric mixer, meaning NO HAND KNEADING. Easy=beautiful for me!

And, for a bit of housekeeping, I realized that it would be very difficult for the readers of this blog to print out the recipes, due to the large amount of photos on each post. As it stands right now, I have no clue how to increase the print functionality of this website. But, I promise to learn, and have a better solution for the future. Until then, please bear with me! I may just include a text-only version of each recipe below the photo-laden part until I come up with a more permanent solution.


Chicken Alfredo

Hallelujahs: Delicious, and much cheaper than eating out, easy to make
Hellfires: Honestly, not many. It does take about 45 minutes-1 hour, which is sort of time consuming, but well worth the wait!


1 lb of boneless skinless chicken breasts/tenderloins
1/4-1/2 cup Kraft Tuscan House Italian Salad Dressing
Italian Seasoning, Garlic Powder, Salt, Pepper, and Onion Powder to taste
1 pint of heavy cream, or half & half
1 stick of butter
2 tablespoons of cream cheese (1 oz) 2-4 tsp garlic powder
A Pinch or Two of Parsley flakes (dried or fresh)
Salt, Pepper to Taste
1/2-3/4 cup Parmesan Cheese (NOT the stuff in the green canister)


-Boil a large pot of water/salt for your pasta. I usually prefer bowtie (farfalle for you high fallutin' types) noodles for this recipe, but I didn't have any, and I had a bunch of egg noodles, which worked just fine.
-Cook pasta according to package directions.
-Meanwhile, cut your chicken tenderloins/breasts into small pieces. I just use the frozen bag of chicken tenderloins from Costco, because they are cheap, and work just fine for this. Plus, I always have plenty of them on hand.
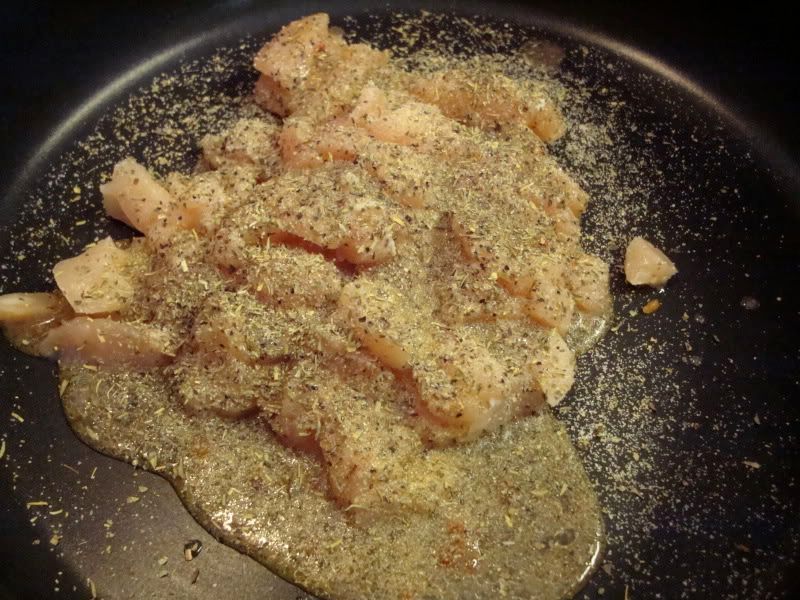
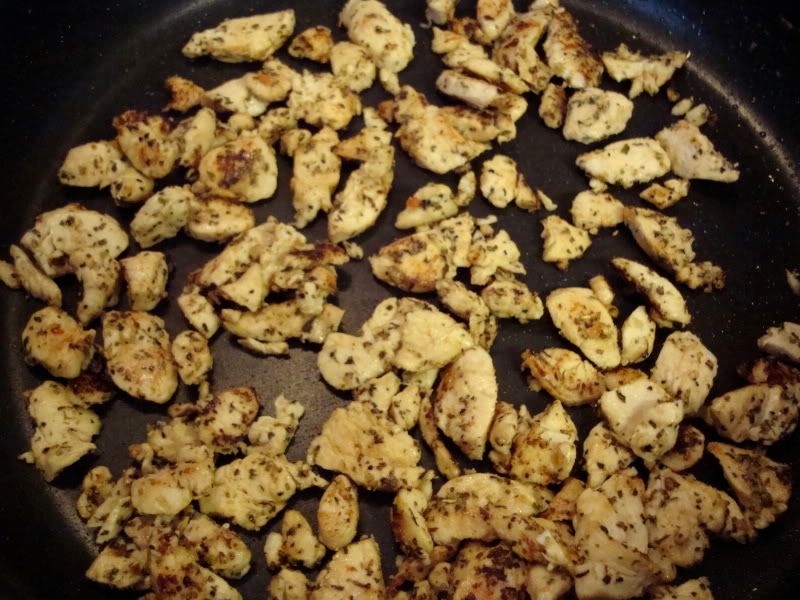
-Add them to your deep frying pan, along with the salad dressing, and seasonings. Stir it around, to get everything well incorporated, and turn burner on med-high. Cover, and begin sauce.
Photobucket
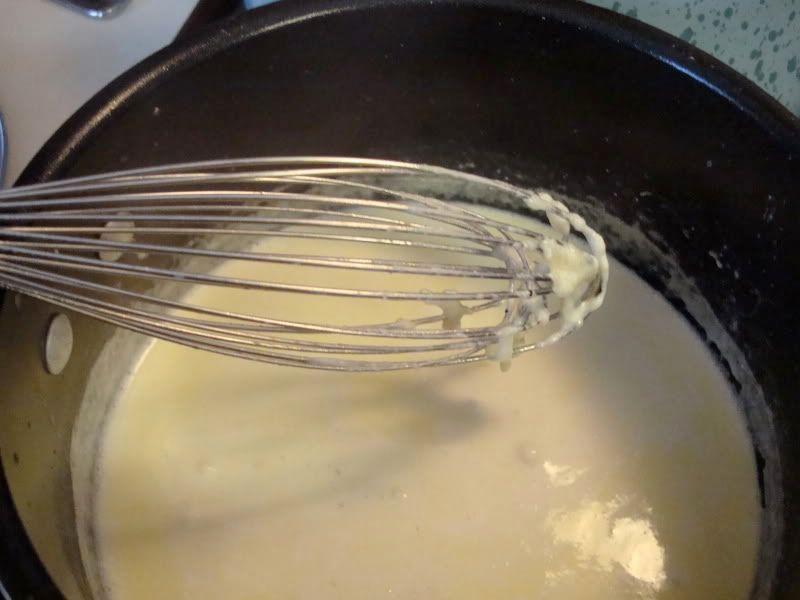
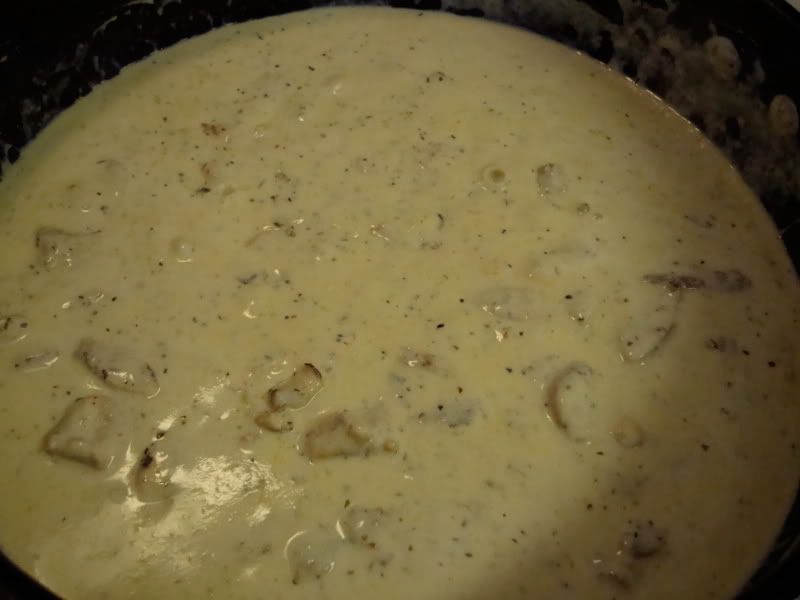
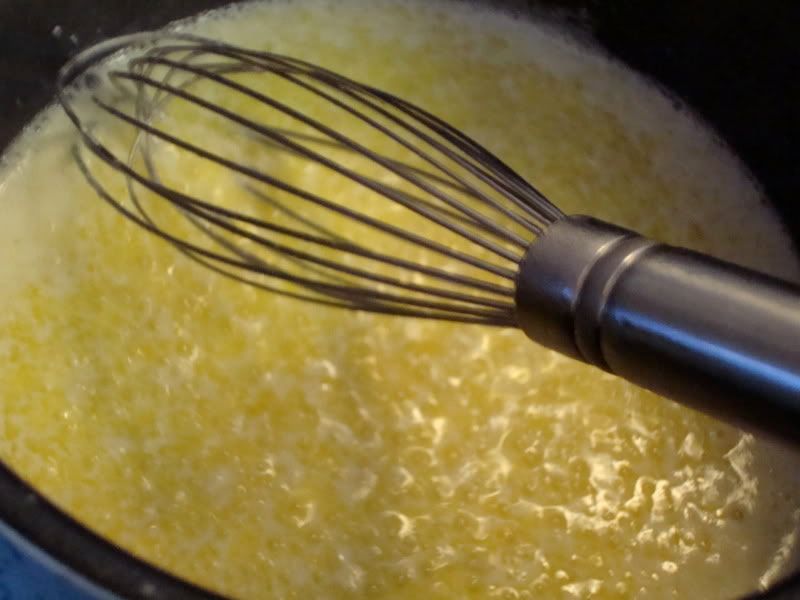
-In a medium sized saucepan, combine butter, and cream cheese, and melt over low-medium heat, whisking occasionally.
Photobucket
-Once they melt together, whisk in the heavy cream, or half and half.
-Note, I am usually skeptical about using anything but heavy cream in recipes. I mean, lower calories are great, and all, but if it also equals lower taste, then it's just not worth it to me. But, in this case, I happened to have a bunch of half & half left over from a cake recipe, and it tasted every bit as good as with the heavy cream. So feel free to use whatever you have on hand. Except for milk, that would be too thin for my liking.
Photobucket
-Reduce heat to low, and simmer the sauce for about 10 minutes or so. It's really important here to cook this on low. If you heat it too high, the emulsification will "break," and your butter will separate from the half & half.
-Add the garlic powder (we LOVE garlic, so I add a LOT), salt, and pepper, and allow to cook for another 5 minutes on low heat.
-I usually add a couple of pinches of parsley here, too, but I forgot to throw it in there in these photos. If you don't have it, don't sweat it.
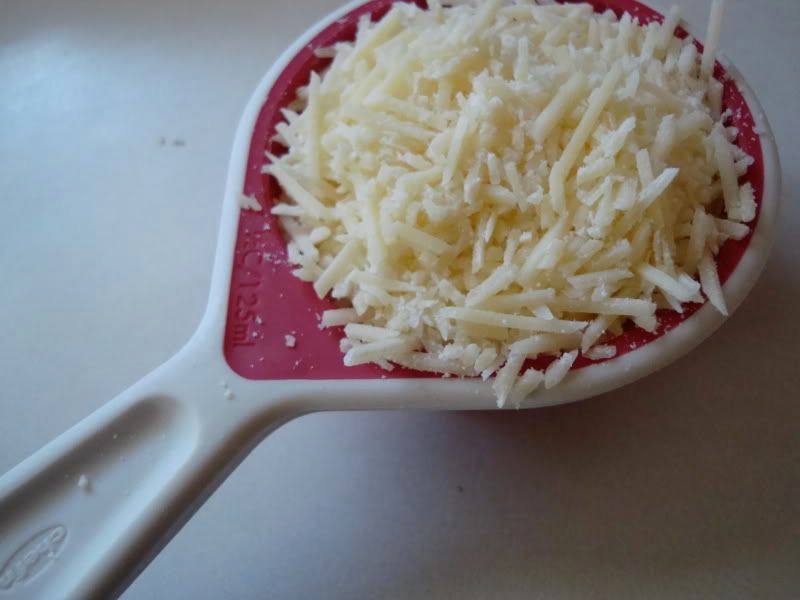
-Add your parmesan cheese. Please, use shredded parmesan cheese, either fresh or from the bag, but whatever you do, do not use the grated stuff in the green canister. It lends a very grainy texture to the sauce, which is not pleasing. Start with 1/2 cup, and taste the sauce, before adding all 3/4 cup. Just keep adding until you get the texture/taste you prefer. You'll need to whisk vigorously to get it all to combine.

Photobucket

Photobucket

-Meanwhile, when your chicken is cooked through, remove the lid, and begin to brown it, getting some nice color on all sides. I actually prefer NOT to use a non-stick pan for this part, so that you get all kinds of nice, brown bits on the bottom of the pan for the sauce to pick up. The non-stick pan I used here did not lend itself to those little lovelies, and I missed them!

Photobucket

-Pour the sauce into your pan with the chicken, and stir, over low/medium heat, scraping up all the brown bits on the bottom of your pan. This should change the color of your sauce, to a deeper blond-like color.

Photobucket

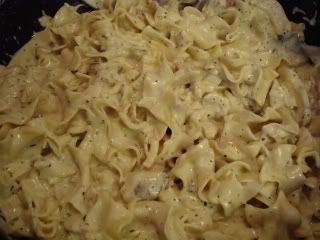
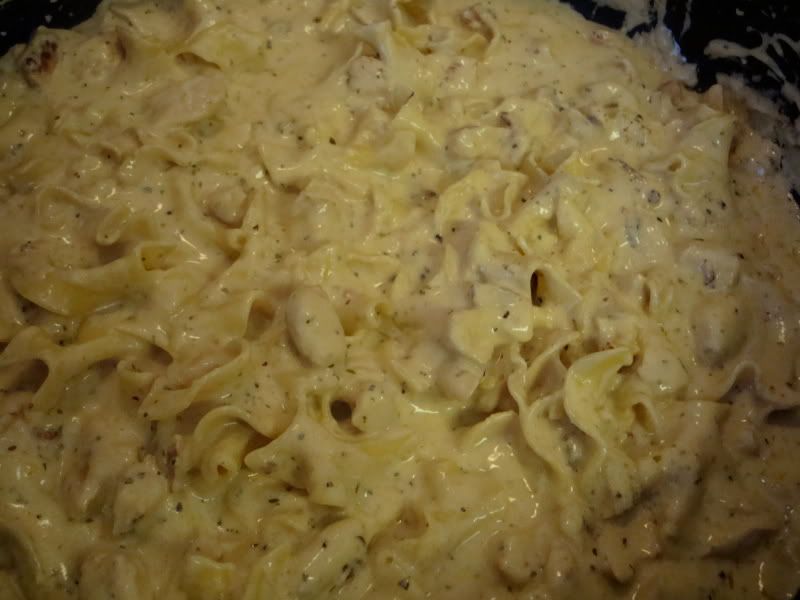
-After draining your pasta, add it to the sauce/chicken mixture, and stir until all noodles are combined.

Photobucket


Macaroni Grill Rosemary Bread

Hallelujahs: Delicious, and about as close to the real thing as you can get, REALLY simple, and hard to mess up!
Hellfires: Time consuming (you have to wait for it to rise), and it doesn't really store well. I tried to double the recipe, and save the extra loaves in Ziploc bags once, and they just got soggy, so you really need to eat them the day you make them.

1 tablespoon yeast
1 tablespoon sugar
1 cup warm water
2 1/2 cups bread flour
1 tsp salt
2 tablespoons rosemary
2 tablespoons butter


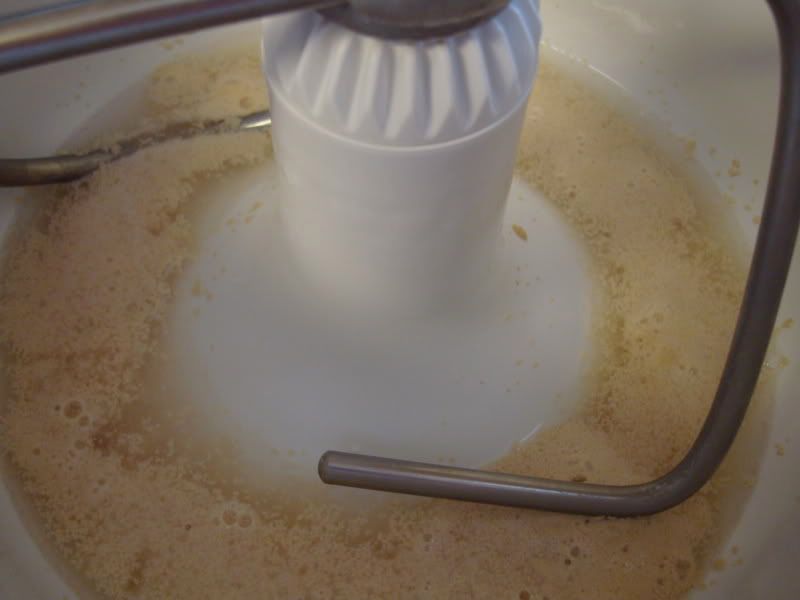
-Place your water, sugar, and yeast in your mixer bowl, and allow to proof (just let it sit there!) for 5-10 minutes until it's all foamy, and bubbly like so:

-And for a random, FYI, the science, and chemistry of how yeast ferments/respires is actually pretty fascinating. It's actually a living organism you're putting into your bread, and then killing when you bake it! The "holes" in your bread are actually the spaces where the yeast used to reside, fermenting the sugars, and creating Carbon Dioxide (bubbles). If you ever have time, look it up, it's pretty cool!

Photobucket

-After the yeast has gotten nice, and foamy, add your butter, flour, and rosemary. I used fresh rosemary this time, because I had a TON of it in my garden. It smelled DIVINE! But, dried rosemary works well here, too.

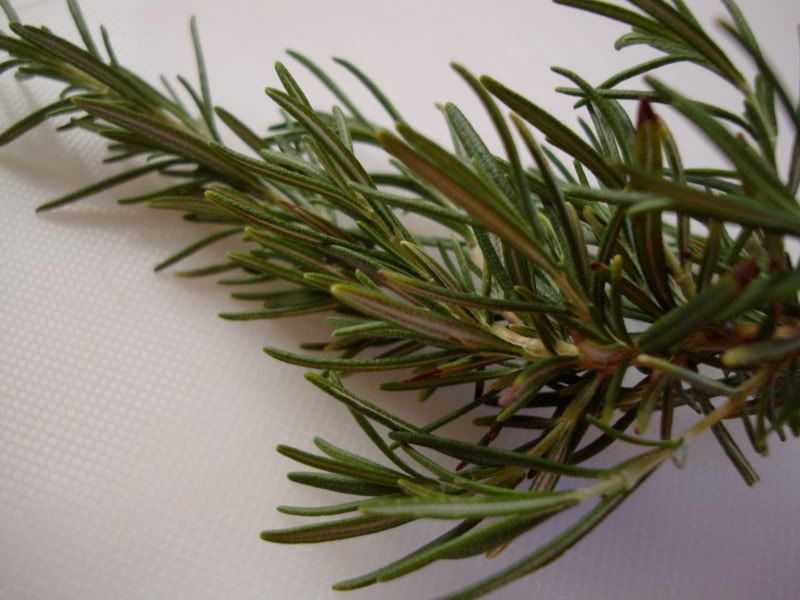
Rosemary (kind of looks, and smells, like a fresh Christmas tree, don't you think?)

Photobucket

Photobucket

-Turn on your kitchen appliance, and allow it to come together until it is smooth, and elastic. In my Bosch, at high speed, this takes about 4-5 minutes. It is going to be a very sticky bread. If it's too sticky, add some flour, but the less flour you use, the better the bread will be.

The Bosch in action:


-Once the dough has been sufficiently kneaded, place into oiled bowl, cover with plastic wrap (this works better for me than a towel), and set in warm, dry place to rise.
-Allow it to rise until it has doubled in size, about 1.5 hours.
-Preheat oven to 375*
-Once it has risen, punch it down, which means exactly what it says. Ball up your fist, pull it back, and take out all your frustrations on that poor little loaf of bread.
-Separate into two halves, and shape into balls.
-Add some additional rosemary on the top of each loaf, and press it lightly into the dough.
-Place on greased baking sheet, and allow to rise for an additional 45 minutes.
-Bake for 15-20 minutes until nice, and golden brown on top.
-As soon as you take it out of the oven, smear it with butter, and sprinkle with coarse Kosher salt.
-Eat immediately, dipping into alfredo sauce, Yum!

Original bread recipe can be found at: http://www.recipezaar.com/recipe/Romanos-Macaroni-Grill-Rosemary-Bread-64446