Tuesday, December 28, 2010

A Tip for Tuesday: {Menu Planning}

In honor of my love for alliteration, and for my resolution to renew my love for menu planning, I'm sharing an incredible kitchen tip with you this Tuesday afternoon!

Is saving money on your list of resolutions for the New Year?  I'm willing to bet that it's near the top for many of us this year.  I'm also willing to be that I'm not the only one who would rather have a root canal than sit down and clip coupons, or type up a strict budget.  All that extra thinking about money just makes me want to throw my hands up and QUIT!  How about a money saving tip that won't have you running for the dentist's office, begging him to give you a root canal, sans novacaine?

The absolute easiest way I've found to save money (a significant amount of money, too, not just pennies) is by planning a weekly (or bi-weekly) menu.  When we were first married, like most newlyweds, we were living on a shoestring budget.  But, like most young, 20-somethings, we also liked food.  A lot.  I noticed that our grocery bills were eating up more of our monthly budget than any other item on the list.  And yet, it didn't seem like we had that much food at all.  In fact, we were spending almost as much on eating out as we were on groceries. 

In an effort to control our ever-inflating costs, and to decrease the amount of take-out we were grabbing, I decided to make a list of all the meals I wanted to cook for 1 week straight.  I thought that if I had the meals planned out, and ingredients purchased in advance, we'd be less likely to splurge on pizza or Chinese simply because we couldn't think of anything for dinner.  What I found was that this 20 minutes of planning at the beginning of the week not only slowed down our consumption of take-out (and was no doubt singlehandedly responsible for profit losses at every fast food join in a 5 mile radius), but it decreased our grocery bills by almost half.  Yes, half, as in 50%.

It turns out, that just randomly picking up items you think you'll need as you wander up and down the vast aisles (especially while hungry!) is not only inefficient, but EXPENSIVE!  I was picking up tons of items I didn't need, and forgetting many that I did, which would lead to extra trips back to the store throughout the week.  And, really, who goes into the store for one thing, and comes out with only that one item?  Not me.  I went in for eggs, and came out with $50 worth of stuff we might need, or that just plain looked good.  I was buying items I already had, because I hadn't taken the time to inventory my cupboards, or the recipes I would be cooking.  Cutting out these extra trips cut down our grocery bills, our take-out bills, and reduced the amount of food we were throwing away each week.

So, I'm going to walk you through the process, so that you, too, can see some extra money in the bank each week.  Though, I take no responsibility for the failure of any nearby restaurants when you see how successful this method is!

How to Save Money by Planning Your Meals!

First, go through your recipes, cookbooks, favorite food blogs, and any other source you might use to think of the recipes you'd like to make this week.  I usually do this on a bi-weekly basis, so I only have to do this step once every 2 weeks.

Then, make a list of those recipes, and the ingredients that you need for each of them.  

Go into your kitchen, and take stock of what you have, crossing out any ingredients you already have at home, so you won't buy them again at the store.

Add to your list any extras you might need: garbage bags, ziplocs, shampoo, specific snacks, etc.  You want EVERYTHING on your list.  Go through the rest of your house if you have to, the more accurate your list is, the less likely you are to need to make that dreaded second trip, where your one bottle of toothpaste will run you $50 in junk!

Head to the store, and STICK TO YOUR LIST.  Avoid the temptation of picking up things that aren't on the list because you "might need them later."  In my experience, this leads to pantries packed full of items that will never see the light of day.

Once you are home, post your list of dinners on the fridge, so you can refer to it when the terror-inducing "what am I going to cook tonight?" moment hits.  Some people get fancy and list ahead of time exactly what night they are making which dinner.  But, that's too scary for me.  I need a little wiggle room.  What if I don't want chicken on the 13th?  What if I want beef?  If I want beef, I'm going to have beef, dangit!  I just post the list, with no dates, and make whatever sounds good to me that night.  Having my choices narrowed down to 7 (or 14 if you do bi-weekly lists) makes all the difference in the world.

Now, do NOT go back to the store until your list of dinners is done.  If you run out of something, put it on a whiteboard, and get it on your next trip.  Unless it's something you absolutely HAVE to have.  The only thing I will go back to the store for is milk, for the kids.  Everything else waits until my next designated shopping day.  This way, I avoid all those extra trips, and costly extra junk that finds its way into my cart during each trip.

It looks like a lot of work written down here like this, but it's really not!  It also makes your trip to the store MUCH faster.  Instead of wandering the aisles, like a lost puppy, thinking about what you might need to pick up, you can walk confidently, and briskly into each one, picking up only what's on your list.  And if you choose to keep this little morsel to yourself, and take the extra time to hit Starbucks for a quiet cup of coffee or piece of coffee cake in peace, who am I to tell your husband on you?

In keeping honest with you guys, I do need to admit that I usually leave 1-2 nights per week open for leftovers, or dinners out.  What?  I said this saved me money, not that I'm perfect, or that I can resist the perfection that is someone waiting on ME for a change every once in a while.

So, to get you started on this Tuesday's Tip, here is my meal plan for this week.  I'll post the recipes as I make them!

{Godbold Family Meal Plan for December 28-January 11}

Chicken 'n Dumplins
Ranch Pork Chops and Perfect Potatoes Au Gratin
Balsamic Glazed Pork Chops and Mashed Potatoes
Rigatoni and Homemade Meatballs
Homemade Beef and Vegetable Soup
Super Simple Chicken Soft Tacos
Sarah's Lemon Pepper Chicken and Rice
Potato Cheddar Soup
PW Pot Roast
PW's Penne a la Betsy (with chicken instead of shrimp)
Steak and Potato Wedges

So, there you have it!  Feel free to take some of these recipes, and use them to create your own weekly meal plan.  Then, sit back and watch your grocery bills shrink!  Think of all the fun responsible things you can do with the money you save!

Saturday, December 18, 2010

{Family Christmas Dinner}: Menu

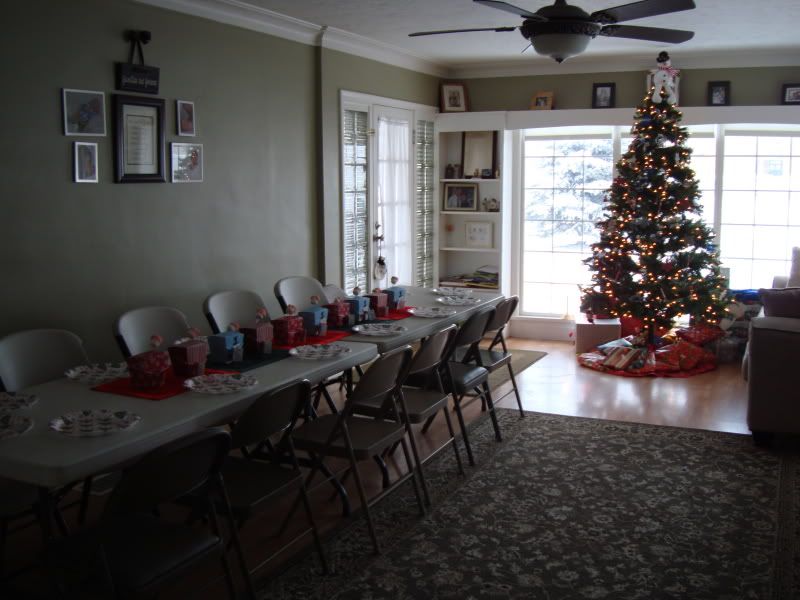
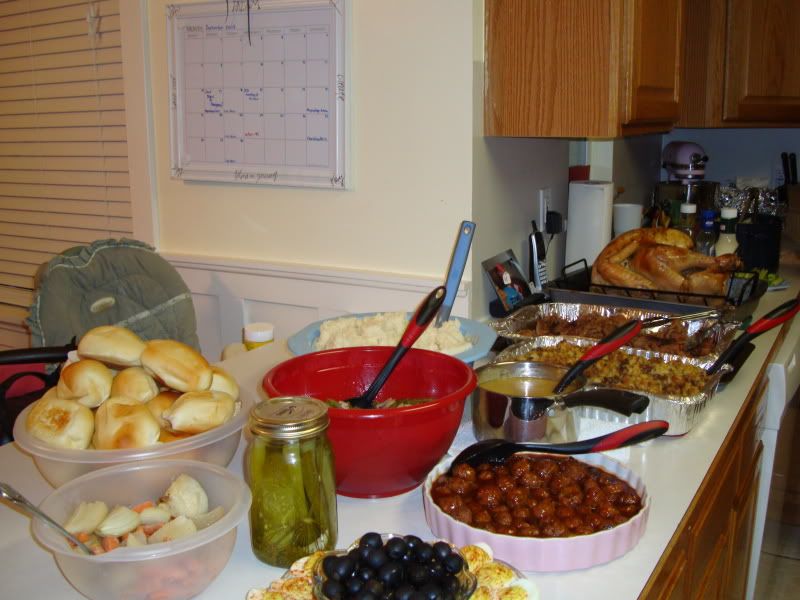
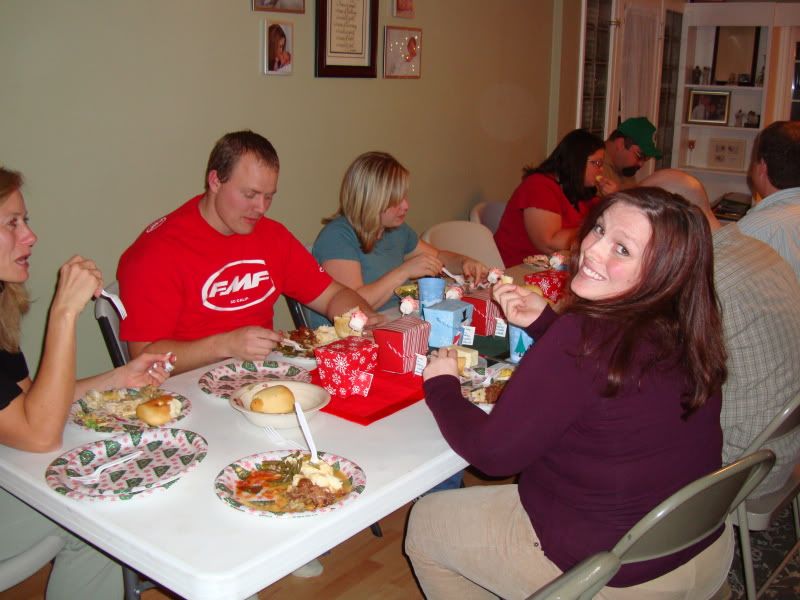
Each year I host our extended family's Christmas dinner at my house. It's a little bit of a tight squeeze to fit 30 people in our little home, but I really LOVE doing it. I get to show off my decorations, make a bunch of delicious food, and enjoy the company of the best family in the world! I really did luck out in the in-law department.

Here are a couple of photos from Christmas dinners over the past couple of years:

Photobucket

Photobucket

Photobucket

I thought I'd take a minute to share our menu for this year's feast with you guys! After the festivities are done, I promise to post the best recipes here for you all to use! Also, today was our sisters' pie day, which will have its own post this week, along with LOTS of great recipes to share! Kelley's Kitchen Revival is alive and well!!


2010 Godbold Family Christmas Dinner Menu


Appetizers:

Deviled Eggs
Olives
Salad
Vegetable Tray


Main Dishes:

Roasted Turkey
Smoked Brisket


Sides:

Sage Sausage Stuffing (or Dressing, if you prefer!)
Parmesan Creamed Spinach
Soul Sweet 'Taters
Golden Corral Dinner Rolls


Desserts:

Chocolate Pudding Pie
Banana Cream Pie
French Silk Pie
Peach Pie
Pumpkin Pie
Cranberry Pudding

Thursday, December 9, 2010

Cookie Craze Day 4: {Pecan Tarts}

Photobucket
Before I get to the good stuff, I just wanted to take a minute to thank you for your patience! I know I didn't get to post nearly as much as I wanted in November, but an interesting tidbit you might not know about me is that I am a serious procrastinator. I made the (poor) choice to leave my online classes for the end of the semester. Basically, I spent 2.5 weeks in Ohio, enjoying my family and friends, and doing absolutely NO schoolwork. So, I pretty much crammed an entire semester worth of work into 5 days...Needless to say, Shelby hasn't seen much action! But, now, it's all behind me, and I can get back to what I do best.

Photobucket

Do you see those babies up there? Those are the Holy Grail of cooking in my world. They are my Mom's recipe books, and have been a part of my cooking life for as long as I can remember. In fact, the white one, with the linoleum cover is even older than I am! My Mom made it for a home economics project when she was in 7th grade!!! That would be 1970, my friends! It's lasted this long because there are some really great little diddies inside, including these fabulous pecan tarts I'm about to feature today. My nephew, Josh, who is currently spending 2 years in Guatemala serving a mission for the LDS church, absolutely LOVES these cookies, and tells me they taste like mini pecan pies! They are always a hit at all family parties, and I promise you won't be disappointed if you make them!

Hallelujahs:Delicious, A LOT less work than an actual pecan pie
Hellfires:They do make a nice mess of your kitchen!

Pecan Tarts


Ingredients:
Dough/Crust:
1/2 lb butter (2 sticks)
6 oz cream cheese
1 1/4 cups flour

Filling:
2 eggs
1 1/3 cups brown sugar
2 tbs melted butter
1 tsp vanilla
1 cup chopped pecans


-Combine butter and cream cheese until evenly incorporated, and fluffy.
Photobucket
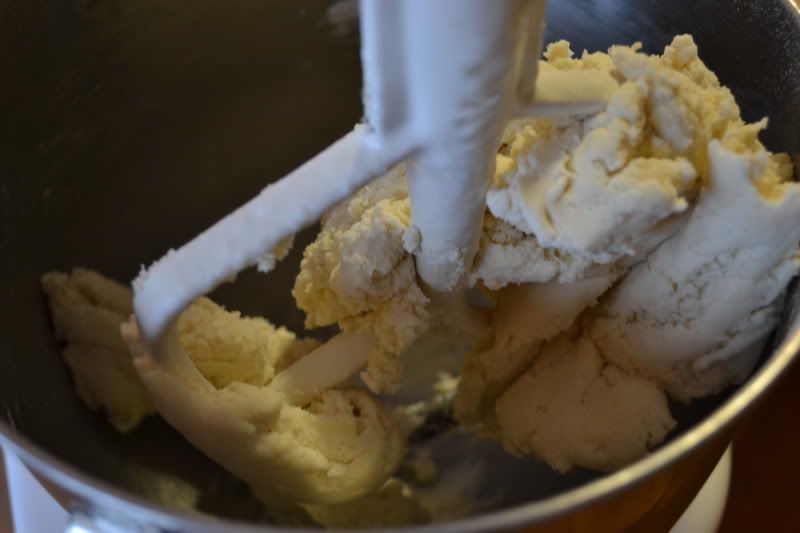
-Add flour and mix.
Photobucket
-Now the original recipe calls for this little number to be chilled for an hour before rolling, but I'm NEVER patient enough for that. To remedy it, I use COLD butter and cream cheese from the outset. If your dough is too sticky to roll, pop it in the freezer (covered) for 15 minutes and come back to it.
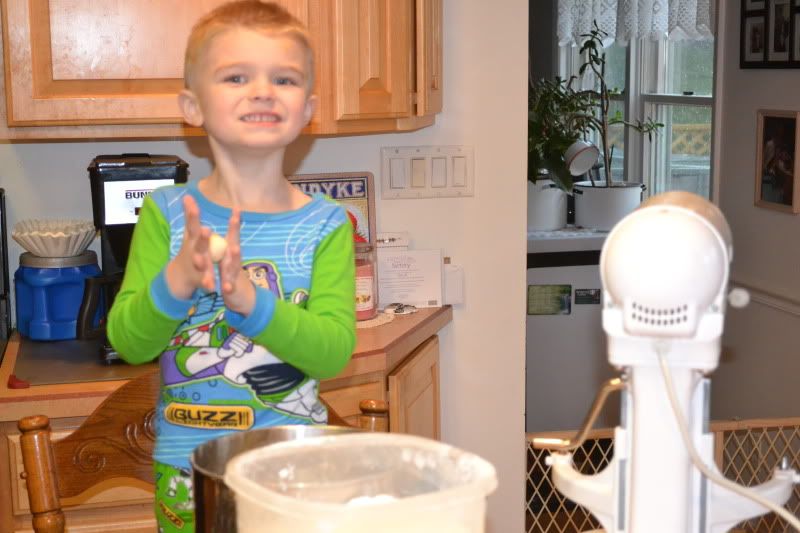
-Roll the dough into 1/2-1 inch balls, and place into tart pan. My little man LOVES to roll dough of any sort!
Photobucket
Photobucket
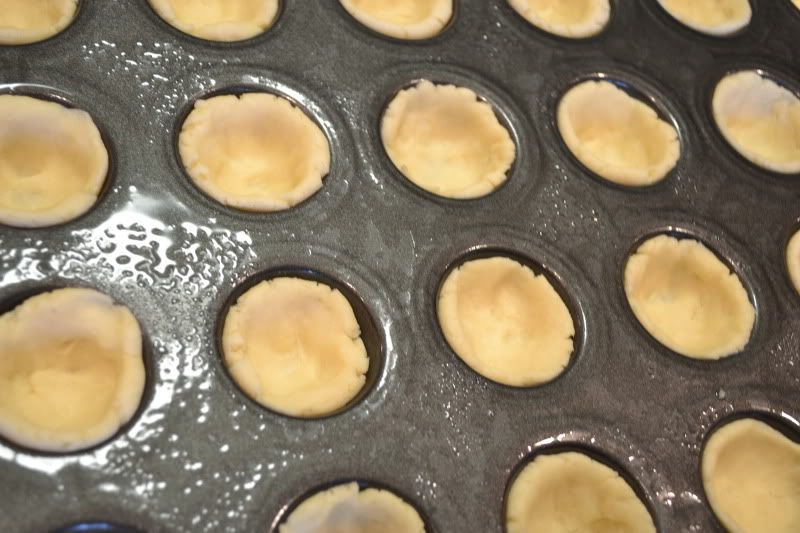
-Next, you're going to press the balls into crust shapes. At home, I have a pampered chef tart shaper that I use (it was like $2) and it makes this process go SUPER fast, but my Mom's house is LOW TECH, and she prefers her thumbs!
Photobucket
-Now, make the filling.
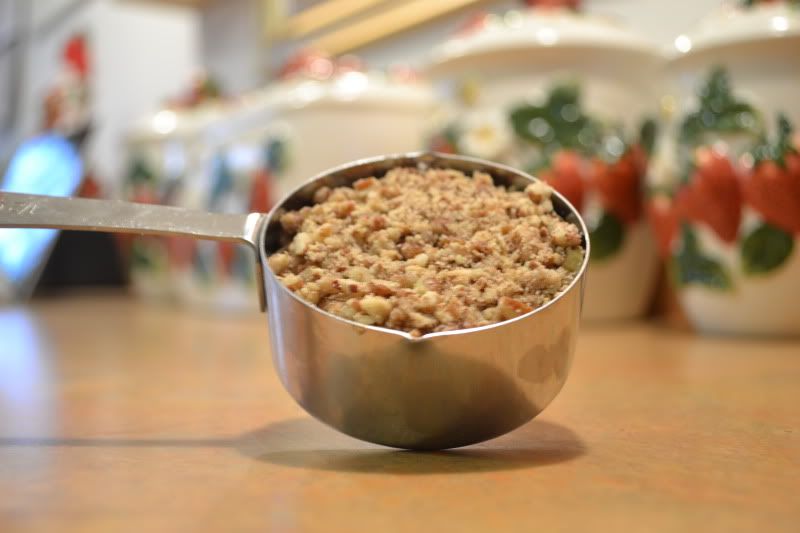
-First, you're going to chop your nuts. These should not be as fine as the consistency for the Russian Teacakes posted a few weeks ago. You want them a little bit chunkier.
-Again, at home, I'd use my magic bullet, but since my Mom prefers the LOW TECH route, we used this, which I'm pretty sure was manufactured in the 1940's!:
Photobucket
-Here's a close up of the pecans, so you can get a feel for the consistency:
Photobucket
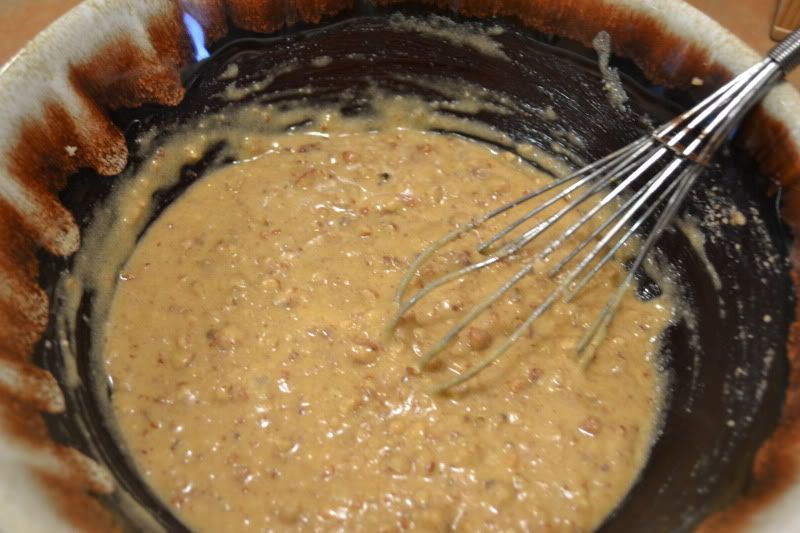
-Combine brown sugar, melted butter eggs and vanilla. Then, add nuts. In following the low tech theme, do this by hand.
Photobucket
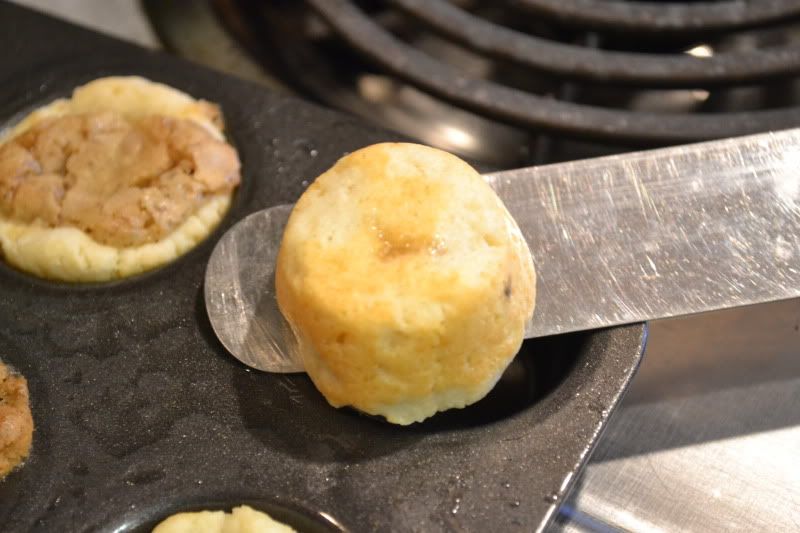
-Now, you're going to fill the tart crusts you made earlier, you want to fill them a little less than 2/3 full. If you over fill them, they will pop when you bake them.
Photobucket
-Bake for 20-30 minutes at 350*. Remove when the crusts are just barely golden brown.

-I know that's a large gap in terms of baking times, but it seems like it's different everytime I make them. So, keep an eye on them. Pull them out when the crusts are barely golden.
-Here is a close up of the bottom of the crust so you can see it. It will still be soft, but will set as it cools.
Photobucket
Photobucket
-Let them cool, and dust them with powdered sugar. If you overfilled, or if for some other mysterious reason the tops broke open, don't worry. Just top them with a pecan half or hershey's kiss, and add more powdered sugar. No one will ever be the wiser.
-Also, if you happen to have extra crust dough, I like to let Landon roll them out, add brown sugar and cinnamon, along with some Christmas sprinkles, roll 'em up, slice 'em, and bake 'em. It makes him SUPER happy to help!
Photobucket

Sunday, November 21, 2010

Cookie Craze Day 3: {Life Changing Peanut Butter Cookies}

Photobucket

Printer-Friendly Recipe


Okay, I know I'm cheating a little bit today, just linking to another recipe on the blog, but I spent last week flying cross-country by myself, with both kiddies, and have been recovering and visiting.  My Mom and I will be in the kitchen all day tomorrow, baking up a storm, and conjuring up nostalgic recipes from my Christmases past, so I promise to have several new cookies up this week.

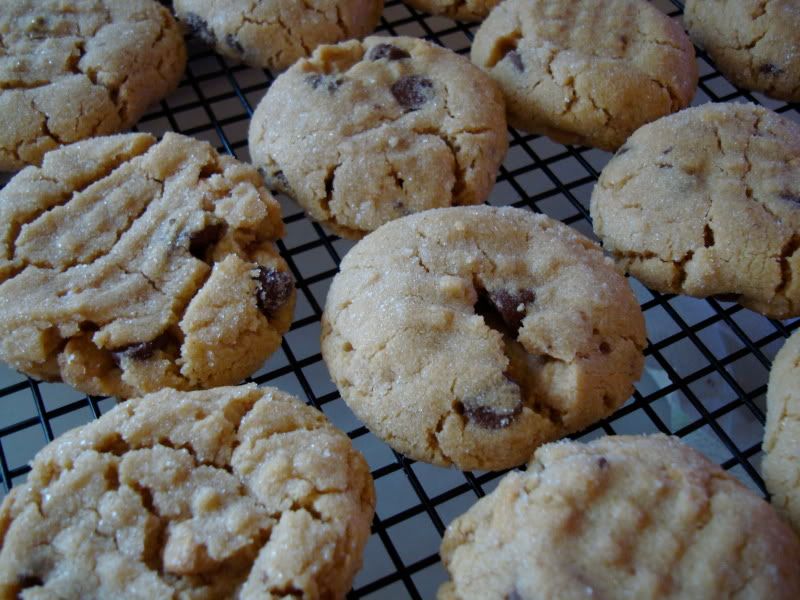
For now, revisit THIS POST for those Life-Changing Peanut Butter Cookies.  They really are that good!

Sunday, November 14, 2010

Cookie Craze Day 2: {Russian Teacakes}

Photobucket

These cookies are known by many names.  Russian Teacakes, Mexican Wedding Cookies, Snowballs, Italian Butter Nuts, and Swedish Teacakes, just to name a few.  Apparently many nations want to claim these not-too-sweet delectable bites, and no one is sure just which nation made them first!  My son has christened them "little white ball cookies," which is not only accurate,  but quite politically correct.  Maybe I've got a budding politician on my hands?   At any rate, I've always called them Russian Teacakes.  I'm not sure why that's the name that sticks with me the most, maybe because one of my closest friends from 5th grade on is Russian.  Or maybe because that's what my Mom called them in her recipe book.  Really, it doesn't matter what you call them, as long as you MAKE them!

These cookies do have nuts, specifically pecans, as one of the main ingredients.  This is important not only for those of you with allergies to nuts, but also to those who don't typically like nuts.  Personally, I can't stand nuts.  In fact, the only nut I will actually eat is a pistachio.  But, I LOVE these cookies.  I think it's because the nuts are so finely ground, they become almost a meal-like consistency, and are used sort of like a flour.  You're going to get the best essence of the nuts, without the unpleasantness of actually biting into a nut.  But, because you cannot tell by looking at them that they are full of nuts, you need to be particularly proactive if you have any family members or friends with nut allergies.  Last Christmas, we had a close call with my nephew who is allergic to nuts, and didn't realize these cookies contained them until he was about 3 cookies in.  Luckily, he has a very mild allergy, and was left with just a sore belly all night, instead of something more serious.  But, it did open my eyes a little, so if you know someone with a nut allergy, be sure to advertise the ingredients of these babies!

Also, I'm not sure if you remember THIS POST on the quintessential nature of snapping beans on the front porch, but take a second to review, and then think of the rolling of these cookies as the Christmas version of bean-snapping.  Yes, it takes a little bit of time to do, but it's repetitive and relaxing motion ushers in the Christmas season much like snapping beans on the front porch ushers in the summer season.  So, throw on some holiday music, and get rolling...literally!  Embrace it, people!

This dough is very thick, and starts out really crumbly.  So, you're REALLY going to want to do this in a stand mixer, or in a BOSCH if you have one.  If you are not lucky enough to own a Bosch, now is a really great time to start lobbying your husband Santa to put one underneath your Christmas tree.  Sexual Favors, batting my eyes always works for me, but feel free to use whichever devices you have at your disposal.  I assure you, this baby is well worth it!  So be VERY NICE this year...or maybe, be a little bit NAUGHTY!  Whatever you do, get yourself on Santa's nice list this year!

{Russian Teacakes}

Ingredients:
1 cup butter
1/2 cup powdered sugar (plus extra for dusting!)
1 tsp vanilla
2 1/4 cup self-rising flour
1/4 tsp salt
3/4 cup crushed pecans


-First, you're going to need to grind up your nuts into a meal-like consistency.  I purchase my pecans in already smashed up bits, because it's cheaper this way.  But even those aren't smashed up enough.  I still have to throw them in my Magic Bullet, and grind 'em up some more!  So, feel free to use whatever kind of pecans you have on hand, whole, halves, or pieces, because you're going to grind them up really fine.
-Important note here, you will measure the 3/4 cup AFTER you grind the nuts, not before!  I use the Magic Bullet for this task, because one of the small cups full of pecan pieces yields just the right amount of ground up nuts for this recipe.
-Place your nuts in your Magic Bullet, or Food Processor, or Chopper of any kind.
Photobucket
-Pulse your nuts until they reach a meal-like, almost pasty consistency.
Photobucket
-The nuts will now pack down just like brown sugar.  So, press them into your measuring cups just like brown sugar to get the proper amount.
Photobucket
-Place all ingredients into your mixing bowl.
Photobucket
-Mix until you've got a thick dough.  At first, it will be very powdery, and you'll be convinced it's not going to come together.  But, just as you begin to curse me for getting you into this mess, it will happen beautifully.
Photobucket
-Now, you're supposed to chill the dough for 1 hr.  This makes the dough easier to handle for rolling, but I'm almost NEVER patient enough for this step.  Sometimes, I stick it in the freezer for 15 minutes, other times, I throw it in the fridge for anywhere from 10-60 minutes, and other times still, I roll it out immediately, as is.
-After letting the dough chill (or skipping this step if you were born with a missing patience gene, like I was!), you're going to pre-heat the oven to 400*.
-Now start rolling your dough into 1/2" balls.
-Don't break out the measuring tape or anything, the actual size of the balls is not nearly as important as making sure that all of them are the SAME size.  
-Place your balls on a large cookie sheet.  These cookies don't really rise very much, so you can really cram 'em in there!
Photobucket
-Bake for 8-10 minutes, until just set.  You don't want them to get too dark on the bottom.
-You can see that I made my cookies too large (about 1"), and they cracked during baking.  But, don't worry, once they're coated in powdered sugar, you'll never see the cracks!
Photobucket
-While your cookies bake, get your dusting sugar ready.  Place powdered sugar in a bowl large enough to roll cookies in.  Just to be festive, I usually take my powdered sugar, and add a whole mess of red and green sugar to the bowl.
Photobucket
-I just stir it around with my hands, and then the cookies have a subtle hint of the season when all is said and done!
Photobucket
-You're going to roll the cookies in the powdered sugar twice. 
-You roll them the first time when they are about 3 minutes out of the oven.  You want them to still be hot, but have a couple of minutes to set.  It's important to note that during this first rolling, the cookies will be Very Delicate.   You must roll them VERY carefully, or they will break.  If one does break, just pop it in your mouth, and no one will be the wiser (except maybe your hips!).
Photobucket
-After the first rolling, you will see that the cookies are still poking through the sugar.  So, you're going to let them sit about 5 more minutes, and then roll 'em again baby!  This time, the sugar will stick even more, and they'll get that beautiful bright white color you're looking for!
Photobucket
Photobucket
-Now, you can either place them in the absolutely cutest cookie jar you can find....
Photobucket
-Or you can put them on the ugliest paper plate you can find, and give them away, so that you don't eat them all!
Photobucket
-And you should DEFINITELY go sit down, have a couple of cookies, and pretend that your sink doesn't look like this:
Photobucket

Tuesday, November 9, 2010

Cookie Craze Day 1: {Pumpkin Chocolate Chip Cookies}

Photobucket


Welcome to a new series, here at Kelley's Kitchen Revival!  Today kicks off the COOKIE CRAZE!

I don't know about the traditions at your house, but in this house, Thanksgiving Day is when we debut our trays of beautiful Christmas cookies for the first time.  It's exciting and fun, and above all, it's DELICIOUS!

I want to make sure that you are all prepared for the Cookie Craze on November 25th, and throughout the holiday season, so I will be baking (and posting!) up a storm for you!  First up, is a classically fall, and amazingly delicious cookie that we affectionately refer to as the "Chunkin' Cookie" in our family.  (A quick combo of CHocolate and pUNKIN, in case you haven't had your morning Coca-Cola, yet!).

Interestingly enough, although I absolutely adore pumpkin pie, and I'm obsessed with chocolate chip cookies, up until a few years ago, I had never even tasted a pumpkin chocolate chip cookie.  In fact, I didn't even know these beauties existed.  Lucky for me, however, my incredibly smart brother-in-law, Granger, married a beautiful and AMAZING woman, named Anne, who has become more than my sister-in-law, but also my very best friend, and who is also the brains behind of these delectable delicacies.  In fact, Anne has become so famous in The Family for these cookies, that she often wonders if we have forgotten that she knows how to cook other delicious food items (like O-Balls, and Green Bean Casserole), since these are her #1 request.

And for good reason.   These cookies embody everything that a perfect cookie should be.  For one, they are GINORMOUS (yes, it's a word...if you don't believe me, go watch Elf!).  For two, they are fluffy, and soft, and perfectly textured.  And they combine two of the very best flavors in the world, pumpkin and chocolate.  Now, if you are my awesome sister-in-law, Anne, you will choose the decadent Ghiradelli Milk Chocolate chips, that are twice the size of the regular ones.  But, if you're like me, and rotten to the core, you'll choose semi-sweet, normal-sized morsels, because you like the slight bitterness they impart.  Or, if you can be an in-di-vi-du-al, and choose any other kind of chocolate chip you prefer. Regardless of what kind of chip you prefer, one thing is certain, you MUST bake these cookies.  Join the cookie craze!

Oh, and you also MUST marvel at my beautiful, and photogenic Anners!

Anne and I at Thanksgiving Dinner, 2008

Photobucket

Perhaps what's MOST amazing is that she makes these amazing treats while chasing after two of the most beautiful baby boys you ever did see!

Photobucket

Okay, enough gushing from me, onto the part you came here for...The COOKIES!

One important note, Anne informed me that while you could theoretically use pumpkin pie spice, in place of the ones chosen here, this particular blend of spices produces a MUCH more delicious cookie.  I can't attest to the pumpkin pie spice version, though, because I know better than to mess with perfection, or to question Anne when it comes to Chunkin' Cookies!


Chunkin' Cookies


Ingredients:
2 1/4 cups of flour
1 tsp salt
1 tsp nutmeg
1 tsp allspice
1tsp cinnamon
1 tsp baking powder
1/2 tsp baking soda
1 tsp vanilla
2 eggs
1 cup melted butter
1 cup sugar
16 oz pumpkin puree
2 cups chocolate chips


-Preheat oven to 375*
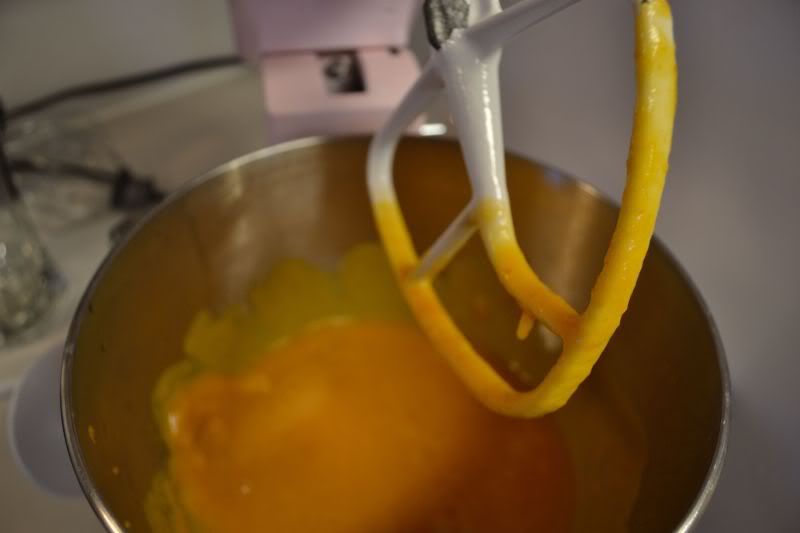
-Beat eggs, add sugar, pumpkin puree, vanilla, and melted butter.  At this point the batter will be very thin.  Much like a boxed cake mix.  It will probably also smell like baby food.  Never fear, I promise it will be delicious, and not at all reminiscent of baby food in the end!
Photobucket
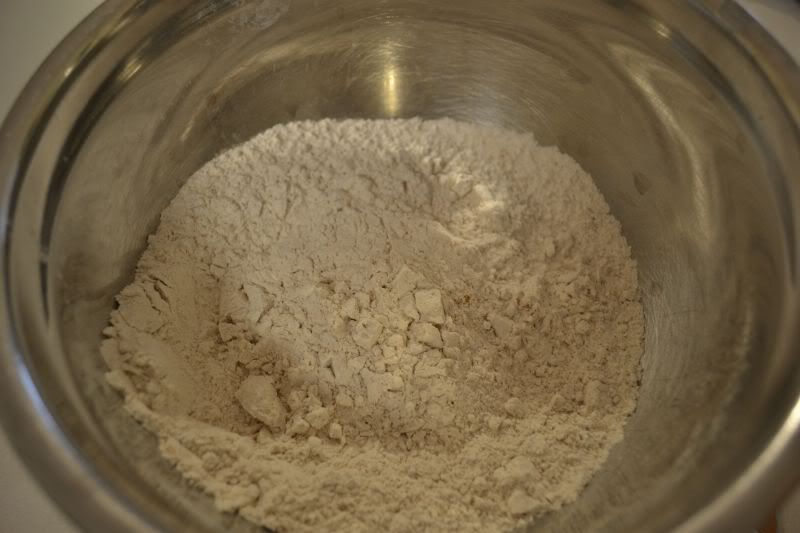
-In a separate bowl, combine flour, salt, nutmeg, all spice, cinnamon, baking soda, and baking powder.  Take a deep breath, and inhale the BEAUTIFUL scents filling the air.
Photobucket
-Add flour mixture to wet ingredients, one cup at a time.
-Even after you add your flour, this will still be very thin, compared to most cookie doughs.  Much like a from-scratch cake batter.  Do not fear, you will still churn out beautiful, fluffy chunkin cookies when it's all said and done.
Photobucket
-Add chocolate chips
Photobucket
-Use large cookie/ice cream scoop to place onto cookie sheets.  It's important you make these cookies LARGE.  I typically only fit about 6 of these on each cookie tray, instead of the usual 12.
Photobucket
-Bake for 15-20 minutes until firm, and just golden on the bottom.
-Serve, and marvel at your delicious handiwork!
Photobucket
-Congratulations, you've officially joined the cookie craze!

Monday, November 8, 2010

Customer Service is NOT dead! {Shameless Product Plug}

Okay, I know that this is a cooking blog (that has been severely lacking in the cooking, of late!), and not an infomercial, but I had such a GREAT experience with GE customer service the past two weeks, that I felt compelled to share. It is my hope that by generating some great publicity for a company providing superior customer service, other companies will be more inclined to follow suit, placing their customer satisfaction over their profits.

I haven't been shy about my love of Shelby (my GE Profile double oven range), from the day she showed up on my doorstep. But, ours has been a relationship of love and hate. I just LOVED what she was supposed to do for me, but I HATED the fact that she could rarely do it. First, the convection system wasn't working appropriately. No big deal, cute little repair guy came out and replaced the sensor on the spot. Problem solved.

But then, my cakes weren't cooking. 45 minutes later, they'd still be raw inside, but burnt on the outside. Then, when they finally did cook, they sunk in the middle. There is little in life more depressing than making the extra effort to make a cake from scratch, and seeing it fall as soon as you pull it out of the oven. So, the cute little repair man made another trek to my home. It seemed that Shelby was in need of a new control panel. The week before I was scheduled to make 2 pans of Halloween Treats for a party. But, no worries, he told me, it only takes 3 days to have the part shipped, and he could come back out, pronto.

Alas, it was not to be. When I called to check on the status, I was informed that the control panel, Shelby's heart and soul, was backordered! For two WEEKS! When I lamented to the agent on the phone about my troubles, she immediately transferred me to Julie, a fabulous customer service specialist, who searched and searched, trying to locate an extra part somewhere, anywhere, for my beloved Shelby. When she was unable to find a part, and I was beginning to think that all was lost, she uttered six words that shocked, surprised, and delighted me.

"Let's get you a new oven."

Yes, I will let that sink in for a moment. A giant corporation, an oven that was now 5 months old, and well past the 90 day return policy, absolutely no screaming or yelling from this feisty Southern gal, and still, a BRAND SPANKIN' NEW OVEN!

The entire process was wonderful from start to finish. It did take 7 days for the new oven to come in, and I did have to make my Halloween treats without the benefit of an accurate oven thermometer, but just like Julie promised, last week, I had a brand spankin' new oven delivered right to my doorstep. Not only that, but the wonderful delivery agents unhooked my old oven, took it out to the the truck, then completely unwrapped, set up, and installed the new one, making sure she worked like a charm (which she did).

I could not be happier with the customer service I received from GE, and I really felt that service so great deserved a glowing, public review. Thanks for bearing with me there!

Oh, and in case you were wondering, this glorious new oven is still going to be known as Shelby. They have the same heart, the same soul, and I think Shelby (the first) would have wanted it that way. Not to mention, I'm not creative enough to come up with another name that conveys such beauty, and marvelous engineering.

Monday, October 18, 2010

Just a link! {Country Chicken Noodle Soup}

Photobucket


Okay, before you all get your panties (or boxers?) in a bunch, wondering why there are no witty descriptions, and step-by-step photos of this recipe, let me try to paint you a picture of what the last week has been like at my house. Baby wakes up, crying, and drenched in...well, something too unsavory to put in a food blog. Let's just say it's not water. Put her in a bath, listen to her scream, and cling to you for dear life for the rest of the day. Repeat every hour. Obviously, finding time to make dinner at all has been a major feat. Taking photos of said recipe, and coming up with fun, interesting info about them is not even on the radar.

However, I have made this recipe TWICE this week. And if I make a recipe twice in the same week, you KNOW it must be good. And this soup is THAT good. It's a rich, creamy soup, not at all brothy, and is honestly the best chicken soup I've ever had in my life. I'm confident that after you make it, you will be willing to forgive the brevity of this blog post!

So, head on over to A Feathered Nest and learn how to make THIS AMAZING SOUP, along with a whole mess of really great crafts, and projects!

In case you missed it above, here is the link for the soup that will knock your socks off: Country Chicken Noodle Soup

Monday, October 11, 2010

An Un-recipe: {Super Simple Chicken Soft Tacos}

Photobucket

Text-Only Recipe


Some recipes are so simple that they almost can't even be called a recipe. Such is the case with this recipe for super simple chicken soft tacos. It's so simple, I'm dubbing it an UN-recipe.

Now, before you read the rest of this post, let me warn you, these tacos are simple, and they are unconventional. I know you are going to be scratching your heads, thinking, "gee Kelley, we really trust you and all, but how on Earth do teriyaki sauce, butter, and rotisserie chicken seasoning equal a chicken soft taco?!?!" Just have a little faith (go ahead, sing the song, I'll wait), and go with it. I promise these will be the richest, easiest chicken soft tacos you've ever made!

Oh, and as this is an original recipe (my Mom's to be exact!), there aren't really exact measurements, just instructions.

Hallelujahs:Delicious, Super Simple, Fast
Hellfires:None!

Super Simple Chicken Soft Tacos


Ingredients:
Boneless Skinless Chicken Breast Tenderloins
Teriyaki Sauce (Several turns of the pan, you want to just coat the bottom)
Butter (probably about 2 tablespoons, or so)
Rotisserie Chicken Seasoining (McCormick)


-First, defrost your chicken tenderloins. If you want to use boneless skinless chicken breasts, they will work just fine, too. Just go ahead, and cut them into strips.
-Get out a deep frying pan. Coat the bottom of the pan with teriyaki sauce. You want to have about 1/8-1/4 inch or so of teriyaki sauce in the bottom.
-Turn the burner on med-low
-Add your butter, and allow it to melt completely before placing chicken in the pan.
-Add your chicken in the pan, and sprinkle each tenderloin with McCormick Rotisserie Chicken Seasoning.
Photobucket
-I know, it looks really orange right now, and not like tacos at all. Just bear with me, I promise the end result will be worth it!
-And, in case you've never heard of Rotisserie Chicken Seasoning, I took a picture of the bottle, so you know what to be on the lookout for when you go to the grocery store.
Photobucket
-Now you're going to let the chicken simmer, uncovered for about 10 minutes or so. You want to keep the heat on the low side of medium though, if you heat too quickly, the teriyaki sauce will caramelize, and get too salty. I alway know it's time to turn the chicken when the white of the cooked side comes a little more than halfway up the sides.
-Now, flip your chicken to the other side, and sprinkle this side with the rotisserie chicken seasoning as well.
Photobucket
-Cook another 5-10 minutes, until you think the chicken is cooked through. If you want to cut into one, and make sure the juices run clear, feel free!
-Also, the sauce in the pan will gradually get a little bit thicker as you cook. This is okay, and just what we want. We just don't want it to boil, and caramelize the teriyaki sauce, burning it.
-Before taking out the chicken, flip it again, and sort of stir it all around in the sauce, coating both sides evenly.
-Now, remove the chicken to a cutting board, and cut into thin strips on the bias.
Photobucket
-After cutting, I sometimes pour some of the extra sauce over the top, and sometimes not, a lot depends on how juicy the chicken looks, and how well it soaked up the juices while cooking.
-To serve, I take my soft tortillas, and butter them on both sides.
Photobucket
-I place them in small frying pan, heated to medium/high and sort of toast each side.
Photobucket
-Then, just pile high with your favorite taco toppings! I like mine with just chicken, and cheese, but The Hubster likes them with sour cream, cheese, and tomatoes. No matter how you make it, it's going to be delicious when you eat it!
Photobucket