Tuesday, November 9, 2010

Cookie Craze Day 1: {Pumpkin Chocolate Chip Cookies}

Photobucket


Welcome to a new series, here at Kelley's Kitchen Revival!  Today kicks off the COOKIE CRAZE!

I don't know about the traditions at your house, but in this house, Thanksgiving Day is when we debut our trays of beautiful Christmas cookies for the first time.  It's exciting and fun, and above all, it's DELICIOUS!

I want to make sure that you are all prepared for the Cookie Craze on November 25th, and throughout the holiday season, so I will be baking (and posting!) up a storm for you!  First up, is a classically fall, and amazingly delicious cookie that we affectionately refer to as the "Chunkin' Cookie" in our family.  (A quick combo of CHocolate and pUNKIN, in case you haven't had your morning Coca-Cola, yet!).

Interestingly enough, although I absolutely adore pumpkin pie, and I'm obsessed with chocolate chip cookies, up until a few years ago, I had never even tasted a pumpkin chocolate chip cookie.  In fact, I didn't even know these beauties existed.  Lucky for me, however, my incredibly smart brother-in-law, Granger, married a beautiful and AMAZING woman, named Anne, who has become more than my sister-in-law, but also my very best friend, and who is also the brains behind of these delectable delicacies.  In fact, Anne has become so famous in The Family for these cookies, that she often wonders if we have forgotten that she knows how to cook other delicious food items (like O-Balls, and Green Bean Casserole), since these are her #1 request.

And for good reason.   These cookies embody everything that a perfect cookie should be.  For one, they are GINORMOUS (yes, it's a word...if you don't believe me, go watch Elf!).  For two, they are fluffy, and soft, and perfectly textured.  And they combine two of the very best flavors in the world, pumpkin and chocolate.  Now, if you are my awesome sister-in-law, Anne, you will choose the decadent Ghiradelli Milk Chocolate chips, that are twice the size of the regular ones.  But, if you're like me, and rotten to the core, you'll choose semi-sweet, normal-sized morsels, because you like the slight bitterness they impart.  Or, if you can be an in-di-vi-du-al, and choose any other kind of chocolate chip you prefer. Regardless of what kind of chip you prefer, one thing is certain, you MUST bake these cookies.  Join the cookie craze!

Oh, and you also MUST marvel at my beautiful, and photogenic Anners!

Anne and I at Thanksgiving Dinner, 2008

Photobucket

Perhaps what's MOST amazing is that she makes these amazing treats while chasing after two of the most beautiful baby boys you ever did see!

Photobucket

Okay, enough gushing from me, onto the part you came here for...The COOKIES!

One important note, Anne informed me that while you could theoretically use pumpkin pie spice, in place of the ones chosen here, this particular blend of spices produces a MUCH more delicious cookie.  I can't attest to the pumpkin pie spice version, though, because I know better than to mess with perfection, or to question Anne when it comes to Chunkin' Cookies!


Chunkin' Cookies


Ingredients:
2 1/4 cups of flour
1 tsp salt
1 tsp nutmeg
1 tsp allspice
1tsp cinnamon
1 tsp baking powder
1/2 tsp baking soda
1 tsp vanilla
2 eggs
1 cup melted butter
1 cup sugar
16 oz pumpkin puree
2 cups chocolate chips


-Preheat oven to 375*
-Beat eggs, add sugar, pumpkin puree, vanilla, and melted butter.  At this point the batter will be very thin.  Much like a boxed cake mix.  It will probably also smell like baby food.  Never fear, I promise it will be delicious, and not at all reminiscent of baby food in the end!
Photobucket
-In a separate bowl, combine flour, salt, nutmeg, all spice, cinnamon, baking soda, and baking powder.  Take a deep breath, and inhale the BEAUTIFUL scents filling the air.
Photobucket
-Add flour mixture to wet ingredients, one cup at a time.
-Even after you add your flour, this will still be very thin, compared to most cookie doughs.  Much like a from-scratch cake batter.  Do not fear, you will still churn out beautiful, fluffy chunkin cookies when it's all said and done.
Photobucket
-Add chocolate chips
Photobucket
-Use large cookie/ice cream scoop to place onto cookie sheets.  It's important you make these cookies LARGE.  I typically only fit about 6 of these on each cookie tray, instead of the usual 12.
Photobucket
-Bake for 15-20 minutes until firm, and just golden on the bottom.
-Serve, and marvel at your delicious handiwork!
Photobucket
-Congratulations, you've officially joined the cookie craze!

Monday, November 8, 2010

Customer Service is NOT dead! {Shameless Product Plug}

Okay, I know that this is a cooking blog (that has been severely lacking in the cooking, of late!), and not an infomercial, but I had such a GREAT experience with GE customer service the past two weeks, that I felt compelled to share. It is my hope that by generating some great publicity for a company providing superior customer service, other companies will be more inclined to follow suit, placing their customer satisfaction over their profits.

I haven't been shy about my love of Shelby (my GE Profile double oven range), from the day she showed up on my doorstep. But, ours has been a relationship of love and hate. I just LOVED what she was supposed to do for me, but I HATED the fact that she could rarely do it. First, the convection system wasn't working appropriately. No big deal, cute little repair guy came out and replaced the sensor on the spot. Problem solved.

But then, my cakes weren't cooking. 45 minutes later, they'd still be raw inside, but burnt on the outside. Then, when they finally did cook, they sunk in the middle. There is little in life more depressing than making the extra effort to make a cake from scratch, and seeing it fall as soon as you pull it out of the oven. So, the cute little repair man made another trek to my home. It seemed that Shelby was in need of a new control panel. The week before I was scheduled to make 2 pans of Halloween Treats for a party. But, no worries, he told me, it only takes 3 days to have the part shipped, and he could come back out, pronto.

Alas, it was not to be. When I called to check on the status, I was informed that the control panel, Shelby's heart and soul, was backordered! For two WEEKS! When I lamented to the agent on the phone about my troubles, she immediately transferred me to Julie, a fabulous customer service specialist, who searched and searched, trying to locate an extra part somewhere, anywhere, for my beloved Shelby. When she was unable to find a part, and I was beginning to think that all was lost, she uttered six words that shocked, surprised, and delighted me.

"Let's get you a new oven."

Yes, I will let that sink in for a moment. A giant corporation, an oven that was now 5 months old, and well past the 90 day return policy, absolutely no screaming or yelling from this feisty Southern gal, and still, a BRAND SPANKIN' NEW OVEN!

The entire process was wonderful from start to finish. It did take 7 days for the new oven to come in, and I did have to make my Halloween treats without the benefit of an accurate oven thermometer, but just like Julie promised, last week, I had a brand spankin' new oven delivered right to my doorstep. Not only that, but the wonderful delivery agents unhooked my old oven, took it out to the the truck, then completely unwrapped, set up, and installed the new one, making sure she worked like a charm (which she did).

I could not be happier with the customer service I received from GE, and I really felt that service so great deserved a glowing, public review. Thanks for bearing with me there!

Oh, and in case you were wondering, this glorious new oven is still going to be known as Shelby. They have the same heart, the same soul, and I think Shelby (the first) would have wanted it that way. Not to mention, I'm not creative enough to come up with another name that conveys such beauty, and marvelous engineering.

Monday, October 18, 2010

Just a link! {Country Chicken Noodle Soup}

Photobucket


Okay, before you all get your panties (or boxers?) in a bunch, wondering why there are no witty descriptions, and step-by-step photos of this recipe, let me try to paint you a picture of what the last week has been like at my house. Baby wakes up, crying, and drenched in...well, something too unsavory to put in a food blog. Let's just say it's not water. Put her in a bath, listen to her scream, and cling to you for dear life for the rest of the day. Repeat every hour. Obviously, finding time to make dinner at all has been a major feat. Taking photos of said recipe, and coming up with fun, interesting info about them is not even on the radar.

However, I have made this recipe TWICE this week. And if I make a recipe twice in the same week, you KNOW it must be good. And this soup is THAT good. It's a rich, creamy soup, not at all brothy, and is honestly the best chicken soup I've ever had in my life. I'm confident that after you make it, you will be willing to forgive the brevity of this blog post!

So, head on over to A Feathered Nest and learn how to make THIS AMAZING SOUP, along with a whole mess of really great crafts, and projects!

In case you missed it above, here is the link for the soup that will knock your socks off: Country Chicken Noodle Soup

Monday, October 11, 2010

An Un-recipe: {Super Simple Chicken Soft Tacos}

Photobucket

Text-Only Recipe


Some recipes are so simple that they almost can't even be called a recipe. Such is the case with this recipe for super simple chicken soft tacos. It's so simple, I'm dubbing it an UN-recipe.

Now, before you read the rest of this post, let me warn you, these tacos are simple, and they are unconventional. I know you are going to be scratching your heads, thinking, "gee Kelley, we really trust you and all, but how on Earth do teriyaki sauce, butter, and rotisserie chicken seasoning equal a chicken soft taco?!?!" Just have a little faith (go ahead, sing the song, I'll wait), and go with it. I promise these will be the richest, easiest chicken soft tacos you've ever made!

Oh, and as this is an original recipe (my Mom's to be exact!), there aren't really exact measurements, just instructions.

Hallelujahs:Delicious, Super Simple, Fast
Hellfires:None!

Super Simple Chicken Soft Tacos


Ingredients:
Boneless Skinless Chicken Breast Tenderloins
Teriyaki Sauce (Several turns of the pan, you want to just coat the bottom)
Butter (probably about 2 tablespoons, or so)
Rotisserie Chicken Seasoining (McCormick)


-First, defrost your chicken tenderloins. If you want to use boneless skinless chicken breasts, they will work just fine, too. Just go ahead, and cut them into strips.
-Get out a deep frying pan. Coat the bottom of the pan with teriyaki sauce. You want to have about 1/8-1/4 inch or so of teriyaki sauce in the bottom.
-Turn the burner on med-low
-Add your butter, and allow it to melt completely before placing chicken in the pan.
-Add your chicken in the pan, and sprinkle each tenderloin with McCormick Rotisserie Chicken Seasoning.
Photobucket
-I know, it looks really orange right now, and not like tacos at all. Just bear with me, I promise the end result will be worth it!
-And, in case you've never heard of Rotisserie Chicken Seasoning, I took a picture of the bottle, so you know what to be on the lookout for when you go to the grocery store.
Photobucket
-Now you're going to let the chicken simmer, uncovered for about 10 minutes or so. You want to keep the heat on the low side of medium though, if you heat too quickly, the teriyaki sauce will caramelize, and get too salty. I alway know it's time to turn the chicken when the white of the cooked side comes a little more than halfway up the sides.
-Now, flip your chicken to the other side, and sprinkle this side with the rotisserie chicken seasoning as well.
Photobucket
-Cook another 5-10 minutes, until you think the chicken is cooked through. If you want to cut into one, and make sure the juices run clear, feel free!
-Also, the sauce in the pan will gradually get a little bit thicker as you cook. This is okay, and just what we want. We just don't want it to boil, and caramelize the teriyaki sauce, burning it.
-Before taking out the chicken, flip it again, and sort of stir it all around in the sauce, coating both sides evenly.
-Now, remove the chicken to a cutting board, and cut into thin strips on the bias.
Photobucket
-After cutting, I sometimes pour some of the extra sauce over the top, and sometimes not, a lot depends on how juicy the chicken looks, and how well it soaked up the juices while cooking.
-To serve, I take my soft tortillas, and butter them on both sides.
Photobucket
-I place them in small frying pan, heated to medium/high and sort of toast each side.
Photobucket
-Then, just pile high with your favorite taco toppings! I like mine with just chicken, and cheese, but The Hubster likes them with sour cream, cheese, and tomatoes. No matter how you make it, it's going to be delicious when you eat it!
Photobucket

Thursday, September 23, 2010

The BEST BBQ Chicken you will ever have! {Apricot BBQ Chicken}

My love for this recipe is very surprising, even to me, because it contains an ingredient that I'm really not a fan of...apricots. Fruit is not something I typically like in my savory dishes...or at all, really. But, I saw this photo on Pioneer Woman's Cooking page, and I was drawn in immediately.

Photobucket

It looked so beautifully delicious that I didn't really care WHAT was in it, I knew I was going to make it. In fact, it looked SO good to me, that I went out that very minute, bought all the ingredients, and made it for dinner that night. And just like all of PW's recipes, it did not disappoint. In fact, I make this almost once a week, it's that good. This is actually not even one of Ree's own recipes, it comes from her recipe website, Tasty Kitchen, which is one of my favorite resources for great recipes!

I did, however, make some changes in the original recipe. For one, I'm not really a dark meat lover. So, I typically make this with chicken breasts (for me), and thighs (for hubby), rather than drumsticks. Really, you can make this with any cut of chicken. Also, the original recipe calls for the chicken to be baked, but because I am lazy love BBQ'd food so much, we typically grill it. This means a lot more flavor for the chicken, and much less work for me, since The Husband does all the real work.

What makes this recipe really special to me is that you make your own BBQ sauce. From scratch. While this may sound intimidating, it really is just a "dump and mix" kind of recipe, but to me, homemade BBQ sauce is pretty high up on the list of impressive foods. The original title of this recipe is "Hot & Sweet Drumsticks," but since I never make it with drumsticks, and because I don't find them to be particularly spicy, I always just refer to it as Apricot BBQ chicken. Now, typically, I make the sauce in the morning, which takes about 15 minutes, and then marinate the chicken until The Husband comes home to get grillin'. It's probably not necessary to marinate the chicken all day, but I find that making the sauce early makes my evening MUCH easier. You can try whatever way works for your schedule. Also, as with a lot of other recipes, I typically double this one, and save the extra sauce for all kinds of great things like dipping, and even making the recipe again!

Hallelujahs:Impressive, Fast, Easy, Delicious
Hellfires:Can't come up with any!
Printer Friendly Recipe

Apricot BBQ Chicken
Ingredients:
1 cup Apricot Preserves
1/2 cup Ketchup
1/4 cup soy sauce
2 tsp minced garlic (I used about 3-4 cloves)
2 tsp hot pepper sauce (I use Frank's Red Hot, or Louisiana brand)
Chicken (whatever cut you like!)


-In a saucepan, place your apricot preserves.
Photobucket
-Then, add the rest of your ingredients.
Photobucket
-Stir all ingredients together with a whisk, and turn on the heat to medium.
Photobucket
-You can see in the above picture that the sauce starts out really thick, and gloppy from the apricot preserves. As you cook, and whisk, it will thin out a little, and get more incorporated. Also, it's really important to whisk this recipe a lot as it cooks, and to not get overzealous on the heat. Burnt apricots will NOT add a good flavor to your sauce.
-The finished sauce:
Photobucket
-Place your chicken, in a large bowl (or Ziploc bag), and then pour enough of the sauce over in order to marinate each piece.
Photobucket
-Save your extra sauce in a tupperware container, for basting, if you're grilling, and for all kinds of great uses later in the week!
Photobucket
-After you've marinated your chicken, you can either grill it, or bake it in the oven at 350* for about 45 minutes!
Photobucket
-Be sure to spend plenty of time bragging about how you made your own BBQ sauce!

Original Recipe can be found HERE

Sunday, September 12, 2010

{Mamal's Sausage Balls} and a new Printer-Friendly Recipe Feature!

Photobucket

Printer-Friendly Recipe


Exciting things have been happening in our house this month. And by exciting, I mean BUSY. My summer classes finally ended Aug 13, and then we left on the 18th for San Francisco for a week. I have PLENTY of San Francisco Treats to post here, and get you guys drooling! The day after we got back from San Francisco, my Mom flew into town, and the following day, Landon started pre-school. Then, on September 1st, my brother, his awesome girlfriend, and my cousin flew into town for a week's visit. On the 4th, we had my sweet girl, Ashlyn's, first birthday party (which was beautiful despite several mishaps, I'll share with you once I can think about them all without breaking down!), and on the 5th, all the grown-ups (minus my Mom who was a FABULOUS babysitter), went to Vegas and Zion National Park for three days. As you can see, I have a PLETHORA of excuses as to why I haven't been posting much the last month or so. But, I am staying home this semester, only taking online classes, and things should be calming down here, pretty soon, leaving me free to inundate you all with some fabulous recipes.

One exciting feature I can't neglect to mention is a new printer-friendly link for the recipes. I figured out how to use Google Documents, and now, under the initial picture, you should see a link for a "printer-friendly version" making it easier for you to print out, and actually make all these fantastic dishes! Right now, I'm trying it out on this post, but if it works the way I hope it does, I'll go back and add it for all the previous recipes as well.

Today, I'm sharing a quickie with you. Not THAT kind of quickie, you sickos. A quick blog post. Since I made these for my daughter's first birthday party, and I was drowning in tasks, and disasters, I didn't have time to take very many pictures. This is a very easy dish to make, and can be served as an appetizer, or a side dish. It's one of my most requested recipes. Oh, and don't be too disappointed in the terrible photos accompanying this blog post. I have talked The Husband into letting me get a new, DSLR camera, and my sweet niece into teaching me how to use it, so better pictures are on the horizon!

Hallelujahs: Simple, delicious, often requested
Hellfires: It does take some time to roll all those little balls


For the Sausage Balls:
2 lbs Mild Ground Sausage (I use Jimmy Dean)
2 Beaten Eggs
1 cup Bread Crumbs (I use the Italian ones, another way to inject even more flavor)
2/3 cup of Milk
1 tsp Sage


-Preheat Oven to 350*
-Combine all ingredients in a stand mixer, fitted with dough hook, or using the best tools that God gave ya (your hands)!
-Shape into 1 inch balls
-Place onto greased cookie sheet
-Bake for 20-25 minutes, being careful not to burn the bottoms.
Photobucket
Photobucket


For the Sauce:
1 1/2 cups Water
3/4 cups Ketchup
8 tablespoons Brown Sugar
3 tablespoons soy sauce
1/2 cup BBQ Sauce (keep reading for some details on what kind to choose)
1/4 cup honey


-Combine all ingredients in a medium saucepan.
-When it comes to the BBQ sauce, you want to use a more red, tangy, ketchup-y type of BBQ sauce for this. I prefer the brand Open Pit, which I can't get in Utah, and have shipped to me from my awesome Mom in Ohio, or I pack my suitcase full of it each time I go home. Yes, I just admitted that I pack a suitcase full of BBQ sauce (and other "home foods") everytime I leave Ohio. Just love me the way that I am. If you use a deeper, sweeter BBQ sauce, the honey and brown sugar will leave this recipe almost TOO sweet.
-Bring all ingredients to a simmer over medium heat, whisking occasionally.
Photobucket
-Simmer 5 minutes
-Add in the baked meatballs
-Stir them around, and then simmer another 4-5 minutes.
-Serve, and Enjoy!
Photobucket

Sunday, August 29, 2010

Confession is good for the soul.

Photobucket

I thought Sunday morning was a fitting time for a little good old fashioned confession.

My confession? I have a slight obsession. Or maybe a not so slight obsession. With dishware. Beautiful, vintage, non-matching, shabby-chic style dishware. And beautiful daisies (from my thoughtful husband) in a vintage-style pitcher.

Check out the new additions to my obsession.

The whole, new tablescape:

Photobucket

My beautiful, new, non-matching plates. And I like it that way!

Photobucket

My new 2-tiered, vintage cake stand, along with those gorgeous scalloped edge dishes I'm planning on using for a new cake-creation, to be soon featured right here.

Photobucket

My beautiful daisies, with green centers, that my sweet husband brought home for me, in my favorite old-fashioned looking pitcher (that I already had).

Photobucket

So, now you know about my obsession. I hope you can still respect me, now that you know my secret. Also, if you happen to live in Utah, or near Rancho Cucamonga, California, head over to Tai Pan Trading today, they have some BEAUTIFUL things, for wholesale prices!

Now that I've shared my obsession, it's your turn. After all, sharing is caring. So, tell me, what is YOUR kitchen obsession?

Thursday, August 26, 2010

Eat out at home: {Homemade Pizza}

Is there any meal so deliciously complete as pizza? You've got your carbs, your dairy, your meat, and your vegetables all in one deliciously delectable bite. It's been called the perfect food, and I'd say it is deserving of such high accolades.

It's been said (by The Husband, and other crazies) that pizza is like sex...even when it's bad, it's good. But, I have to disagree. Homemade pizza is not often perfect. The crust is often very bready (and maybe even raw in the middle), the cheese is mediocre, and the sauce usually comes from a can. Because of these issues (and many others), I have previously not been much of a fan of homemade pizza. But, after doing some research, and several practice runs, I have finally found a homemade pizza recipe that tastes as good as the take-out variety. Dare I say, it actually tastes even better than some of those take-out versions.

There is such a thing as bad pizza (as for the other...I'll leave that up to you, and your bedroom!), and it is usually due to some bad crust. The crust makes the whole pizza, and a terrible crust can ruin an otherwise perfect venture. I've said it before, and I'll say it again (because it's SO TRUE), the Pioneer Woman has NEVER let me down. Her recipes are always foolproof, and amazing, and her pizza crust is no different. We had tried many different crust recipes before this one, and they all came out too bready, or too crunchy, or too...something we couldn't put our finger on. This one struck the PERFECT balance between NY Style thin crust, and something you could really sink your teeth into, and chew. After one bite, The Husband declared that we need not try any other recipes. Ever. And boy, what a relief that declaration was. Pizza crust, being a bread is a fairly lengthy process, in which one must make the batter, and then leave it, to rise for hours. There are not many things so disappointing as investing 2-4 hours in a recipe, only to have the end result be less than perfect.

The other "must-have," for amazing, at-home pizza, is a delicious sauce recipe. It can't be too sweet, or too acidic, and it must have a perfect balance of herbs, and spices. It's a critical part of the pizza process, and not easy to master. The sauce recipe I use is kind of a conglomeration of several recipes that I've kind of combined into my master recipe, which has received rave reviews from The Husband, and The Family, alike. So, to all of the almost-perfect pizza sauce recipes out there in internet-land, THANK YOU, for helping me to hone my own!

A quick note about this recipe. It is a VERY lengthy process. The first time we made this, it was about 3-4 hours of on-our-feet, in-the-kitchen, WORK. I thought, well, it was just the first time, next time will go much faster. But, it was not meant to be. This time, it was another 4 hours of cook/prep time. But, the end results were more than worth it. I think this is a really great Friday Night Date-Night-In type of meal. Because it gets you, and your loved ones in the kitchen together, working on a common goal, and maybe even having a flour fight or two. It's a lot of work, but a whole lot of fun, and sometimes the biggest messes make the most fun! I also smartened up this time, and made a double batch of dough, and froze the leftovers. I also made a double batch of sauce, and froze the rest of it, as well. So two of the big jobs will already be done the next time we want to have pizza night. Obviously, you can use whatever toppings you prefer, this time, we made a couple of meat lover's pizzas, frying the bacon, and sausage ahead of time, and one caprese pizza with some basil, and tomatoes from our own garden. There are not many things more satisfying than eating food that you have grown with your own two (dirty) hands.

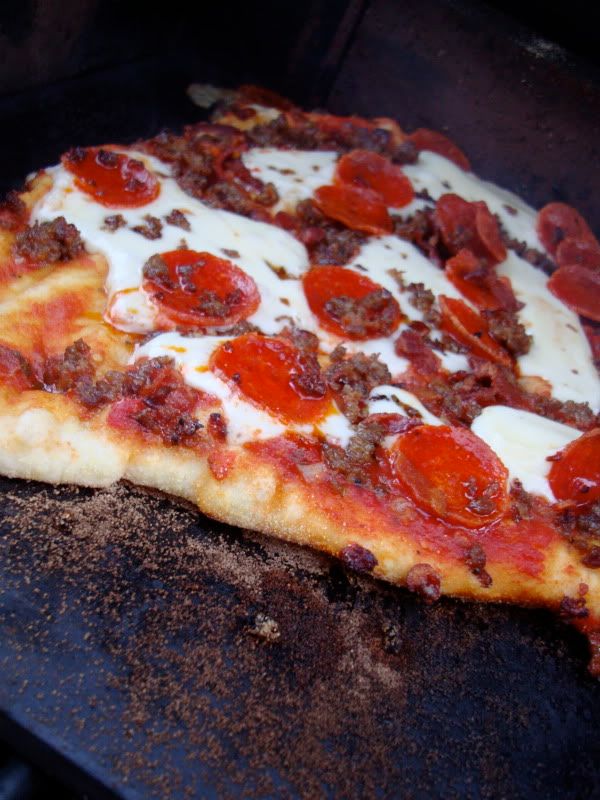
Also, the one thing we HAVEN'T perfected is the method. These pizzas are meant to be grilled, at high heat in order to achieve that delicious wood-burned taste, and texture. We saw this method on an episode of "What would Brian Boitano Make?" on the Food Network. Of course, by "we," I mean, *I* saw this method, since The Husband wouldn't be caught dead watching Brian Boitano do ANYTHING. Basically you line your grill with red, clay bricks that you can find at the hardware store. Then, place a pizza stone on top, and close up the grill, cranking the heat way up, until the inside of your grill reaches 500*. However, each time we've made this recipe using this method, the bottom of the pizza crust cooks MUCH faster than the top, which means we have to be VERY careful not to let the bottoms burn. It also means, that if you aren't careful, your pizza stone (which is a must!) may turn black. You might want to set one aside specifically for pizzas, so you don't have a whole bunch of black stones, since I also use them for baking cookies. If anyone has any suggestions for improvement, we'd love to hear them, until then, I'll keep tinkering with it, and when I come up with the perfect method, I'll update you!

Hallelujahs:Delicious, Amazing, Fresh
Hellfires:Time-Consuming, Messy


Homemade Pizza Crust

a la my Hero, The Pioneer Woman

Ingredients:
1 tsp Active Dry Yeast
1 1/2 cups warm water
4 cups All-Purpose Flour
1 tsp Kosher Salt
1/3 cup Olive Oil


-Note, this amount of dough will make 2-3 fairly large sized pizzas. But, I highly suggest doubling the recipe, and freezing the extras, after rising. This will save you a lot of time in the future.

-Place warm water, and yeast in a bowl, and allow to proof until the mixture becomes frothy/bubbly. This should take about 5-7 minutes.
-I just let this proof in the bowl of my Bosch, and then after it's proofed, I added all of the other ingredients, in any, haphazard order, and turned it on. It worked perfectly. But, PW has a list of more specific instructions, as to the order of ingredients, in case you want to be perfect about it. The link is provided at the end of this recipe.
-Once you've added all your ingredients, turn on your mixer, and let it swirl! The important thing to note is that you do not need to knead this dough. You just mix it until it's well combined (only a couple of minutes), so this is much faster than traditional doughs.
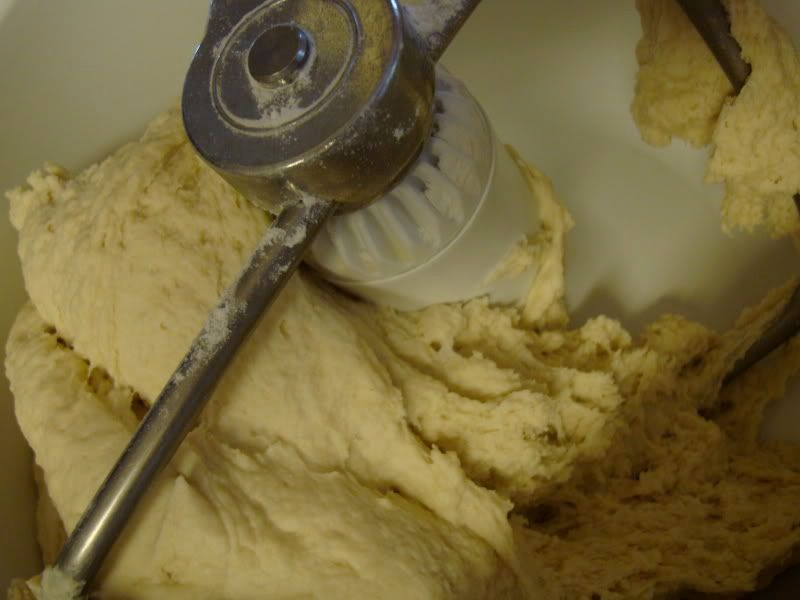
Photobucket
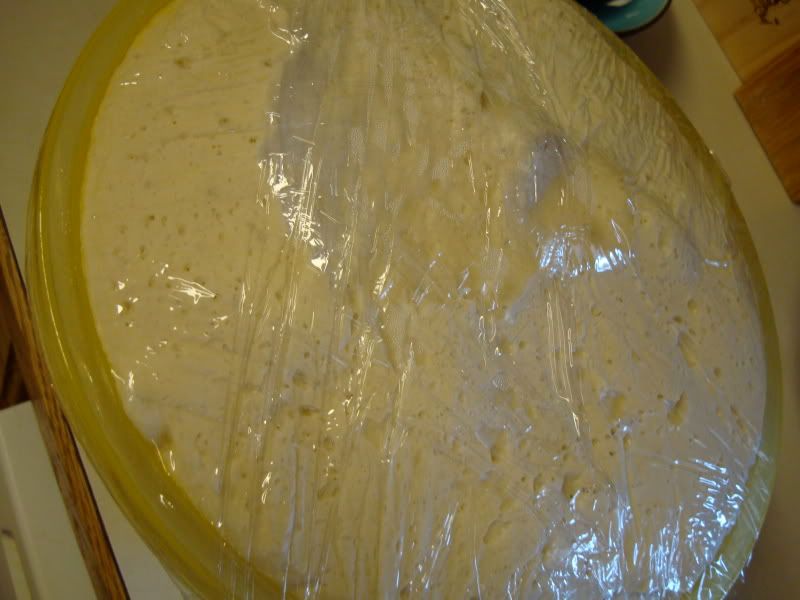
-Once the dough is mixed, place it into a well-oiled bowl, and cover with saran wrap. Place the bowl into a warm, dry place, and allow it to rise until it doubles in size. I think it took about an hour and a half for me.
Before Rising:
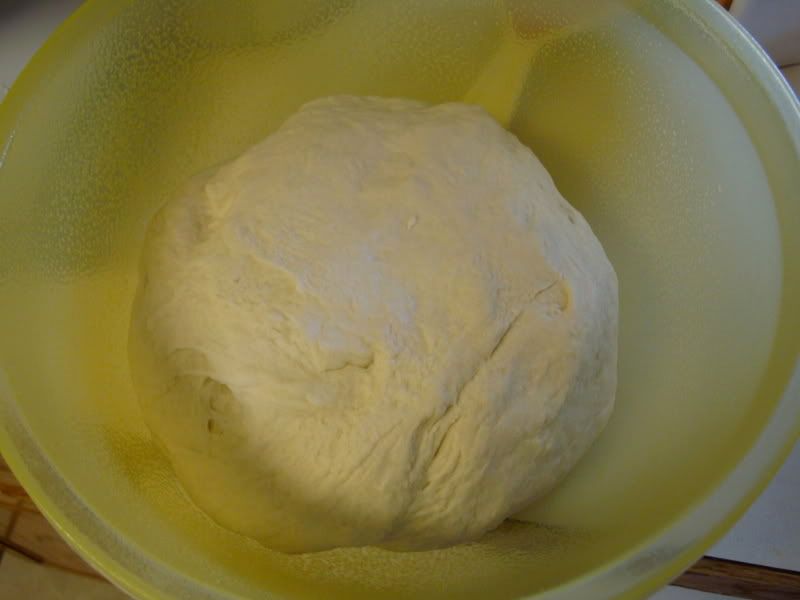
Photobucket
After Rising:
Photobucket

Original Recipe: PW Basic Pizza Crust Recipe

Homemade Pizza Sauce:
Ingredients:
A few tablespoons of olive oil
1 small onion, diced VERY finely
4-6 garlic cloves
1/2 tsp red pepper flakes
1 tsp dried oregano
1 can of crushed tomatoes (14 ounces)
1 can of tomato puree (14 ounces)
Handful of Sugar
Salt and Pepper, to taste
Fresh Basil, 10-12 leaves
Fresh Rosemary, 1 sprig


-First, drizzle the olive oil into a deep frying pan, and let it get hot.
-Add your finely chopped onion, and saute until it gets a little bit translucent.
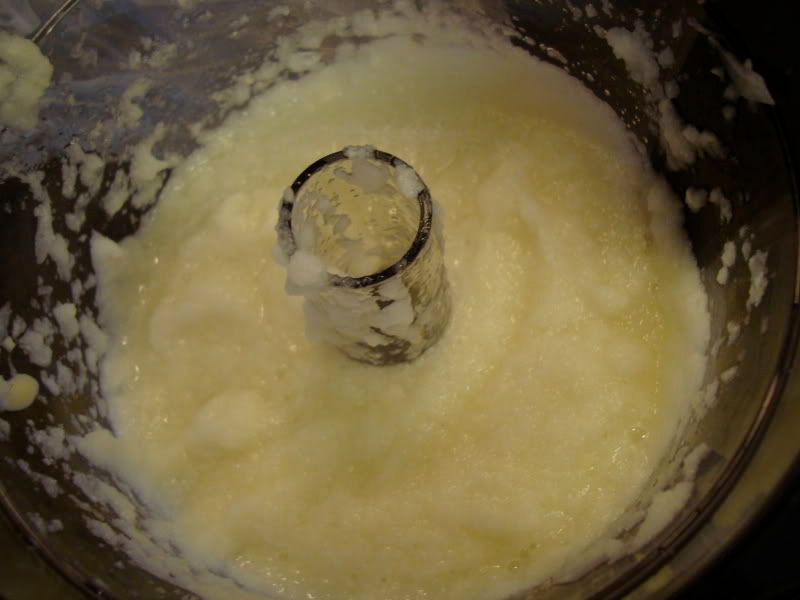
-Interesting story here...I happen to HATE biting into large chunks of onions. So, I got the bright idea to place the onions, and garlic into my brand spankin' new food processor in order to have very finely chopped onions. Unfortunately, this did NOT work out. It turned them into an applesauce-like consistency that was watery, and disgusting. I had to scrap it all, and just chop the onion SUPER fine, the old-fashioned way.
The Mess:
Photobucket
The RIGHT way:
Photobucket
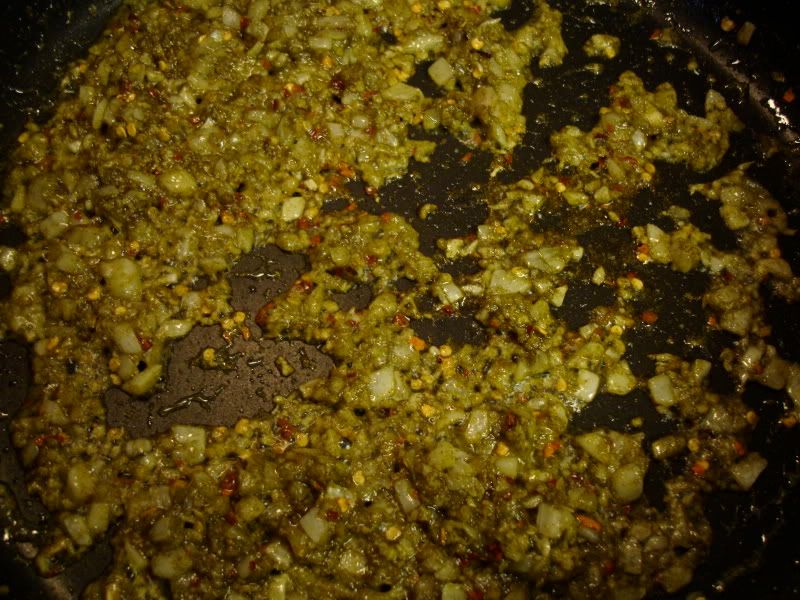
-Add garlic (use your handy-dandy garlic press), red pepper flakes, and oregano, and saute for about 3 minutes more. The oregano turns your onions and oil a beautiful bright green color.
Photobucket
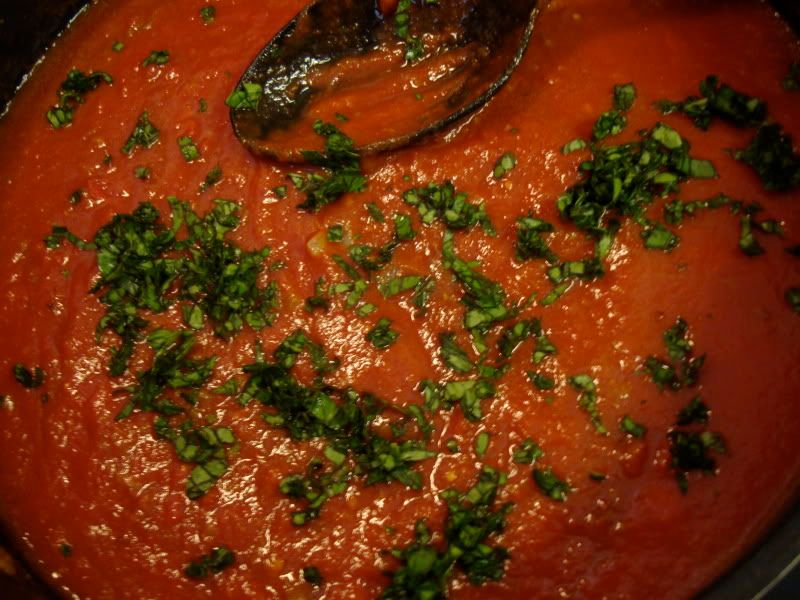
-Add your crushed tomatoes, and pureed tomatoes, along with your basil and rosemary. I like to add a LOT of basil, and a much smaller amount of rosemary.
Photobucket
-The easiest way to cut fresh basil is to roll several leaves together, and slice along the short end. I like to then go back over, and dice a little bit finer after.
-Add your salt and pepper, cover, and cook for about 10 minutes.
-Add a handful of sugar to cut some of the acidity of the tomatoes. Stir, and re-cover.
-Continue cooking for about 10-15 minutes, stirring occasionally.
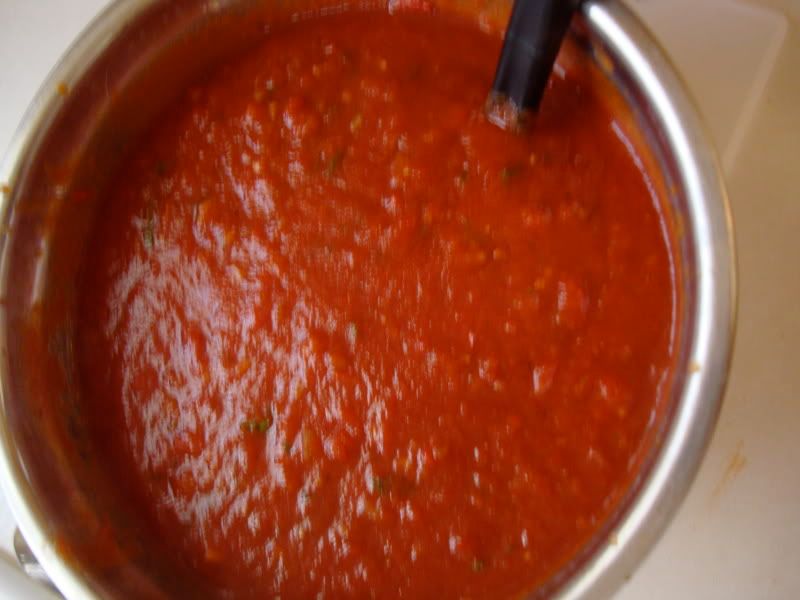
-Remove sauce to a bowl, to cool.
Photobucket

-Note: I've provided the recipe for one batch of pizza sauce, but the best method is to make a double batch, and freeze the leftovers, making your next go-round MUCH simpler.
-Also, the original recipes said to allow the sauce to cool to room temperature before spreading it onto the dough, but I'm NEVER patient enough for that, and I've not ever had an adverse outcome because of it.

Putting it All Together
Ingredients:
A couple of tablespoons of olive oil
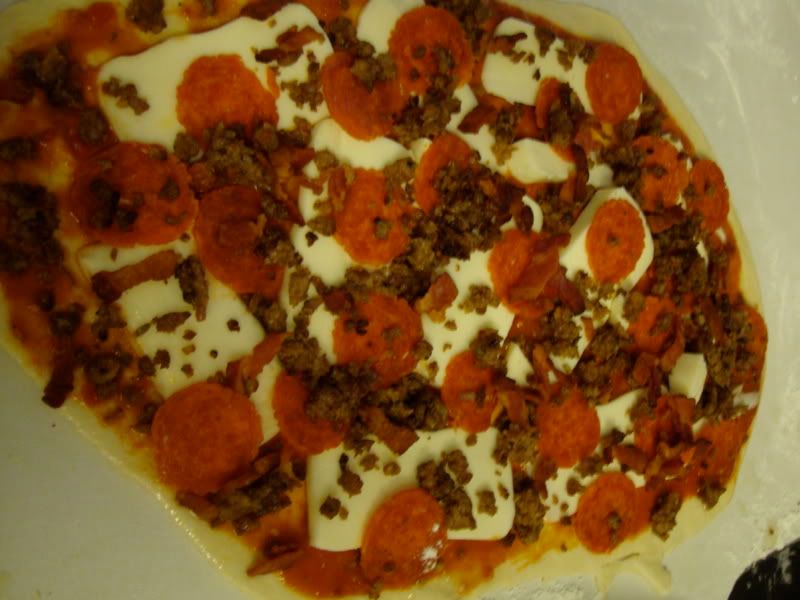
Toppings of choice (I used sausage, pepperoni, and bacon for one, and fresh tomatoes, and basil for the other)
FRESH mozzarella cheese
Cornmeal for sprinkling


-Roll Out your pizza dough, as thin as you like it. I prefer it to be really thin.
-Place the rolled out dough on top of a cookie sheet covered in cornmeal (to allow it to slide off onto the grill. If you have a pizza paddle, this would be even better, but I don't own one, so I use large cookie sheets. Use a LOT of cornmeal, so your pizzas don't stick to the cookie sheet (or pizza paddle).
-Place a tablespoon or so of olive oil on the dough, and then sprinkle on some garlic powder before adding your sauce.
-Add a ladle-full of sauce and spread it around the pizza.
-Slice your fresh mozzarella, and spread it around the pizza. It is REALLY important to use fresh mozzarella here. I bought mine from Wal-Mart, and it was only $3.22 for a pack, and it took 2 packs for 4 pizzas, so it's not as crazy expensive as you might be thinking.
-Add your toppings to the pizzas.
Photobucket
-Take them to the grill, and slide them onto the hot pizza stone (cover the pizza stone with cornmeal too, to make removal of the pizza easier). Close up the grill, and bake for about 5 minutes. They cook VERY fast because of the high heat. Just check them at 4 minutes, and if they don't seem done, close that baby up, and give it another 2-3 minutes. Just watch that the bottoms of your crusts don't burn.
Photobucket
-If it seems like the bottom of your pizzas are finished before the mozzarella is melted, you can always remove it from the grill, and put it in the oven, on broil to finish the top!
-ENJOY!
Photobucket
Photobucket

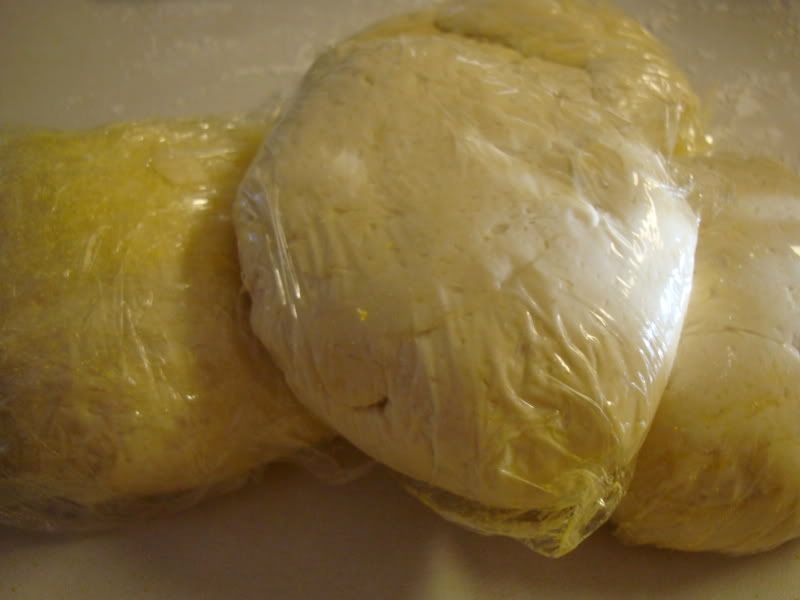
-In order to save your leftover dough for next time, you need to shape it into individual sized balls, and then wrap them up EXTREMELY well in saran wrap. You want ALL areas of that dough to be covered. Then place the wrapped balls in a freezer bag, double bag it, and place it in your deep freeze. I usually spray the saran wrap with Pam, or the generic version of it, first, in order to make sure that it doesn't stick.
Photobucket

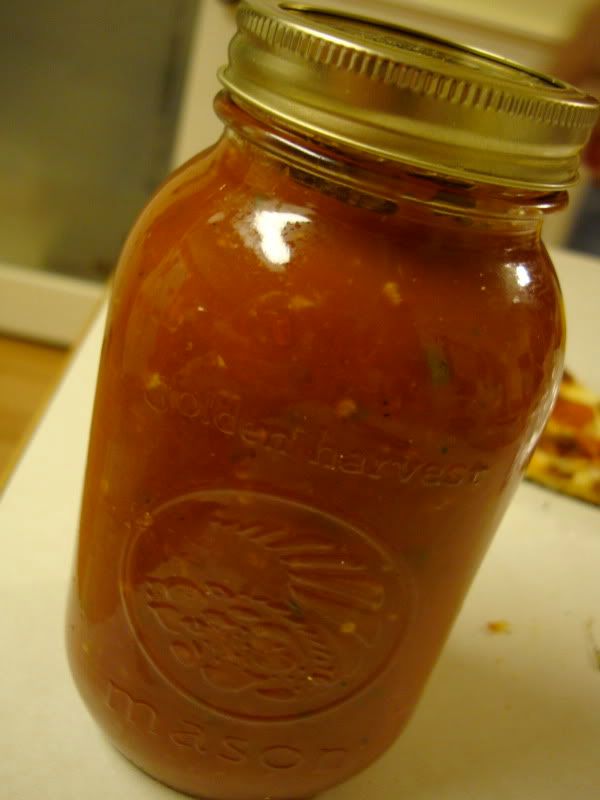
-For the sauce, I like to place mine into a mason jar (but leave room at the top for expansion), and then put the mason jar into a freezer bag. Place this deliciousness inside the freezer, and you're already ahead for the next time.
Photobucket

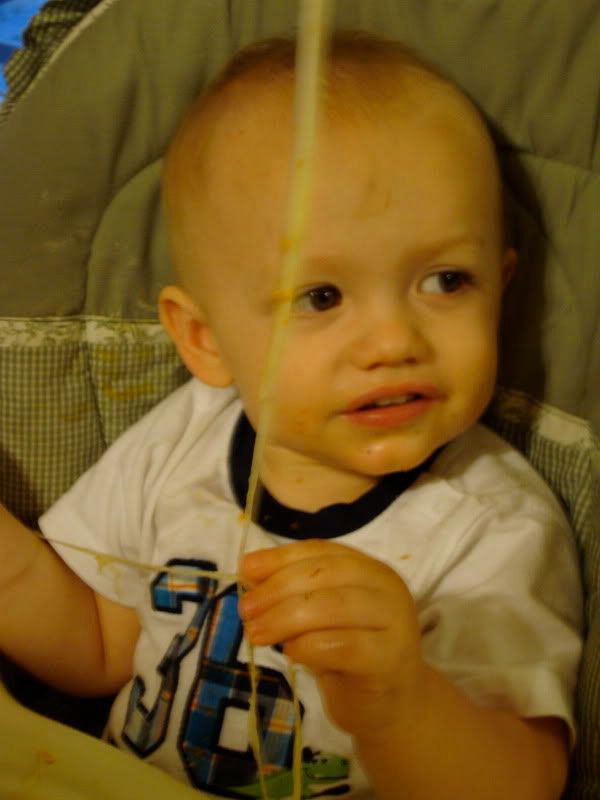
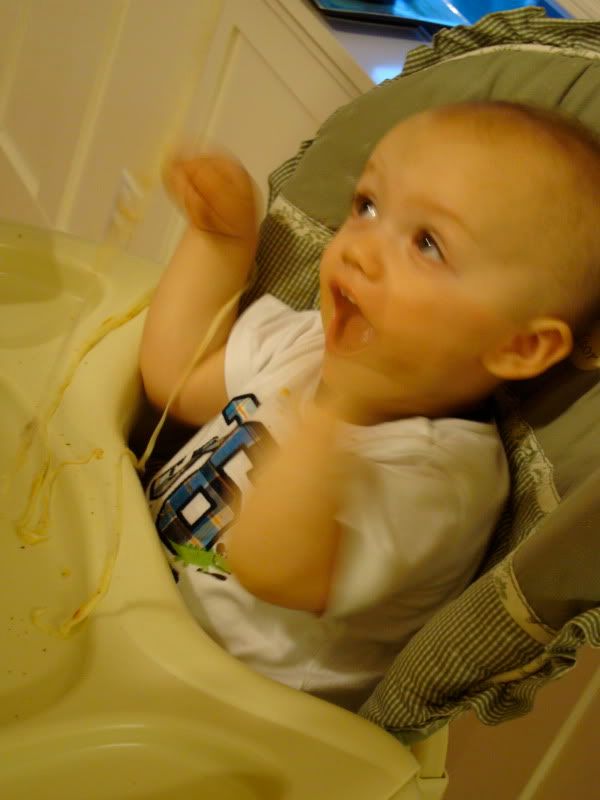
Now, THIS is why it's so important to us fresh mozzarella cheese. It makes feet, and feet, of delicious, melty goodness for cute kiddos, like my nephew, Nathan, to get all tangled up in!
Photobucket
Photobucket